The Barn Studio Build Manual
Turning the steel barn into a real recording studio.
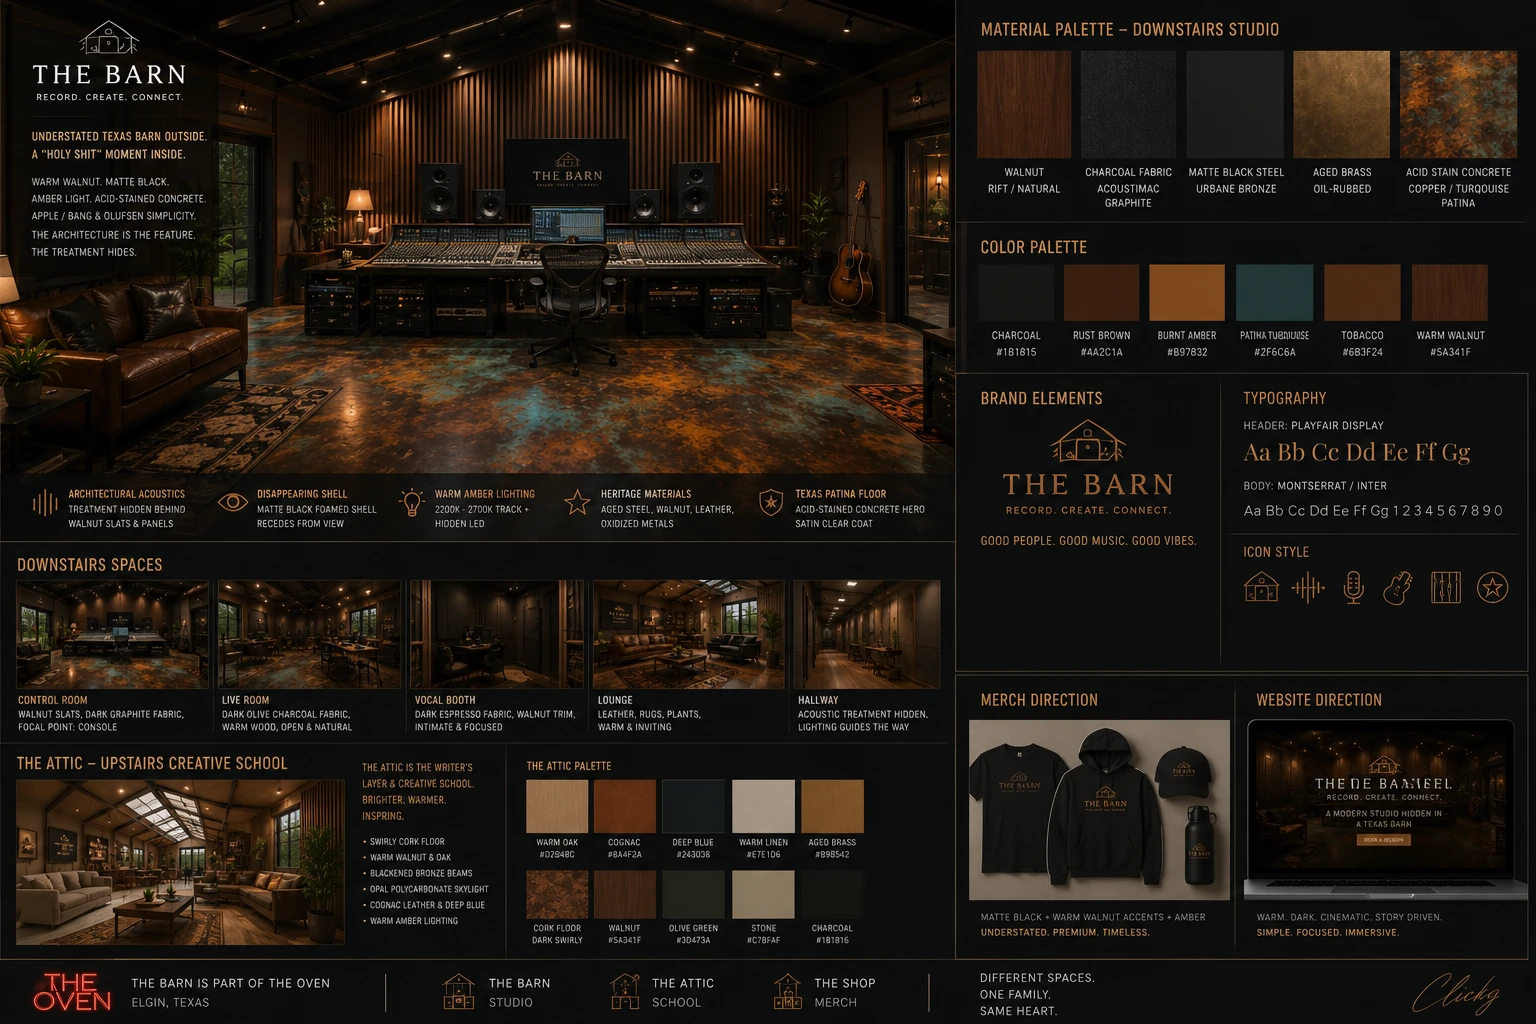
This is the book we build from. Read “The One Rule” (§3) first, it’s the thing that ruins studios when people get it wrong. The measured shell + blueprints are in §2. Numbers marked locked are decided; open means waiting on a field measurement or a David call.
1The goal
Turn the steel barn into a real recording studio: a place to record, mix, and master at a professional level, plus a controlled vocal/overdub room and a flexible live room. Build it in phases so it can start earning while it’s being finished.
Control room first, that’s where the money is made (mixing, mastering, the daily work).
Want to actually understand it? The beginner class is right here ↓
★The game plan: what we're actually going to do
Read this first. This is the map of the whole build, the order we do it in, and the calls we've already locked, so you can see the whole game before studying any one stage. Everything else in this binder is the deep detail. This is the plan.
Dirty work first, pretty work last. Get it EARNING before you perfect the finishes. Anything that gets covered (foam, walls, floors, wiring) has to be planned before it's covered. We do not sink money into the patina floor, the cork, or the slat walls until a room is recording and paying for them.
The fastest path to a working studio (do this first)
Six moves take the barn from bare metal to a room that earns. Everything else phases in after.
| Step | Move | Why |
|---|---|---|
| A | Clean + pest removal + fix every leak + temporary power/lights/fans | Safe, dry, workable. A leak hidden under foam rots the build. |
| B | Foam the shell + black fire coating + temporary AC | The envelope. Stops the metal sweating. Hire a pro. |
| C | Build ONE control/recording room properly (room-within-room) | One real room = open for business. Mass where you record. |
| D | Stain only the main floor that has to be finished now | The hero floor, but only where it's needed yet. |
| E | Basic audio + network + lighting + one rack/patch | Plug in and record. |
| F | Add the Attic, cork, 2nd room, venue treatment LATER | Phase the rest in while the room earns. |
The full order of work
The complete sequence, dirty to pretty. Each stage has its own section in this binder for the deep dive.
- Clean + pest + inspect. Wasps and rodents out, dry-clean then wet-clean, fix every leak, check rust / slab / loft.
- Plan the utility spine. Where power, audio, network, HVAC, and penetrations live, before anything gets covered.
- Rough penetrations + sleeves. Holes, vents, conduit paths, exterior boxes, before foam.
- Foam the shell. Closed-cell on the metal, ~2" walls / ~3" roof, exterior walls + roof deck ONLY (not the attic floor). HIRE A PRO.
- Fire coating, finished MATTE BLACK. Intumescent over the exposed foam so the shell disappears (ask for DC315 / No-Burn Plus XD / FIRESHELL F10E), or drywall cover.
- Paint exposed steel. Blackened bronze / charcoal, overhead, before the floor.
- Rough HVAC. Mini-splits / ducts + drains, after foam, before finishes.
- Frame the studio rooms. Room-within-room, air gap off the shell.
- Wire the rooms. Power + audio + data in conduit / accessible walls, never in foam.
- Insulate + close. Mineral wool cavities, double 5/8" + Green Glue, seal everything.
- Prep + stain the concrete floor. Grind, test, stain, base-seal, then PROTECT it.
- Cork the Attic floor. Late, after the dirty work and once the building is stable.
- Finish electrical / audio / lighting. Devices, plates, patchbay, fixtures.
- Acoustic treatment. Bass traps, panels, clouds, curtains, tuned to measurement.
- Floor topcoat + gear + tune + OPEN.
- Foam = HIRE A PRO. DIY kits would run ~$16–18k for our shell; a pro is ~$3–14.5k. Budget by board-foot (~5,000 bf), get 2–3 quotes, ask if the fire coating is included.
- Foam FIRST, floor finish LAST. Never spray over a finished floor.
- The look = matte-black shell. Coat the foam matte black / very dark charcoal so the shell recedes and the wood + lighting + design are the stars. K-13 acoustic spray is held for later (only if measurements need it), not the initial build.
- Foam = envelope only: exterior walls + roof deck, NOT the attic floor (that is an acoustic assembly, see the floor section).
- Don't buy the room materials yet (Rockwool, drywall, Green Glue, studs, channel, flooring) until the layout is locked. Right now you only need the two spray contractors: foam + fire coating.
- Wiring stays accessible: conduit or inner walls, never buried in foam. No junction boxes in foam.
- DIY where it pays: bass traps (~$263 vs ~$5,800 bought), acoustic panels, woodwork, finishes.
- Power = licensed electrician. Permitting = Bastrop County, not Austin city.
- Sub placement #5 locked; control room 13'7" × 17'8" × 9'6".
That is the whole game. Everything below is the deep-study detail, stage by stage. Use the tabs or the search to jump in.
★The build playbook (what comes next)
This manual is the why. The Build Playbook is the what to do, in what order, and how fast: the long day-by-day plan merged into clear phases, triple-checked, with the safety and sequencing traps baked in.
Dirty → Sealed → Wired → Closed → Finished → Clean → Gear → Booked.
Finish the control room to that standard first, shut the door to keep dust out, and build the rest of the barn around a room that's already earning.
Pick your pace
| Track | Gets you |
|---|---|
| Sprint 60 | One finished, client-ready control room (~60 work days) |
| Steady 90 | Control room + Bambi booth + basic live room = bookable |
| Documented 120 | Same build, every step photographed, nothing rushed |
Three lanes, always moving
A · David's hands (clean, frame, baffle boxes, drywall, paint, panels) · B · The trades (foam, electrician, HVAC, booked ahead) · C · Ordering (long-lead: polycarbonate, hardware, skylight, mini-split). When one lane is blocked, push the other two. Idle is the enemy, not the trade.
The phases at a glance
- 0 · Start the slow clocks: mill the land's wood now (it dries ~1 yr/inch), lock the attic use.
- 1 · Prep + document: safe, clean, measured, quoted. Hantavirus + no-pressure-wash rules.
- 2 · Lock layout + cut shell penetrations: skylight + AC sleeves cut and curbed BEFORE foam.
- 3 · Seal the shell: closed-cell foam (shell only) + intumescent barrier + dark overhead coat. Pro.
- 4 · Main comfort: one mini-split so the barn is workable in the heat.
- 5 · The floor: base-seal the whole slab early, ram-board it, hero topcoat dead-last.
- 6 · Frame the control room: room-in-room on a sill gasket, ceiling pipe-grid tie, all blocking.
- 7 · Rough-in: power + baffle-box HVAC + fresh-air ERV + audio/data, tested + photographed.
- 8 · Close the walls: insulate (open mineral wool), double 5/8" + damping, mud, prime.
- 9 · Finish + seal the room: paint, plates, door seal, topcoat, broadband traps. Clean-room gate.
- 10 · Gear → test → tune → book: install, measure (REW), tune, first paid session.
→ The Build Playbook carries the done-standards, the order-before lists, copy-paste contractor quote messages, the HVAC master plan, and the budget gates.
✦Wood from the land (the soul of the build)
The dream: the studio's walls, the console desk, the bar, the furniture, all cut from the trees on our own land. We already have big Texas trees down on the property. Milled into slabs and boards, they become the face and the soul of the room, a story no money can buy and the thing to drool over while we grind through the build. This could shape the whole space: the paneling, the slat walls, the sculpting, the live-edge furniture.
- ID + check the fallen trees. Photos of the cut end-grain + the bark (or a local sawyer / arborist) tell us the species. Push a screwdriver in: hard = solid, mill it; punky = rustic / firewood only.
- Get a mobile sawyer out. They bring a portable bandsaw mill to the property and cut the logs on-site. Don't buy a mill.
- Cut for the job: fat logs into live-edge slabs (console desk, bar top, coffee tables, the showpieces); the rest into boards for paneling, slat walls, trim, shelving, the barn-door leaves.
- Sticker-stack + dry (see the rule below) so it's ready when the walls go up.
Green (fresh) wood is soaked, and a sealed, climate-controlled studio pulls it down to ~6–9% moisture hard. Green boards on a wall cup, warp, crack, and gap. The wood has to be dried before it goes up: air-dry ≈ 1 year per inch of thickness (stickered, off the ground, under cover), or kiln-dry in weeks. Because drying takes a year, the felling / milling / stacking is a Phase 0–1 start-now job, not a "grab it when we need it" job. The fallen logs are also on a rot clock in Texas humidity, so mill the sound ones soon. (Bonus: some aging gives spalting, the prized black-line figure, beautiful in a slab top.)
This wood is the finish, the face, the furniture, the soul, not the soundproofing. The isolation is still the dead-wall mass + decoupling (see Sound walls). Milled slats can also become diffusers (acoustic treatment), but the planks are never the sound barrier. Build the quiet box, then dress it in the land's own wood.
What's probably out there (Central TX)
- Box elder + bigtooth are true maples (box elder can throw a stunning red flame figure).
- Sycamore, sweetgum, cottonwood, hackberry are the big maple look-alikes: soft, easy to mill, great rustic paneling + slabs.
- Pecan, cedar elm are nicer mid-hardwoods for desks + panels. Post / live oak is the premium hard, heavy, stable face. Cedar (Ashe juniper) is aromatic, rot-resistant, instant character.
- Metal in the trunk (old fence wire / nails grown into the wood) destroys sawmill blades. Scan first.
- Oak wilt if we ever cut LIVE oaks: only in the cold dormant window, paint every cut immediately. (Already-fallen trees are fine.)
- Ground contact + mushrooms = rot working in. Get the good logs up on stickers.
Next: snap end-grain + bark photos of the fallen trees so we can ID them and flag a sawyer. Tree + slab photos drop in here once we have them.
✦Sound 101: the beginner class
The yellow box up top is the 10-second version. This is the class if you want to actually get it: three plain ideas, three pictures. (Sources at the bottom.)
Lesson 1, Soundproofing: the 4 levers
Blocking sound in or out comes down to four things used together: MASS (heavy blocks more), DECOUPLING (a gap so vibration can't cross), DAMPING (Green Glue between layers kills the panel ring), and ABSORPTION (insulation in the gap soaks the trapped sound). The classic build is a mass–spring–mass sandwich:
Lesson 2, Absorption: soak the echo
Inside the room, sound bounces off hard surfaces and smears into echo and boom. A soft panel soaks that bounce. Thicker panel = catches lower notes. This barely blocks any sound leaving the room, it only cleans up the sound inside it.
Lesson 3, Treatment: tune the room
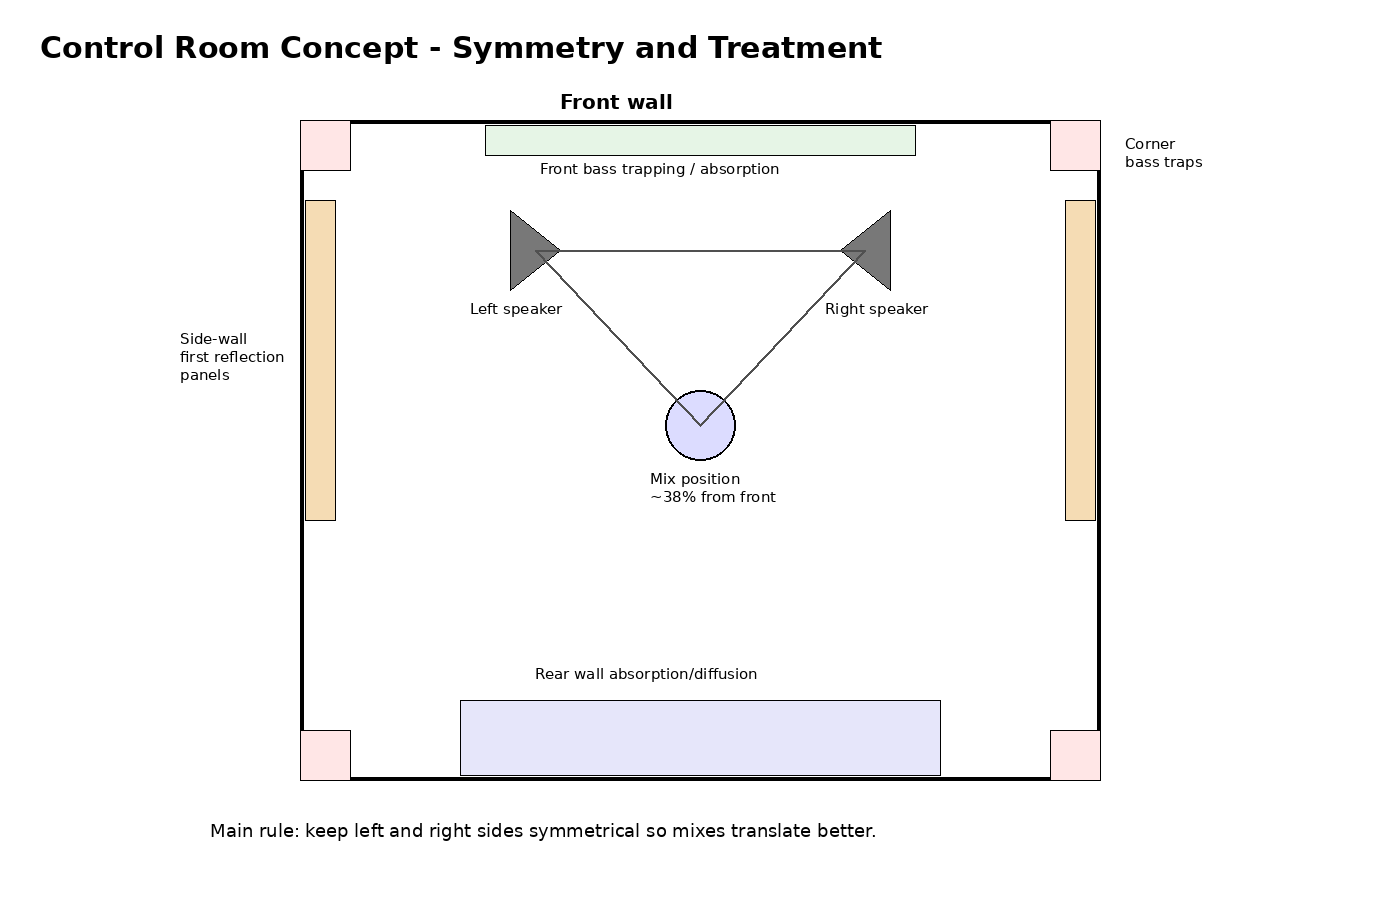
Treatment is arranging the soft stuff (plus some scattering) so what you hear at the mix seat is true. The map:
- The mirror trick (find your first reflections): sit at the mix seat, have someone slide a mirror along the side wall. Wherever you can see a speaker in it, put a panel there.
- Bass traps in the corners: bass piles up in corners, so thick (4–6") absorbers go there first. Front corners behind the speakers = top priority.
- Behind you: absorb in a small room, or scatter with diffusion in a bigger one, so it doesn't slap back into your ears.
- Cover ~40–60% of the walls, not everything. A totally dead room sounds unnatural and wrong.
Proof the box (mass + gap + seal) so sound can't get in or out, then treat the room (panel the first bounces, trap the bass in the corners, leave some life) so what you hear is true. Different jobs, same goal, done in that order.
Sources: Sound on Sound "Beginner's Guide to Acoustic Treatment", GIK Acoustics (early reflections / bass traps / diffusion), Sweetwater "Installing Acoustic Treatment", Commercial Acoustics "Soundproofing 101 (mass, decoupling, damping, absorption)".
2The measured shell + blueprints
Six survey rounds locked the real envelope (blueprint Rev G). Every room has to fit inside this, not a guess. Tap any drawing to open it full-size.
The steel anchor beam runs 8'1" off the west wall and drops to ~7'4" clearance, that beam is your hard ceiling low-point. Real ceiling height: 18'3" only at the ridge in the front bay, 11'1" under the loft, 7'4" under the beam. Plan rooms around that map, not a flat ceiling.
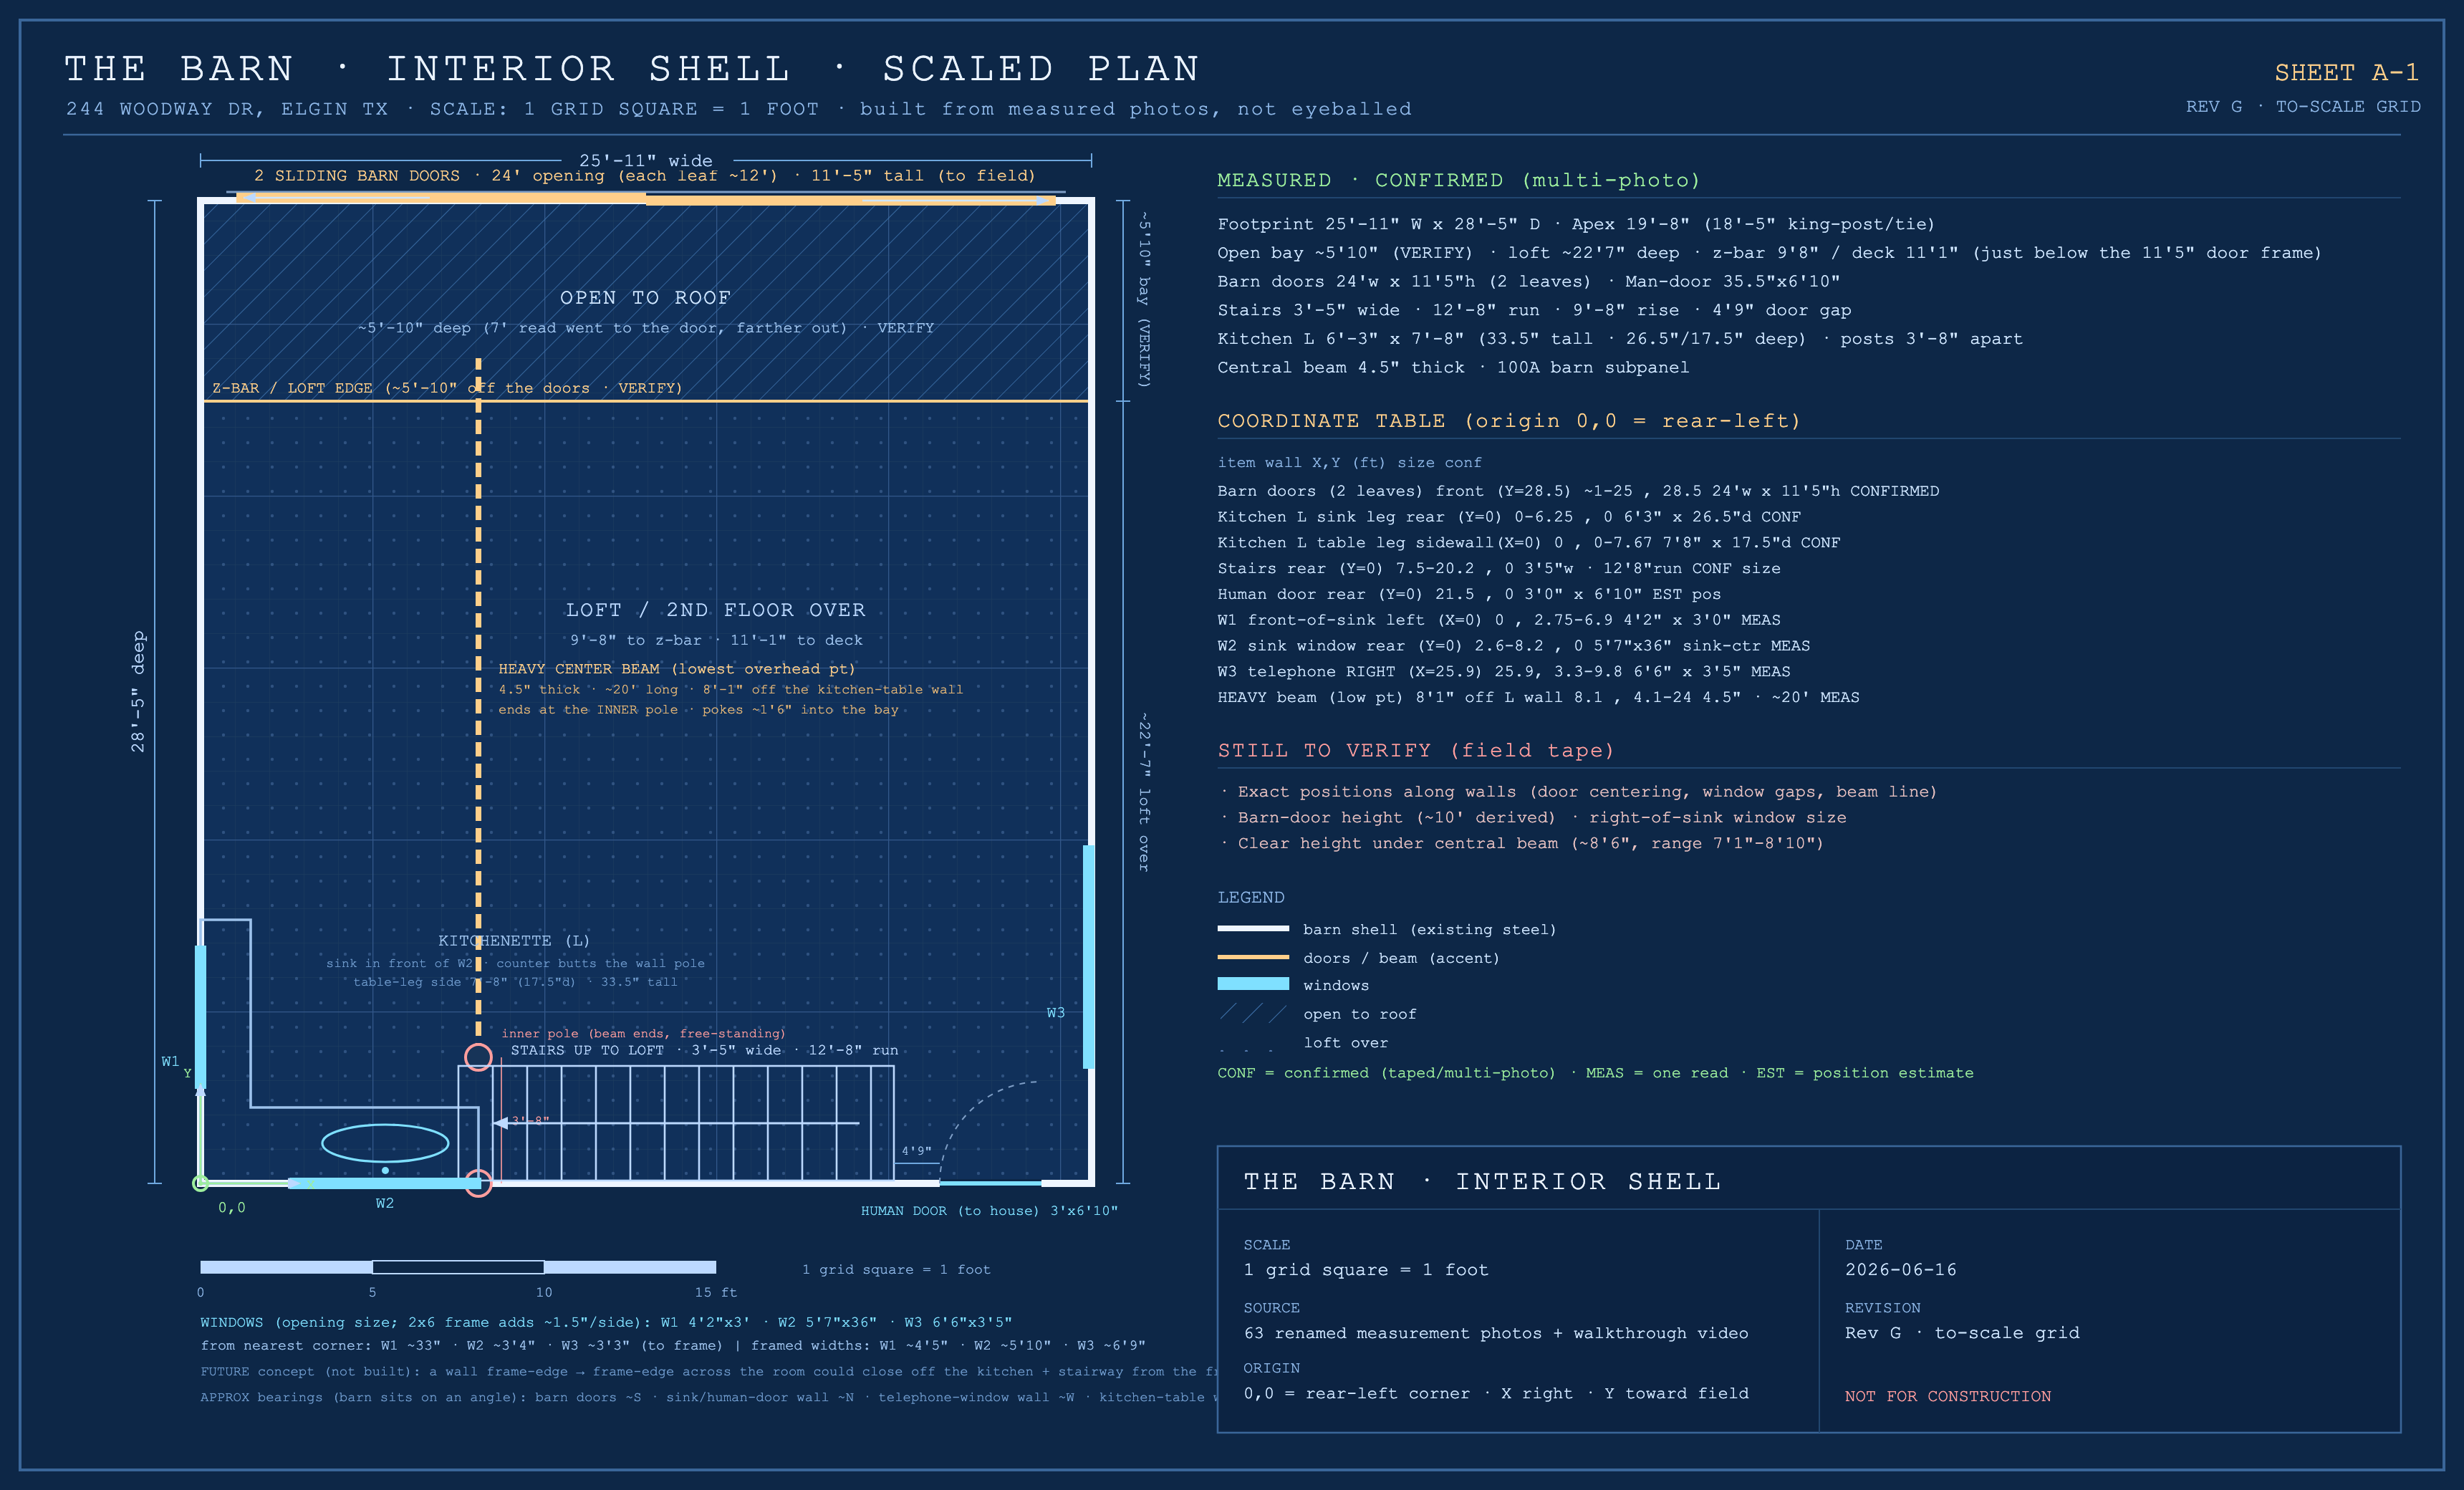
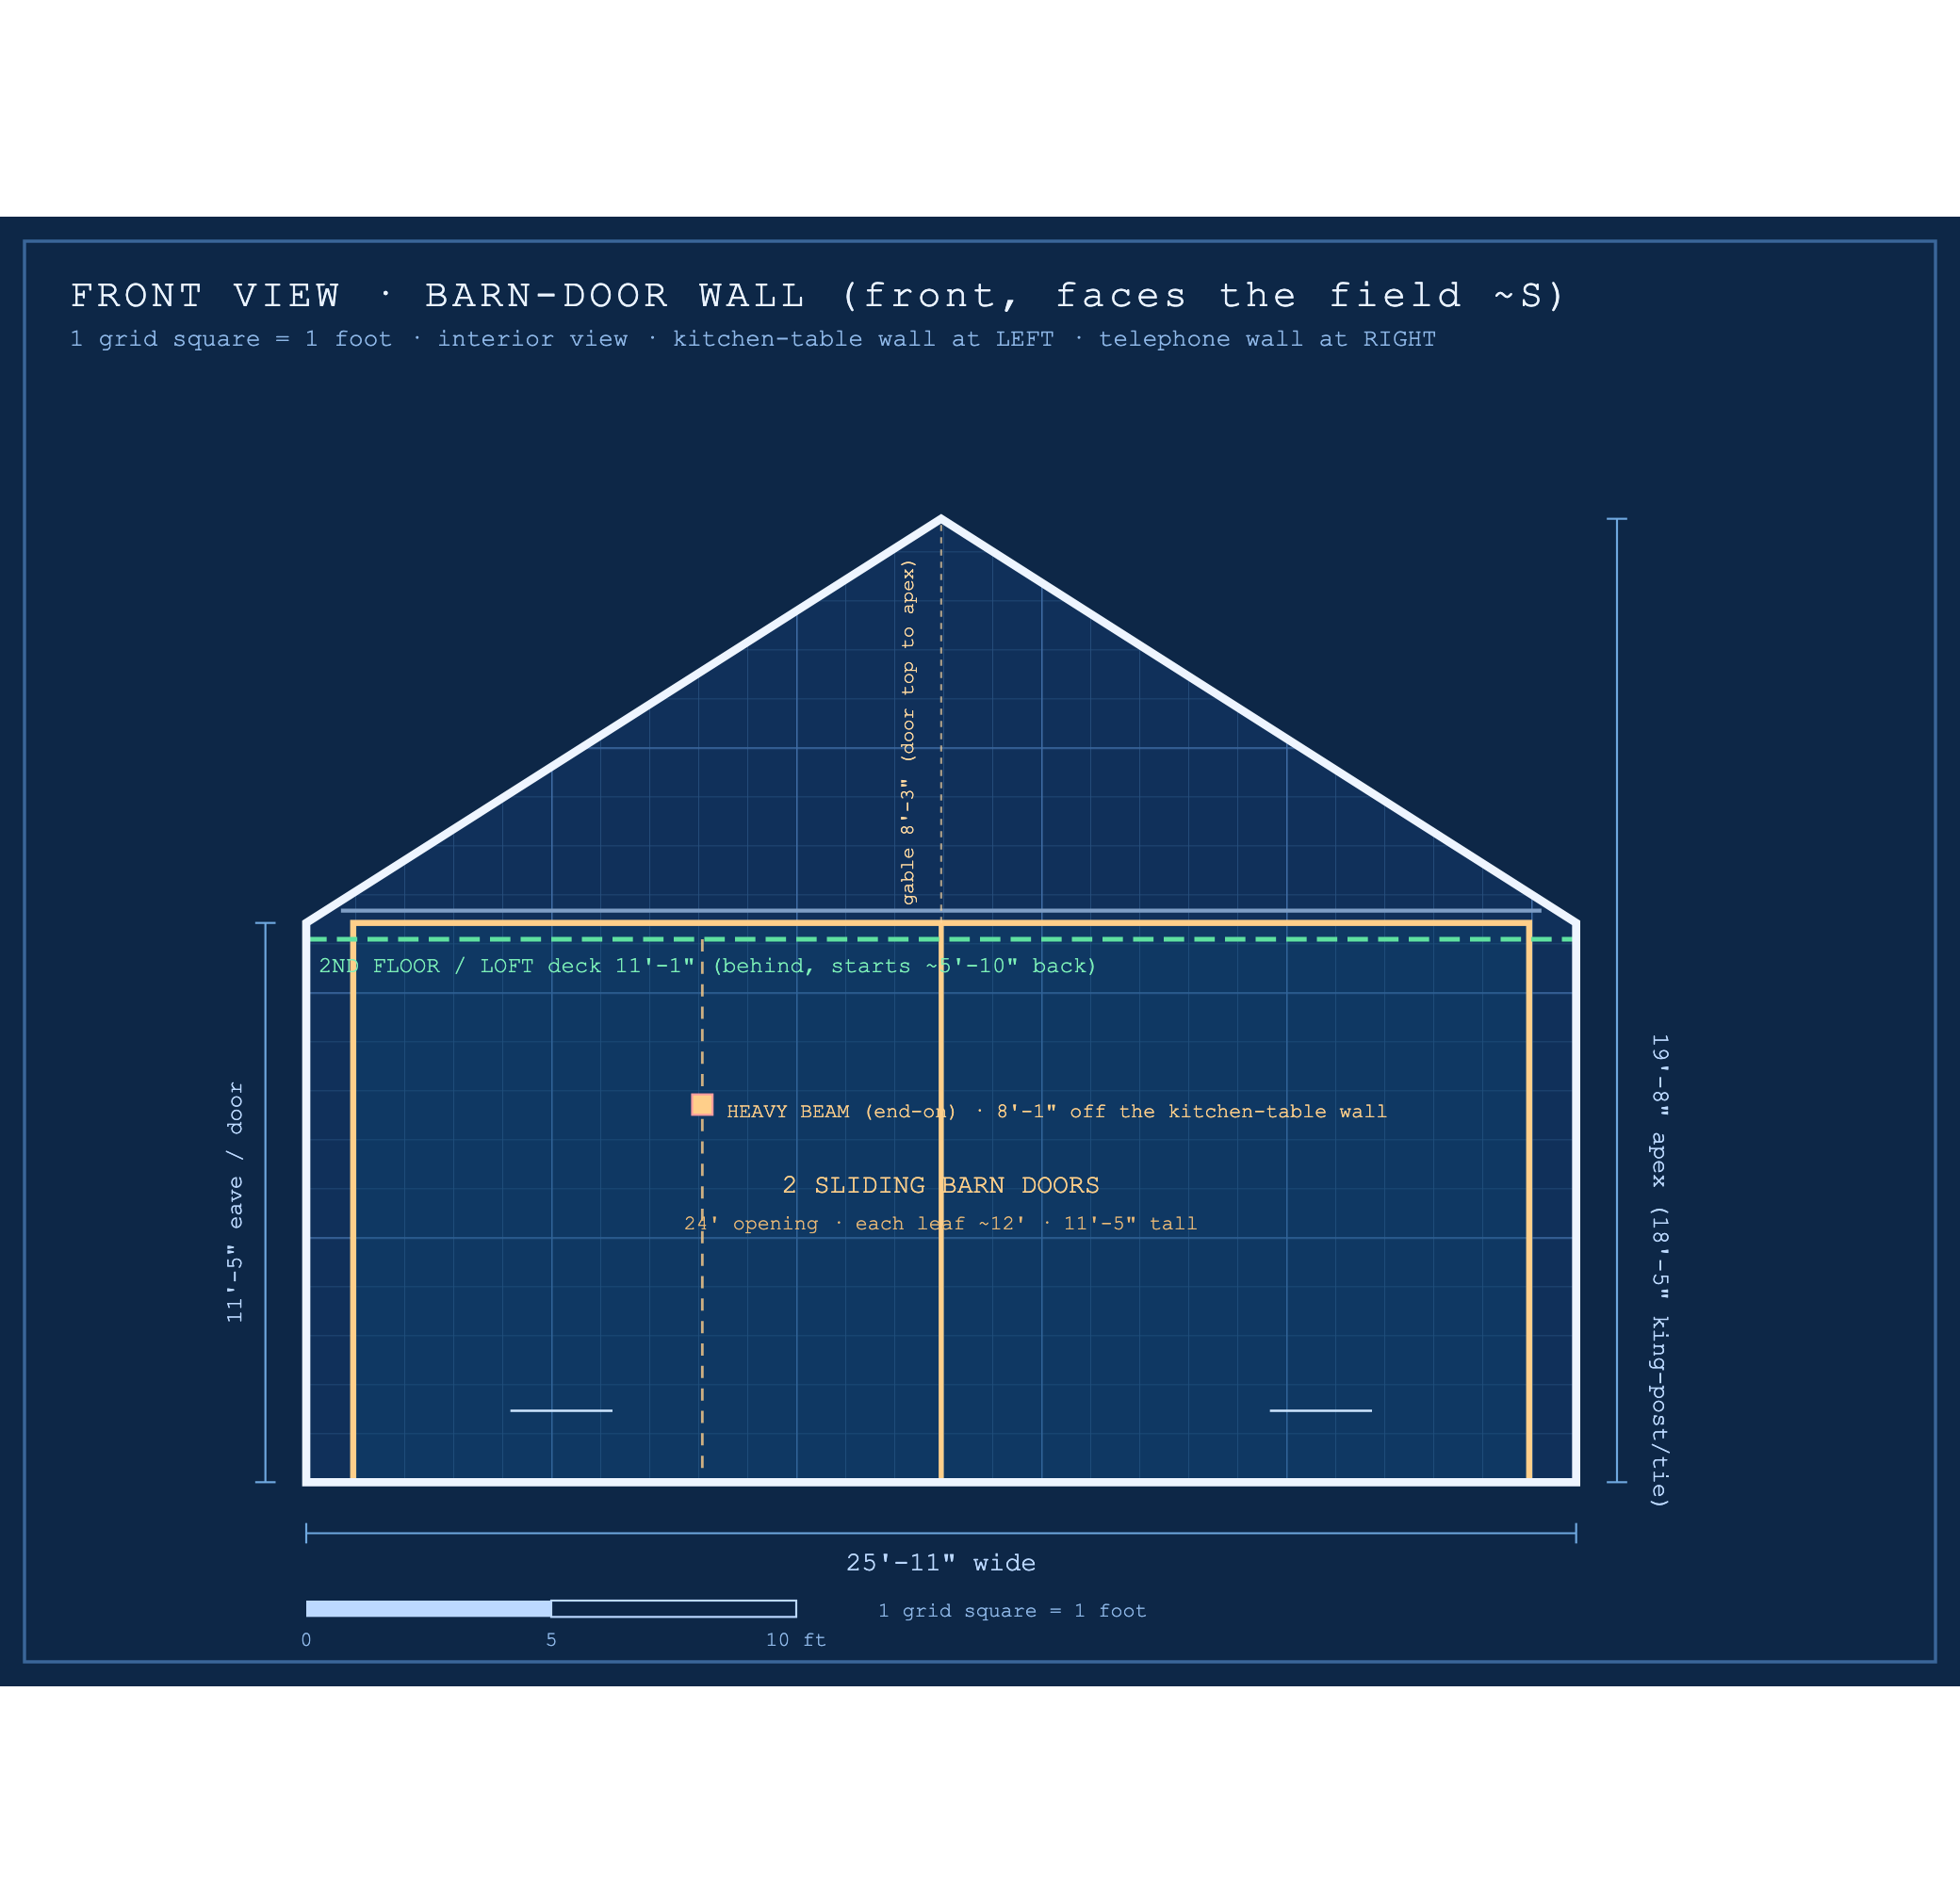
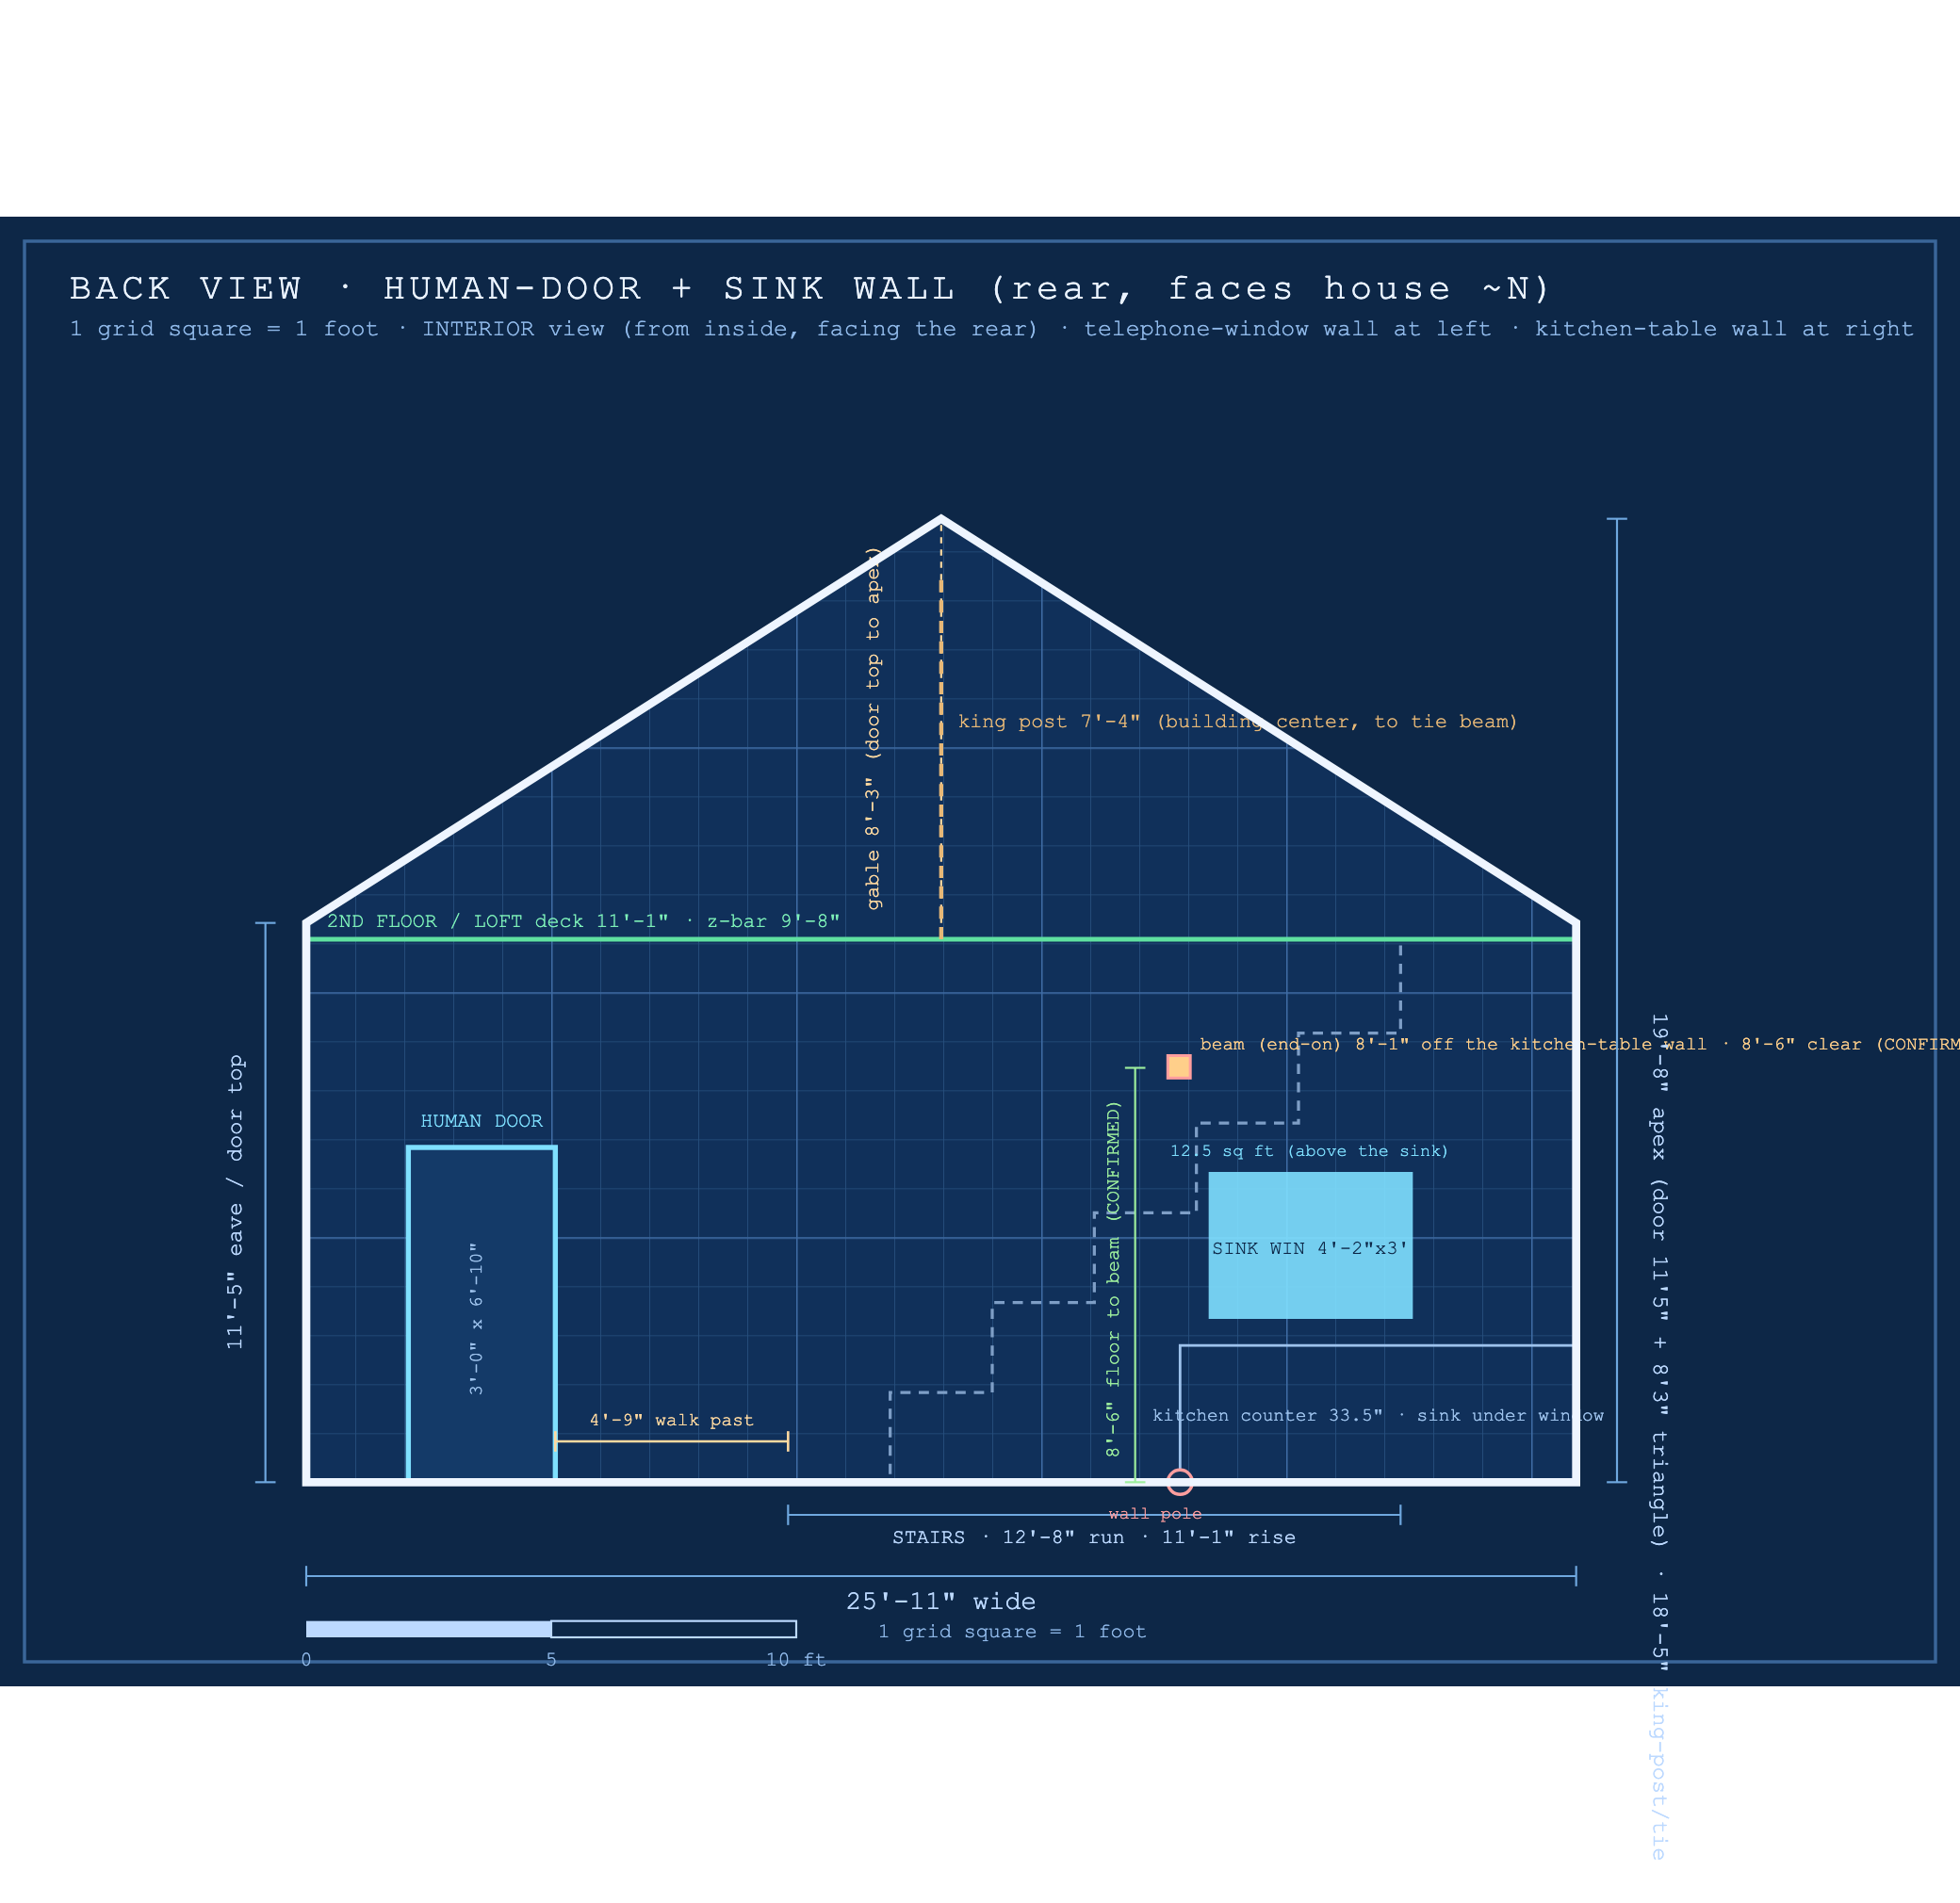
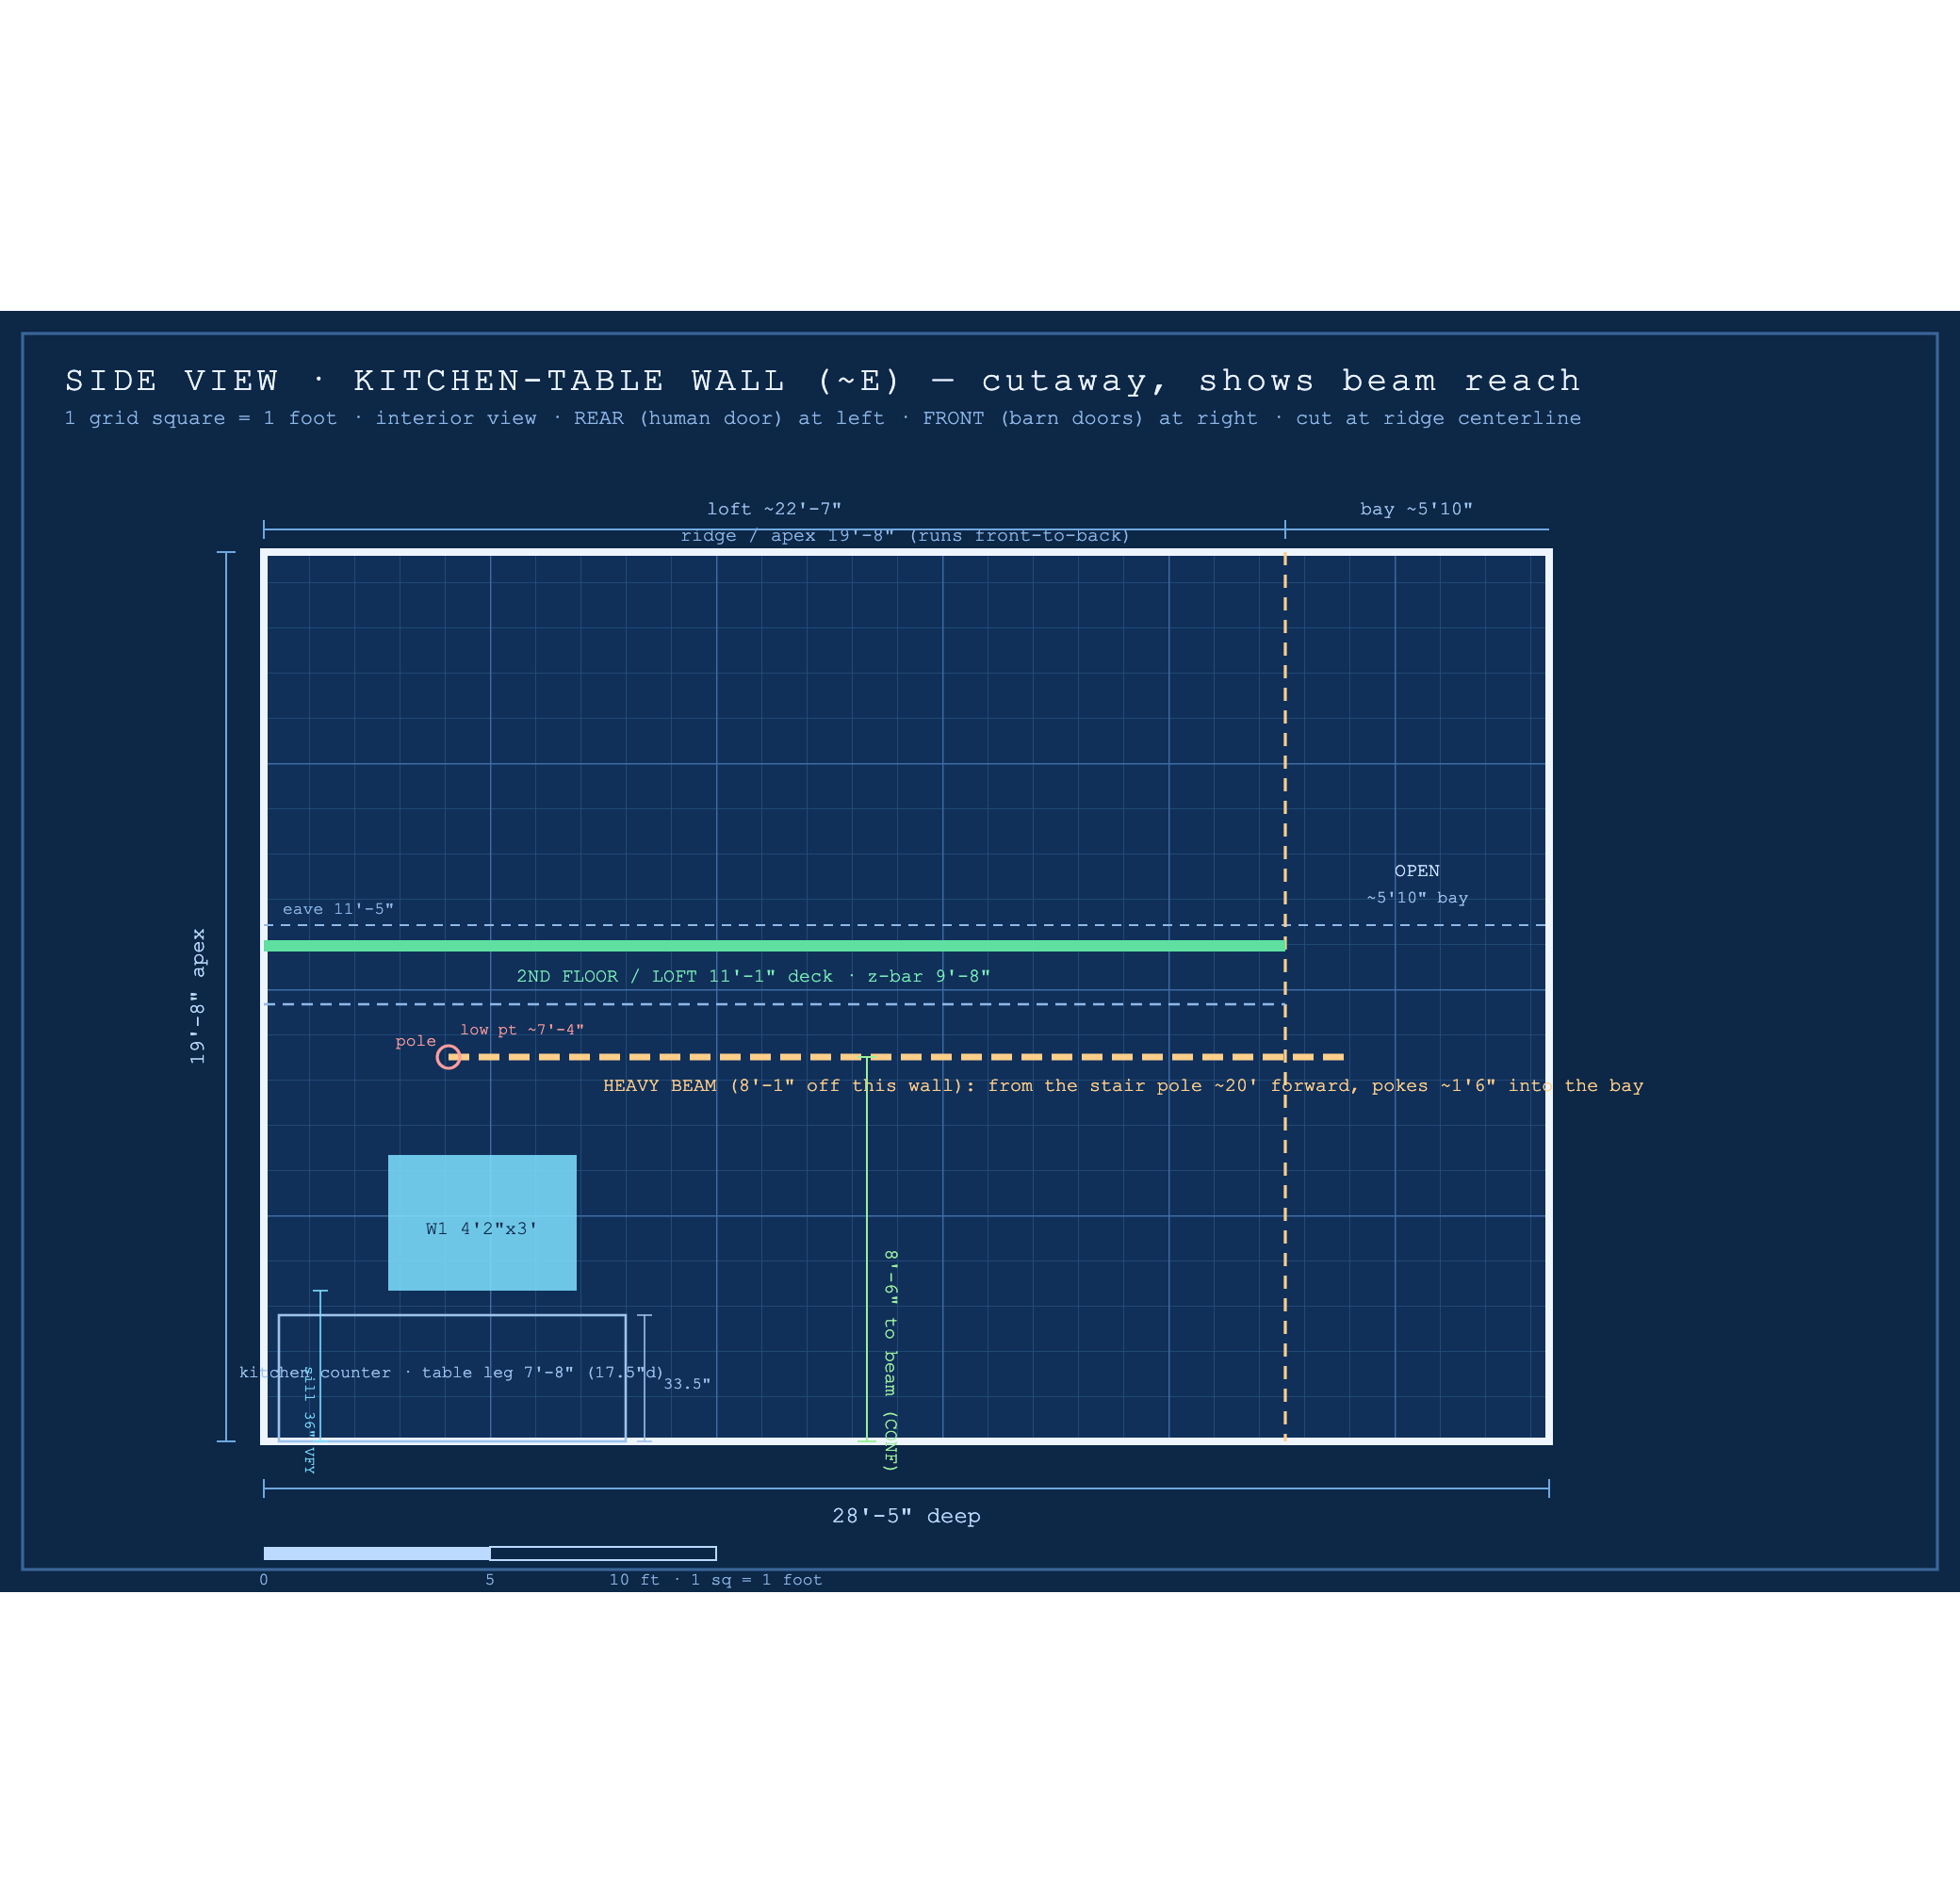
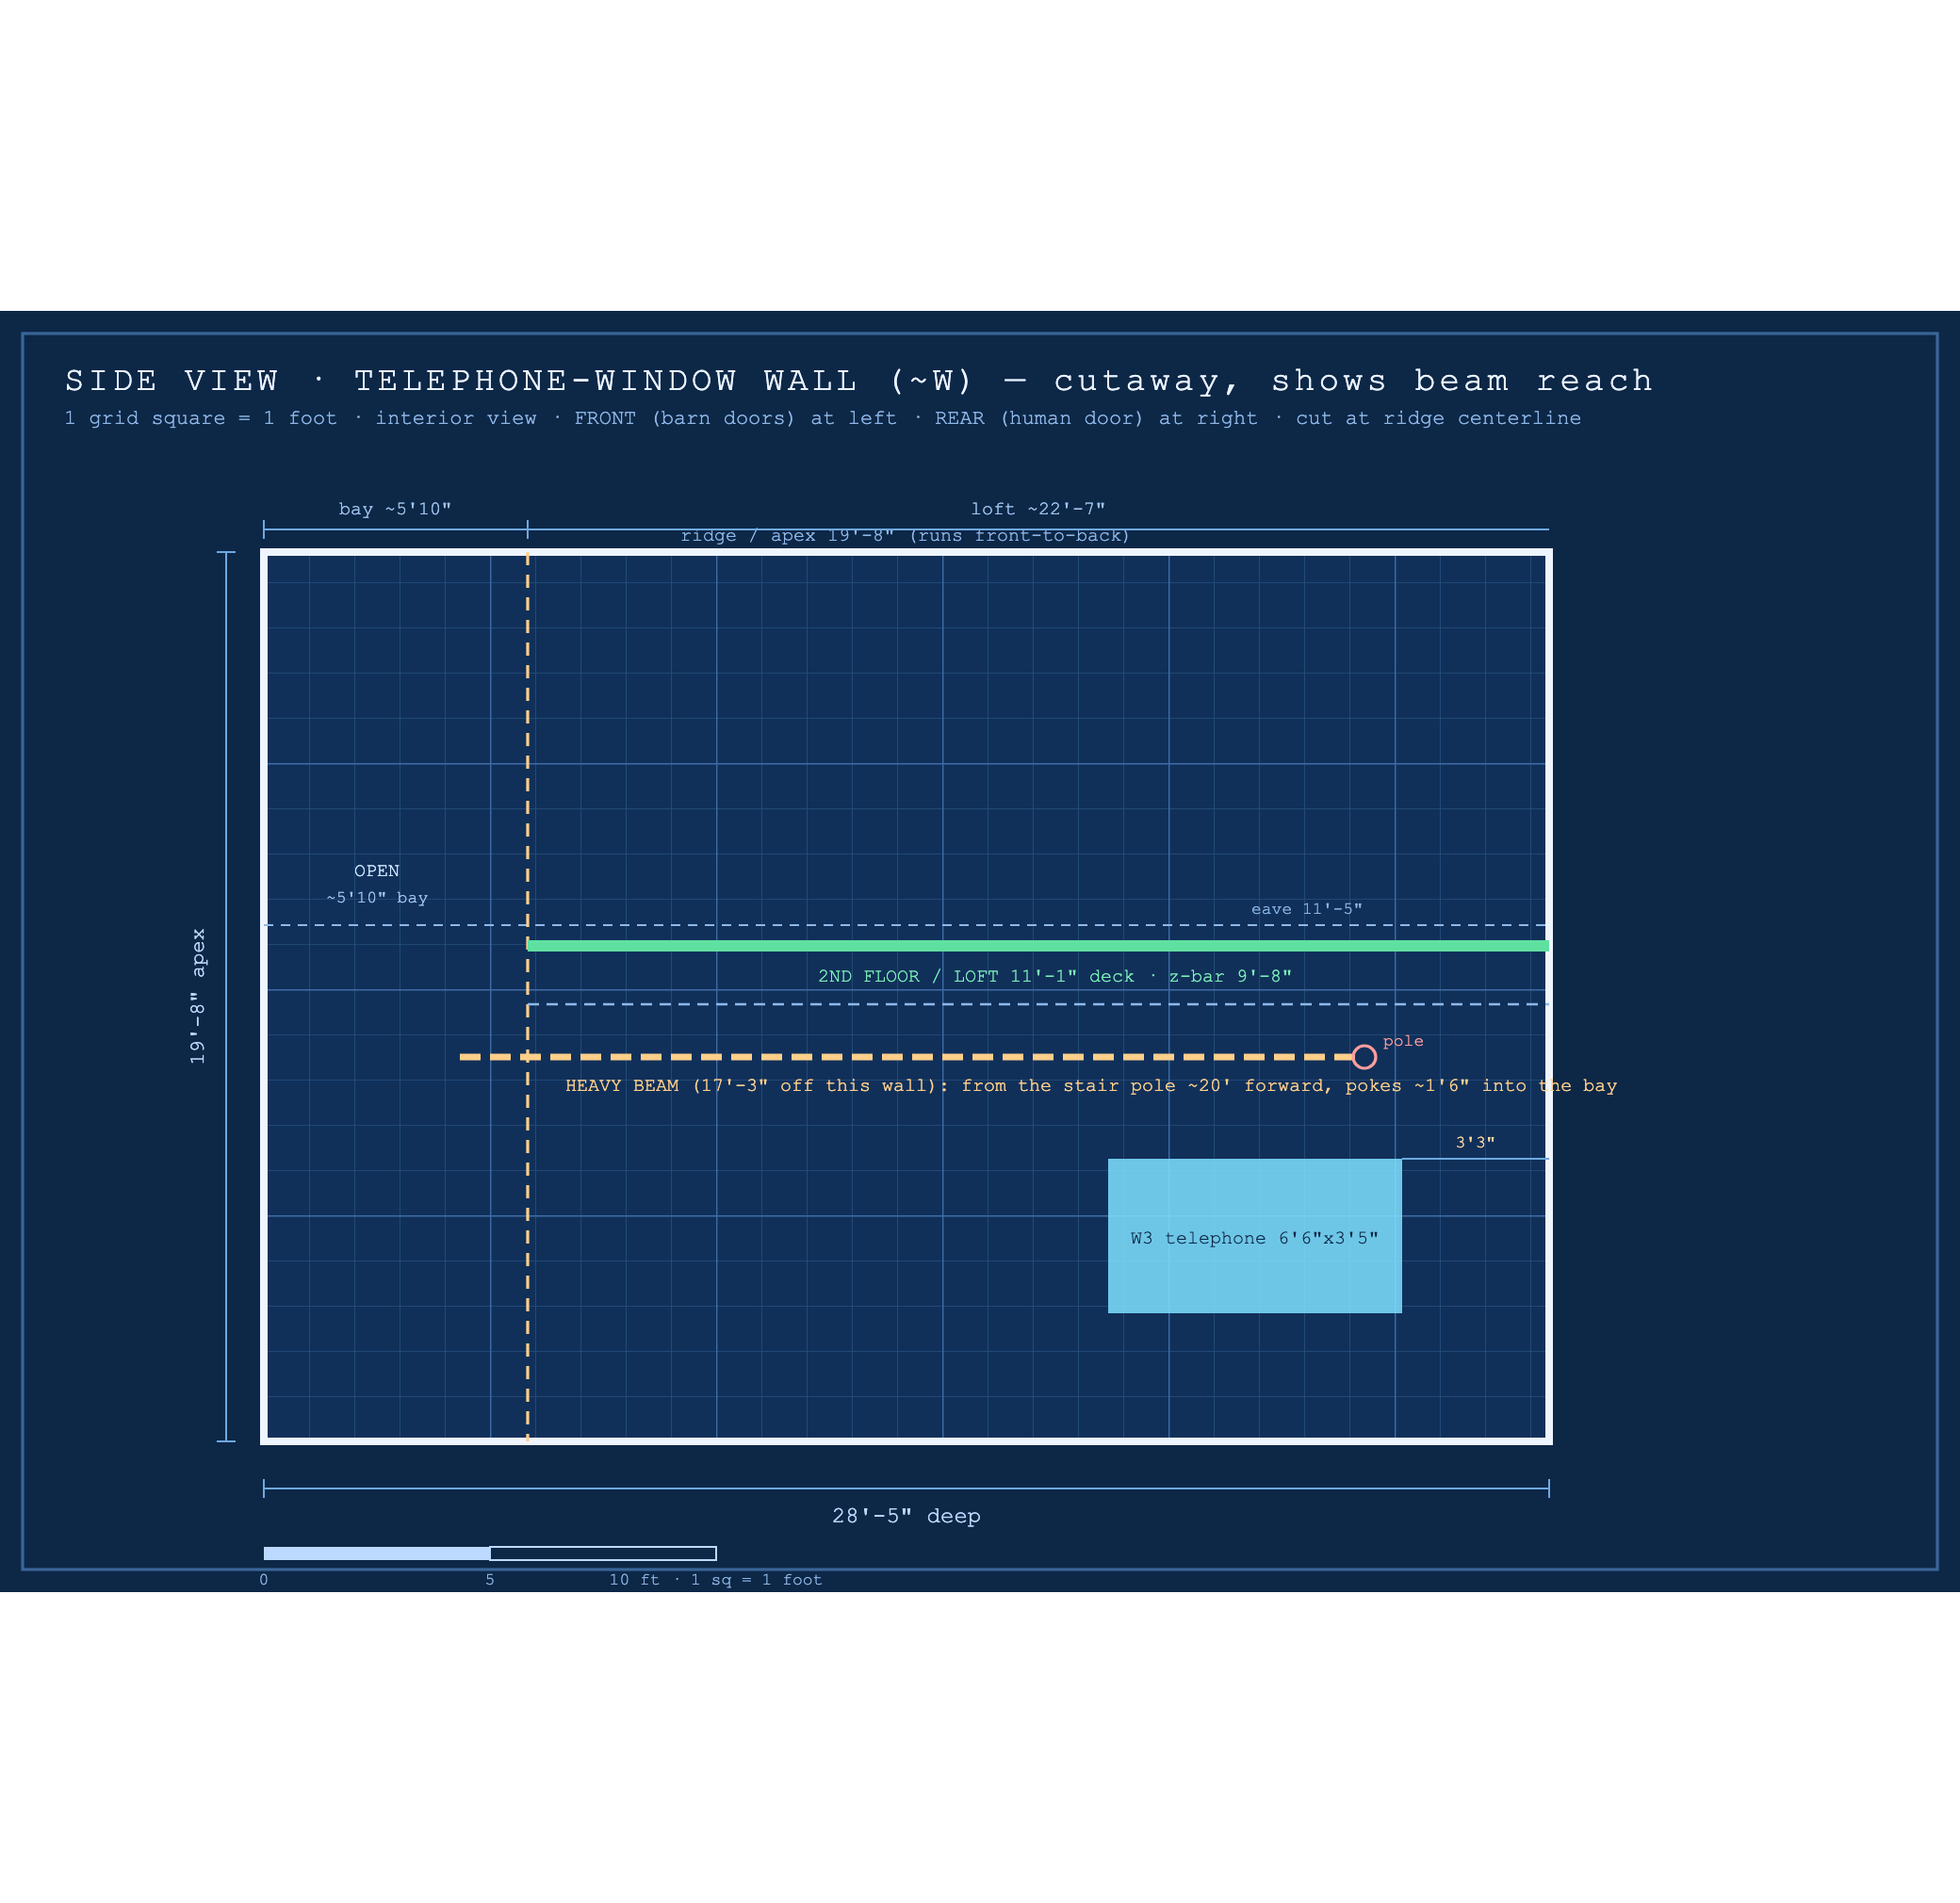
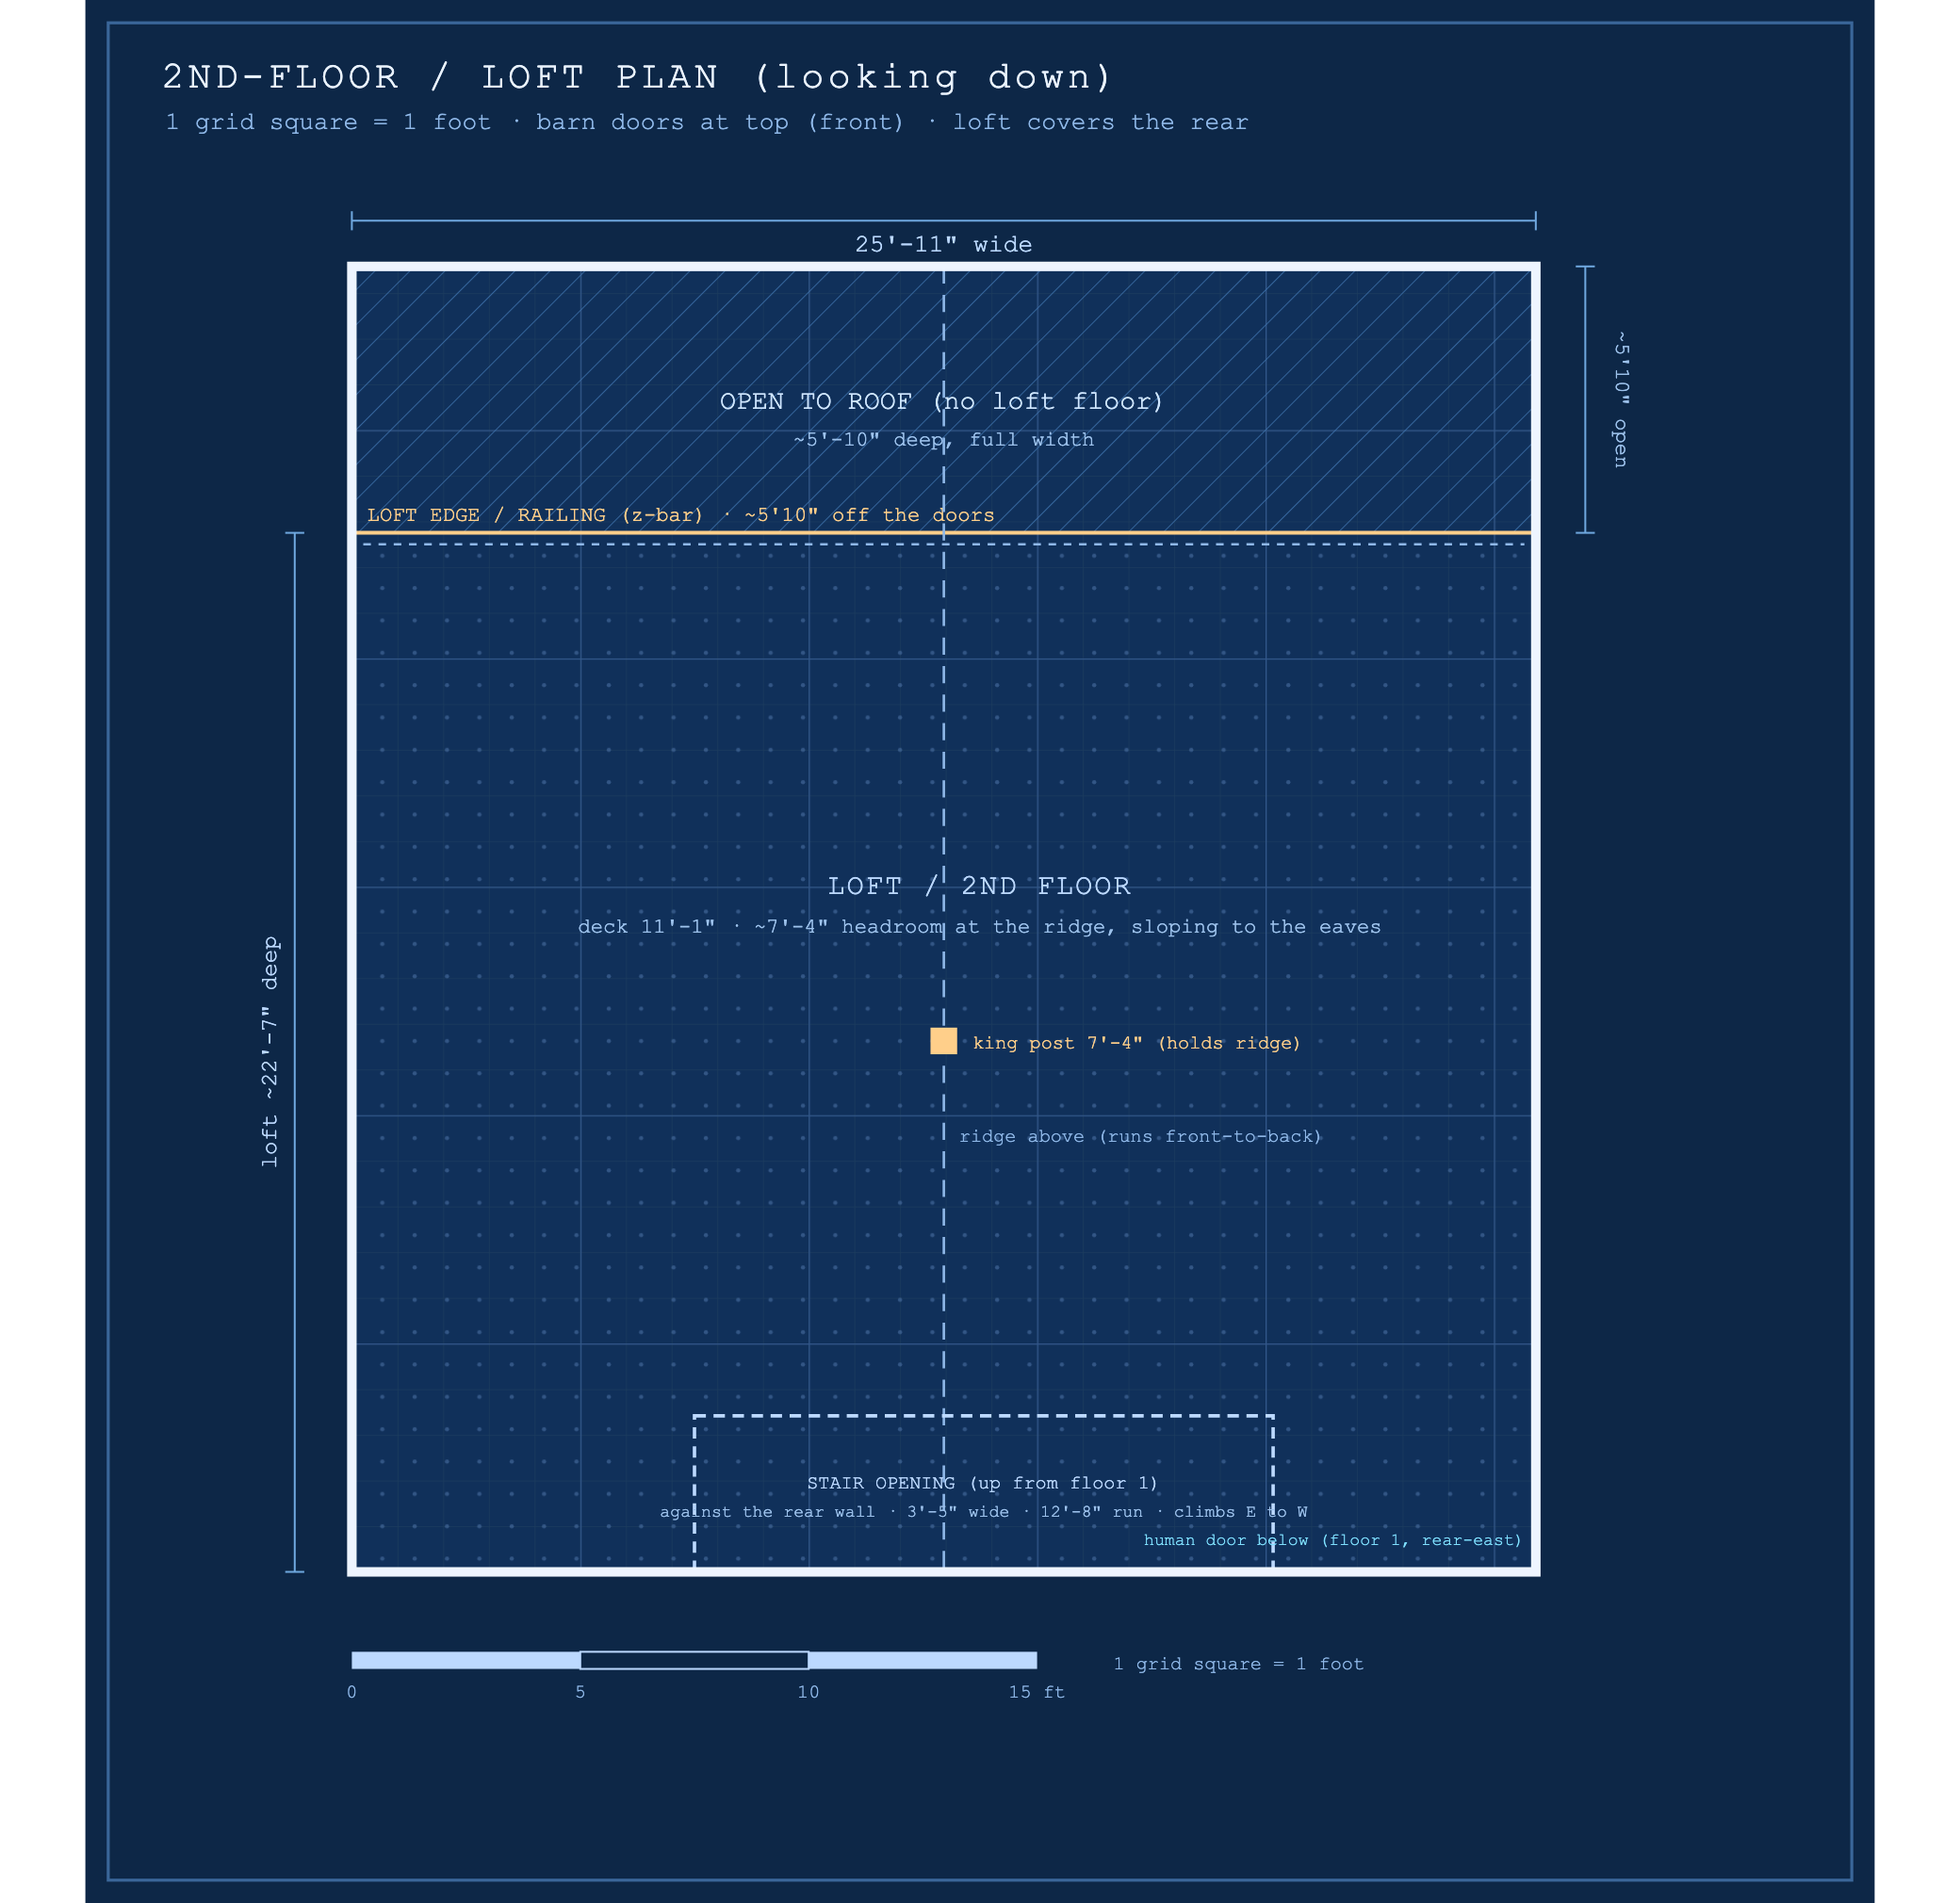
Eave height · exact beam run + post locations · loft footprint · window/door sizes · slab level/moisture · overall footprint. Rule: dims are taken to the edge of beam / z-bar / stud (the build-off surfaces).
★First move: seal the shell with spray foam
Foam the exterior walls + roof deck (not the attic floor), coat it matte black so the shell disappears, then build the studios inside. The foam is the weather barrier + thermal, and it stiffens the metal; it is NOT the sound treatment. The two renders below are our actual barn: the foamed stage, then the matte-black finished stage.
Once the barn is cleaned and the leaks are fixed, the first thing we do to the building is foam the shell. Everything else (the floor, the rooms, the wiring, the look) builds on a sealed, dry envelope. In a hot-humid Central-Texas metal building this is not optional: bare metal sweats, and a sweating shell rots the build from the inside. Closed-cell spray foam on the steel is the fix.
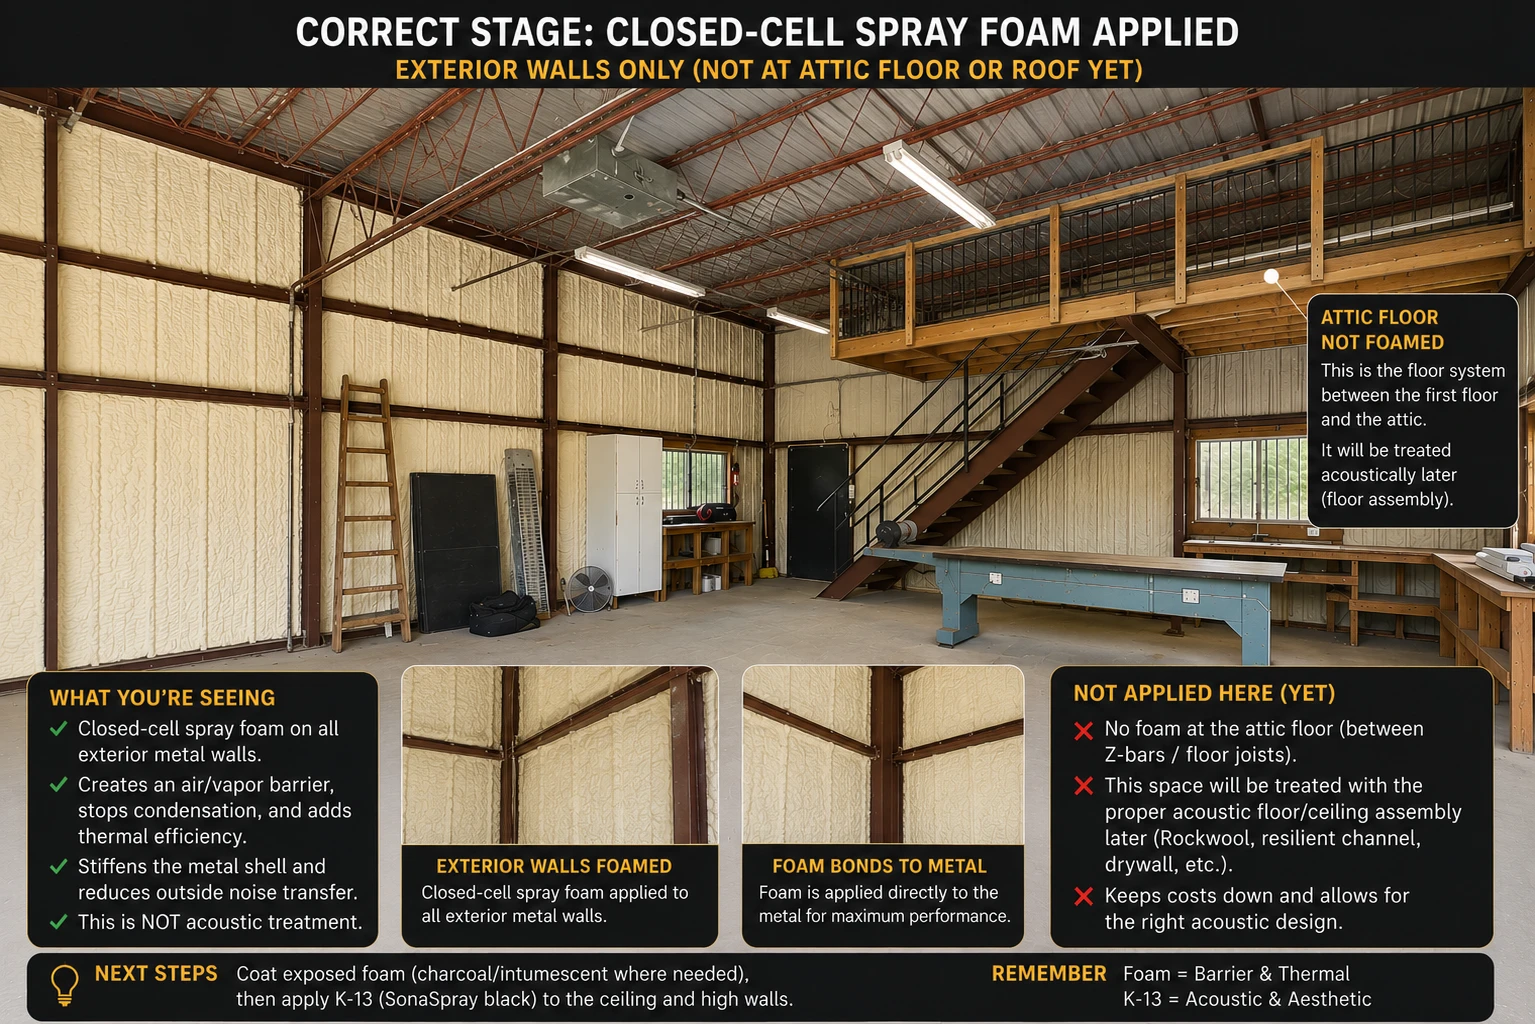
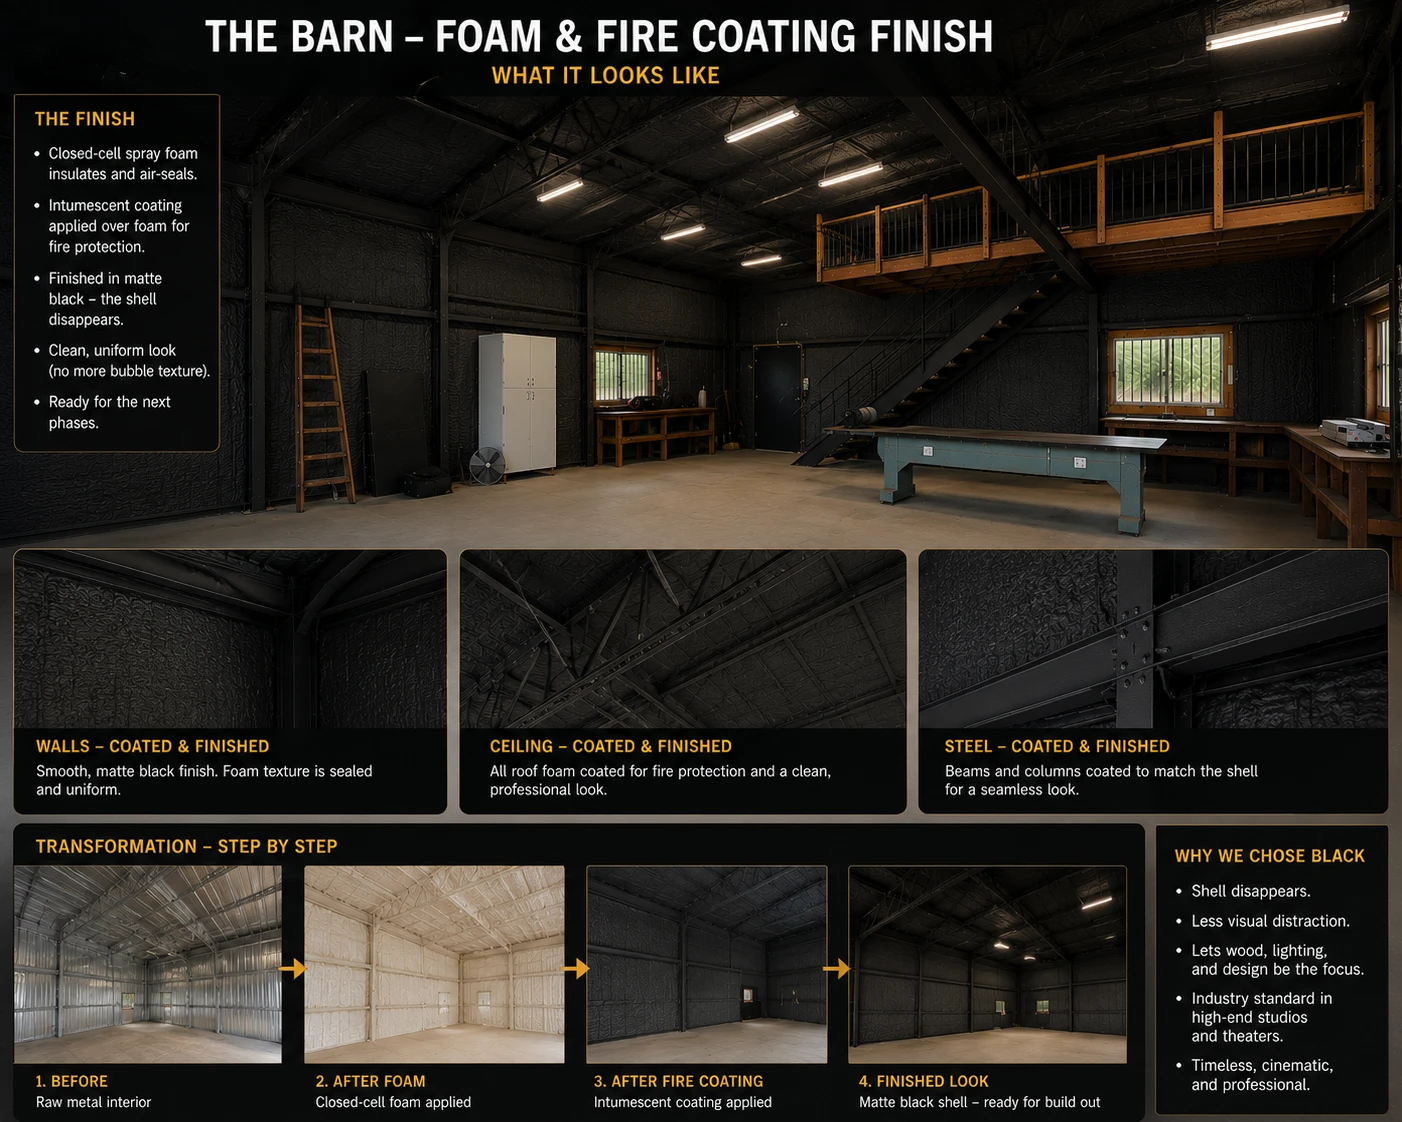

Foam is one of the first steps; the floor's beautiful finish is one of the last. You never spray foam (or the dark coating) over a finished stained floor: overspray would destroy it, and cured foam has to be ground off concrete. So the order is clean and prep, foam the shell, do the overhead dark spray, THEN grind and stain the slab, protect it, and save the final topcoat for last. This is the documented pro consensus: foam shell first, decorative floor finish last.
- Material: closed-cell spray foam on the inside of the metal roof deck and the wall bays. ~2" minimum for the vapor + air barrier in our climate (Zone 2A); bump the roof to ~3" for more R-value. No separate vapor retarder needed, closed-cell IS the vapor barrier.
- Area: ~2,054 sq ft of surface (roof underside 873 + walls 967 + gable ends 214; the 24' door opening excluded).
- Foam quantity: ~5,000 board-feet (roof @ 3", walls @ 2").
- NOT in the room cavities: the decoupled studio walls get open mineral wool later, never closed-cell (closed-cell shrinks the decoupled air gap and kills isolation).
- NOT the attic floor. It sits between two conditioned spaces, so it is an acoustic assembly, not weather. The z-bar / joist bays stay open for the floor/ceiling build-up (§13), not foam. Foam only touches the outdoors: roof deck + exterior walls + gable ends.
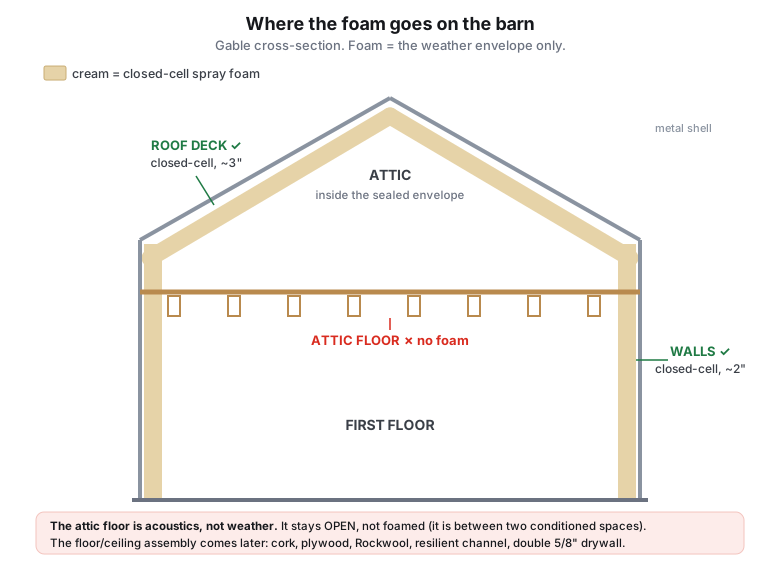
- ✓ Underside of the metal roof deck. Exposed to Texas heat + condensation. Foam it (~3").
- ✓ The exterior metal walls + gable ends. They touch the outdoors. Foam them (~2").
- ✗ NOT the attic floor / z-bar joist bays. That sits between two conditioned spaces (first floor and attic), so it is acoustics, not weather. Closed-cell earns its cost on condensation, air-sealing, thermal, and shell-stiffening, and none of those apply here. Leave the bays open for the floor/ceiling assembly (§13): cork, plywood, Rockwool, resilient channel, double 5/8" drywall ceiling below.
Leaving the attic floor open until the loft use is locked (control room, writer's loft, lounge, storage) also keeps your options open: each of those wants a different floor/ceiling treatment.
Unlike the bass traps (where DIY wins big), spray foam is cheaper AND better with a pro at this scale. The real numbers:
- Pro spray (budget by BOARD-FOOT, not sq ft): our takeoff is ~5,000 board-feet (the shell is not all 2", the roof is bumped to 3", so square-foot pricing lies). Installed closed-cell on a metal building runs roughly $0.60–2.90 per board-foot depending on thickness, access, minimums, prep, and whether the fire coating is bundled. Treat ~$3,000–14,500 as a quote target, not a fixed price. The pro has the rig, the exact A/B tank-ratio control, and sprays it in a day.
- DIY kits: a Froth-Pak 620 kit is ~$2,000 and yields ~620 board-feet, so the whole shell needs ~8–9 kits = ~$16,000–18,000 plus your labor and the real risk of off-ratio foam (wrong tank temps = foam that never cures right and has to be torn out). DIY kits are for sealing gaps, not a 2,000 sq ft shell.
- The call: get 2–3 quotes from Austin/Bastrop closed-cell spray-foam contractors, priced by board-foot (~5,000 bf), and ask each whether the fire coating is included or separate. This is the rare line where hiring is the smart money.
Make the foam disappear. The design direction: do not try to make the foam pretty, coat it matte black (or very dark charcoal) so the shell recedes and the wood + lighting + design become the focus. That look comes from the intumescent fire coating itself (it is the fire/ignition barrier AND the dark color), applied over the exposed foam.
The contractor ask: "I'd like the finished appearance as close as possible to a matte black or very dark charcoal while staying within your approved fire-rated system." That lets them hit the look with an approved coating or finish coat without breaking the rating.
Approved systems to ask about: DC315 (the standard, ~40 gal for our area with primer + 2 dark coats), No-Burn Plus XD, or FIRESHELL F10E. Acrylic / water-based only (solvent eats foam). Insurance can require the fire barrier even with no local building code. Or cover the foam with drywall where you want a flat clean finish instead of the exposed look.
Wiring: plan it before foam (penetrations + the main conduit paths), but run the actual wiring after foam, in conduit on the shell or in the inner walls, never buried. No junction boxes in foam, ever. See the diagram above.
- The foam (hire a pro): get quotes from Austin/Bastrop closed-cell spray-foam contractors (the area is well served). Confirm they spray closed-cell at 2"+ on a metal building.
- Intumescent coating: DC315 (Huntsman / International Fireproof Technology). Technical data sheet (TDS), sold through fireproofing/coating suppliers. Verify the wet-film thickness for your foam.
- Mineral wool (later, for the cavities): Rockwool Safe'n'Sound at Home Depot (~$59/bag, local pickup).
Verify the fire-barrier requirement with Bastrop County (the barn is in Bastrop County, not Austin city, so the rules are lighter, but the insurer still cares). Videos to watch are in the §26 sources list.
★The wall system: architectural acoustics
The wall you liked, for the outer shell. The shell disappears into matte black, and the walnut becomes the star. The real acoustic work (Rockwool + air gap + black fabric) hides behind the wood slats. Nobody sees insulation; they see a beautiful wood wall. This is how Blackbird, Skywalker, Galaxy, Wisseloord, and nearly every Dolby Atmos room is built.
This is the outer-shell wall build-out (a Phase 7 to 8 job), not the near-term work. This week is just foam, AC, and the floor (see the 2-week sprint in the playbook). The wall system lives here, right next to the foam, so the whole shell story reads together: foam the shell, coat it matte black, then build this wall over it later.
- Protect the building (building science): metal panel then closed-cell foam. Stops condensation, seals air, cuts the HVAC load, kills the metal-panel resonance. Nothing to do with sound quality yet.
- Control the sound (acoustics): foam then Rockwool then air gap then fabric. Sound enters the porous Rockwool, turns to friction and heat in the fibers, and does not reflect back. A 1" air gap behind the Rockwool makes it absorb lower frequencies.
- Hide everything (the look): Rockwool then black fabric then walnut slats. You think you are looking at a wood wall. You are looking at a hidden broadband absorber.
The two build-ups (both start with foam on the metal)
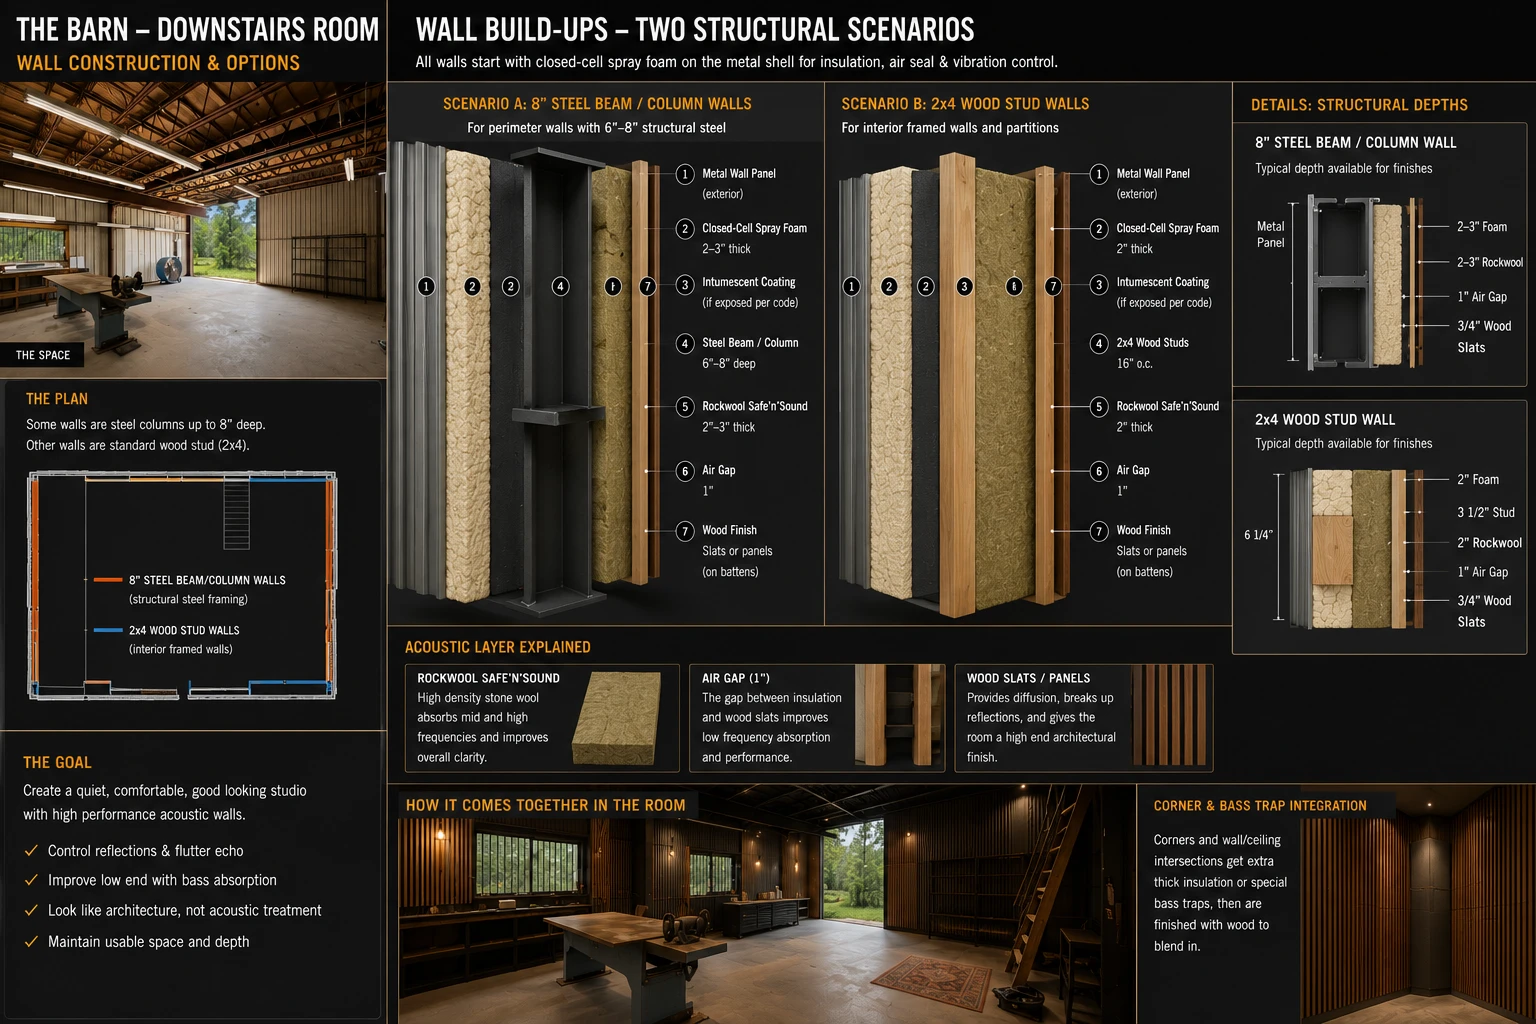
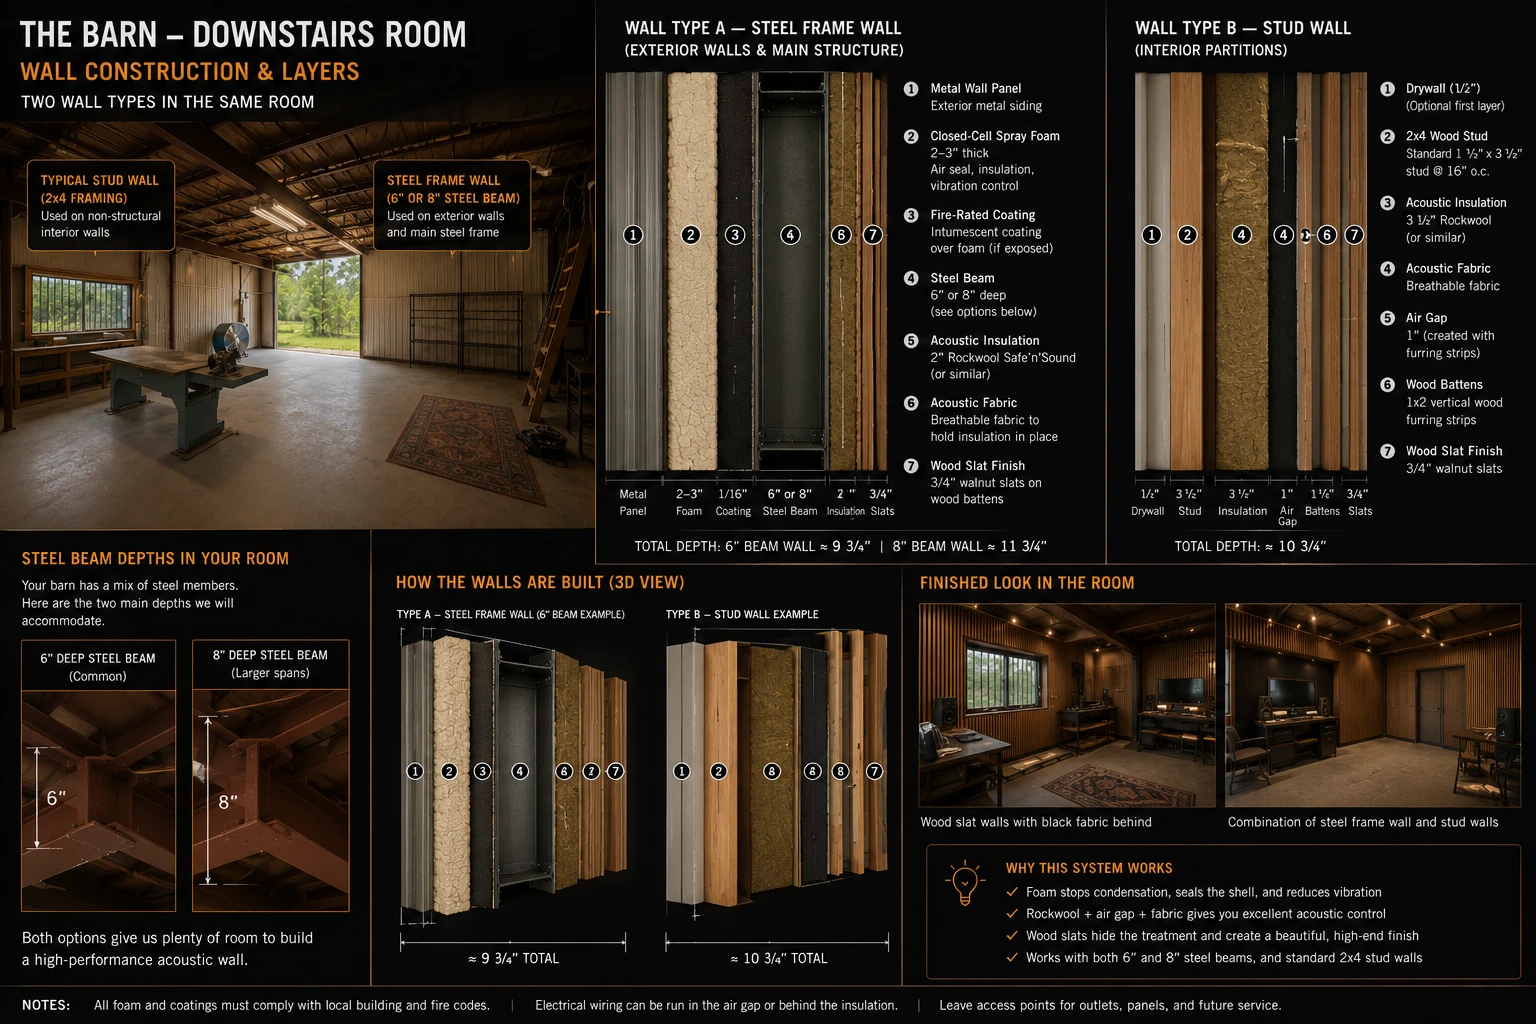
| # | Type A: steel-beam / column wall (exterior + main structure) | Type B: 2×4 stud wall (interior partitions) |
|---|---|---|
| 1 | Metal wall panel (exterior) | Drywall 1/2" (optional first layer) |
| 2 | Closed-cell spray foam 2–3" | Closed-cell foam 2" (shell side) |
| 3 | Intumescent coating (if exposed, matte black) | Intumescent (if exposed) |
| 4 | Steel beam / column, 6" or 8" deep | 2×4 wood studs @ 16" o.c. |
| 5 | Rockwool Safe'n'Sound 2–3" | Rockwool 3.5" |
| 6 | Air gap ~1" (furring) | Air gap 1" (furring) |
| 7 | Black acoustic fabric + 3/4" walnut slats on battens | Black fabric + 3/4" walnut slats on battens |
| Depth | ~9 3/4" (6" beam) to ~11 3/4" (8" beam) | ~10 3/4" |
Your barn has both: 6" and 8" steel beams / columns on the perimeter and main structure, and standard 2×4 for interior partitions. Both give plenty of depth for a high-performance acoustic wall.
- Rockwool = the porous absorber. Air moves into the fibers, friction turns it to heat, the reflection dies. Safe'n'Sound absorbs mids + highs and cleans up clarity.
- The 1" air gap = the cheap trick. Mounting the absorber off the wall makes it work at lower frequencies, so you get more bass absorption for free.
- Black acoustic fabric = not for sound, for concealment. It holds the fibers back, hides the insulation, and disappears visually. Must be acoustically transparent (Guilford of Maine, Camira, Acoustimac).
- Walnut slats = the magic. They protect the insulation (no exposed Rockwool), scatter high frequencies (diffusion, so reflections break up instead of coming straight back), hide the fabric, and turn the wall into architecture instead of a recording studio.
A world-class room is not "treated," it is tuned. Do not build every wall identical:
- Front wall (behind the speakers): heavier, deeper, substantial bass trapping; flush-mount the monitors if you go that way.
- Side walls (first-reflection points): hidden broadband absorption behind the slats, where measurements say it helps.
- Rear wall: lean on diffusion and deeper low-frequency treatment, not pure absorption.
- Corners: dedicated bass traps built into the architecture (extra-thick insulation, finished with wood to blend in).
Same beautiful wood look everywhere; different work happening behind it. That is why high-end rooms feel both controlled and natural.
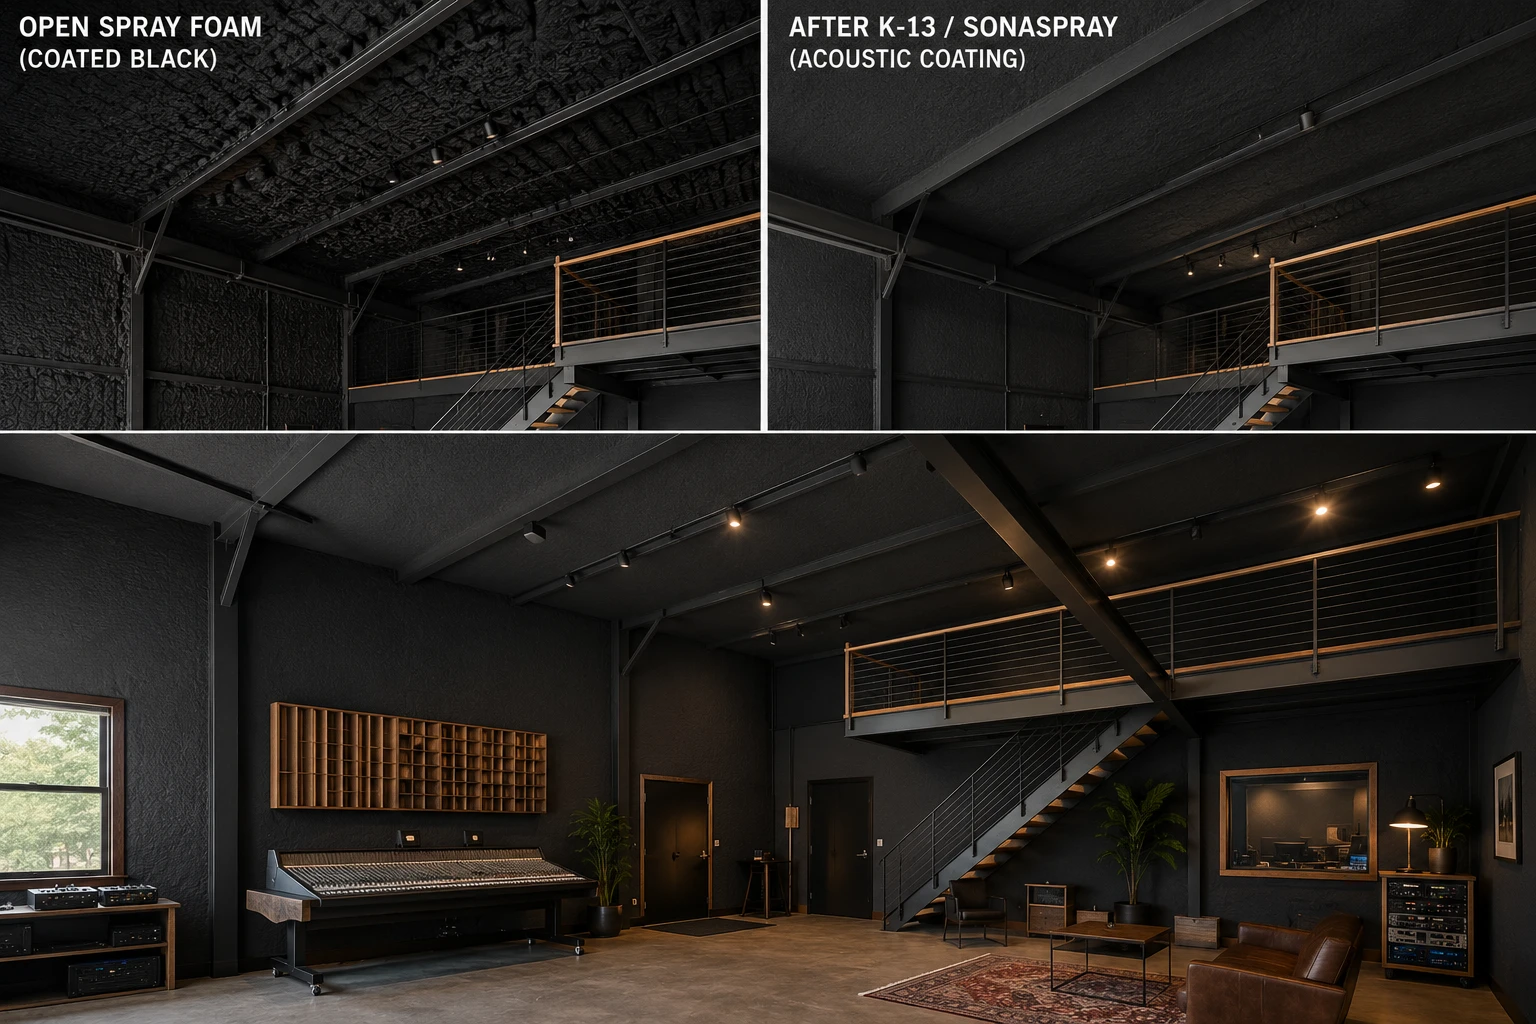
The walls get their absorption from the hidden Rockwool behind the slats, so K-13 is not needed on the walls. The open question is the ceiling / high roof deck, which is too high to slat-wall:
- Option A: black-coated foam only. Cheapest. The shell reflects; fine for a live / vibe room, too live for critical listening.
- Option B: black foam + K-13 only on the roof deck (walls stay the slat system). Adds ceiling absorption where you cannot build slats.
- Option C (the strong look): black foam + floating walnut acoustic clouds (with absorption backing), no visible K-13. The eye goes to the wood clouds + lighting; the shell disappears. Usually the most expensive-looking result.
My read: Option C for the control room and the money spaces (the clouds carry the ceiling absorption and look incredible). Keep K-13 as the optional tool for the very high roof deck or above the clouds, only if reverb measurements say you need more. One correctness note: the walnut clouds are the ceiling absorber; the walls still need the hidden Rockwool behind the slats for a control room. Wood clouds alone over bare coated-foam walls looks great but leaves the room live.
Who builds walls like this
This is called architectural acoustics: instead of "where do we hang panels," the question is "how do we build the treatment into the architecture." The rooms that do it: Blackbird (Nashville, wood slats + hidden absorption), Electrical Audio (Albini, heavy construction + wood + big bass traps), Skywalker Sound (wood + diffusion, very architectural), Galaxy Studios (massive hidden bass trapping, wood everywhere), Wisseloord (slats + hidden fabric), Dolby Atmos mix rooms (treatment always hidden), and BBC / NPR broadcast rooms. Clients walk in and see walnut and lighting, not foam.
- Rockwool Safe'n'Sound (the absorber), Home Depot local pickup.
- Black acoustically-transparent fabric: Guilford of Maine (FR701), Camira, or Acoustimac. Black so it vanishes behind the slats.
- 3/4" walnut slats + 1×2 battens (the visible finish). Mill from the property's own wood if the drying is ready (see the wood section).
- Furring for the 1" air gap. Electrical can run in the air gap or behind the insulation; leave access for outlets, panels, and future service.
All foam + coatings comply with local building + fire codes. This is the OUTER-SHELL / treatment wall (absorption + look). The control room still gets its heavy decoupled isolation shell inside it (see the control-room section).
★The fabric: dark charcoal, not black
The hidden layer of the wall. Its only jobs: let air through, hold the fibers in, hide the Rockwool, and disappear. It is not decorative, the wood is. So we spend on the Rockwool and the walnut, and buy the fabric smart. Think like a luxury interior designer, not an acoustician.
Fabric is one of the last things installed: after the walls are built AND after the acid-stain floor is done and sealed. Acid stain and its fumes must never touch the fabric or the wood. Order it early, install it late (a Phase 9 finish).
Everyone thinks black disappears. It does not. A pure-black panel reads as a black rectangle you notice. A very dark charcoal / graphite / anthracite reads as shadow, and the walnut pops even harder. Between the slats your eye sees wood, then shadow, then wood, never "fabric."
Per room, slightly different: control room = dark graphite (almost black, subtle); live room = dark olive charcoal (a touch warmer); vocal booth = dark espresso (warmer, more intimate). All disappear; each sets the room's temperature.
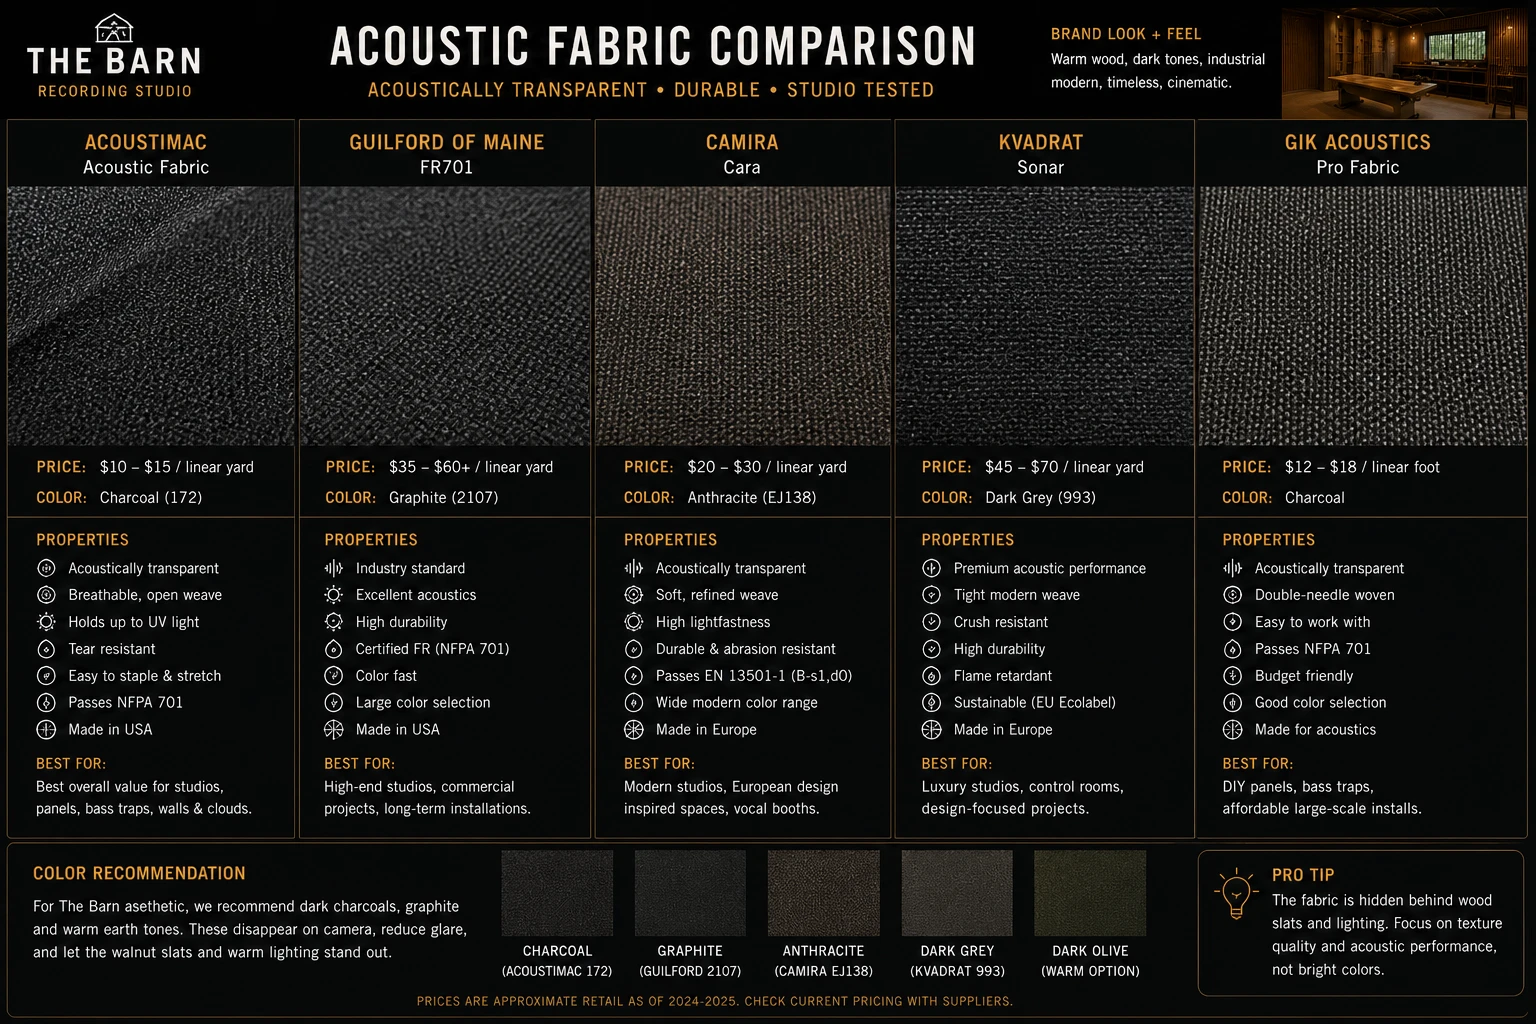
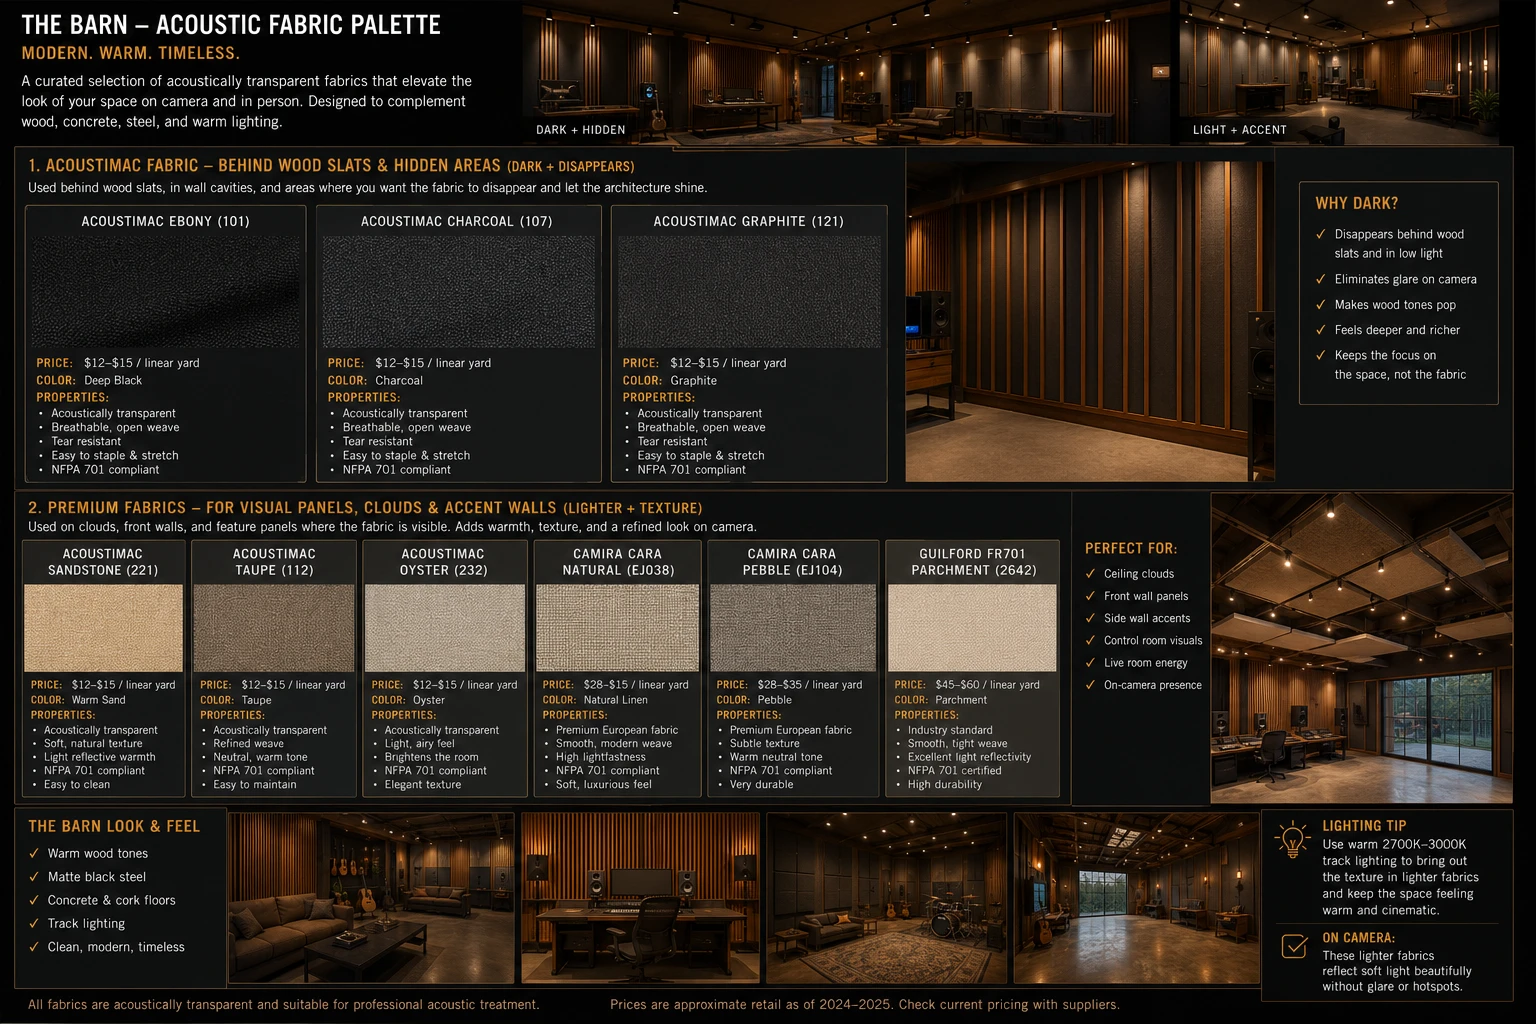
Which fabric (spend on Rockwool, not the fabric)
The fabric only has to be acoustically transparent and hold the fibers. Put the money into Rockwool Safe'n'Sound, not $50/yard fabric.
| Fabric | Price / yd | Call |
|---|---|---|
| Acoustimac (charcoal / graphite) | $10–15 | Best value, our pick. Made for studios, breathable, easy to stretch, lots of dark colors. |
| Camira Cara | $20–30 | Excellent, modern, European. A step up in weave if you want it. |
| Guilford of Maine FR701 | $35–60+ | The industry legend. Worth it ONLY for commercial clients, matching an existing studio, or a big budget. You pay for the commercial fire rating + reputation, not better sound. |
| Kvadrat Sonar | $45–70 | Luxury / design-focused. Overkill here (it hides behind slats anyway). |
| GIK Pro Fabric | $12–18/ft | Budget, made for acoustics, fine for DIY panels + traps. |
- Rockwool Safe'n'Sound (the absorber, where the money goes).
- Dark charcoal acoustic fabric (Acoustimac, best value; graphite / anthracite, not pure black).
- 3/4" walnut veneer slats (the visible star).
- Black battens (hidden behind the slats).
- Warm 2700–3000K LED / track lighting: the walnut glows, the fabric vanishes.
Target ~30% wood coverage; the rest is hidden dark fabric that becomes shadow.
The bigger win is not premium fabric, it is a signature wall designed on paper first. Lock these before ordering:
- Exact slat width, depth, and spacing (the rhythm that makes it "The Barn").
- Hidden LED locations (grazing light down the slats).
- Removable acoustic panels + service access (get to wiring, outlets, future changes).
- Integrated bass traps in the corners, finished in wood to blend in.
- Where solid walnut goes vs where acoustically-transparent fabric (absorption) goes.
Composition + lighting + craftsmanship move the needle far more than which mill the fabric came from. That designed wall is what a client recognizes the second they walk in.
3Walk the space: 3D model
The blueprints in §2, built to scale into a 3D model you can walk through. Tap the picture to open it, drag to spin, scroll to zoom, or hit WALK to fly through the room in first person. Same measurements as the drawings, just standing up.
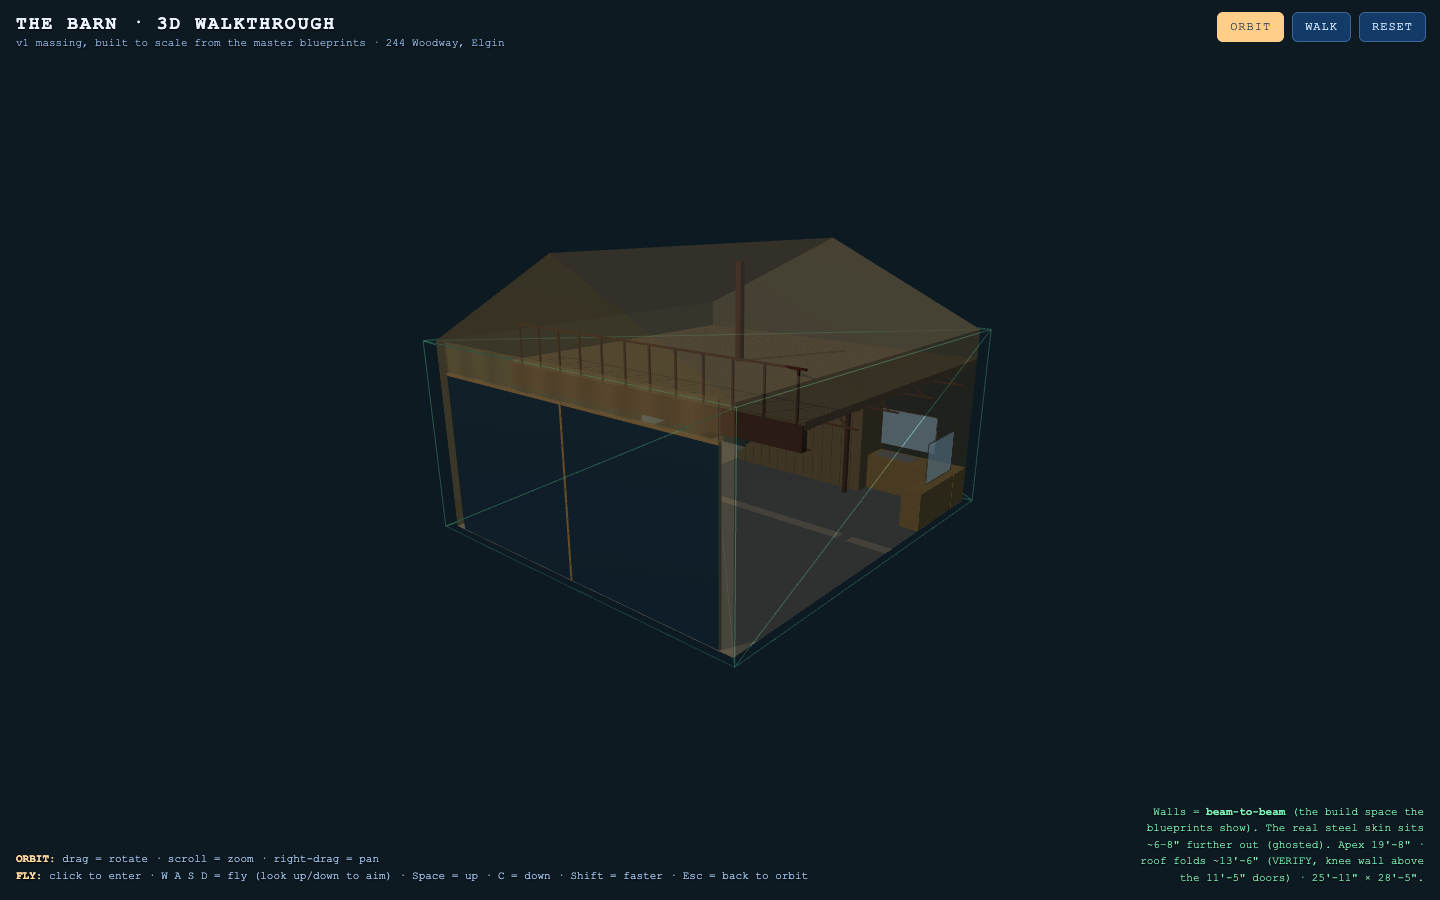
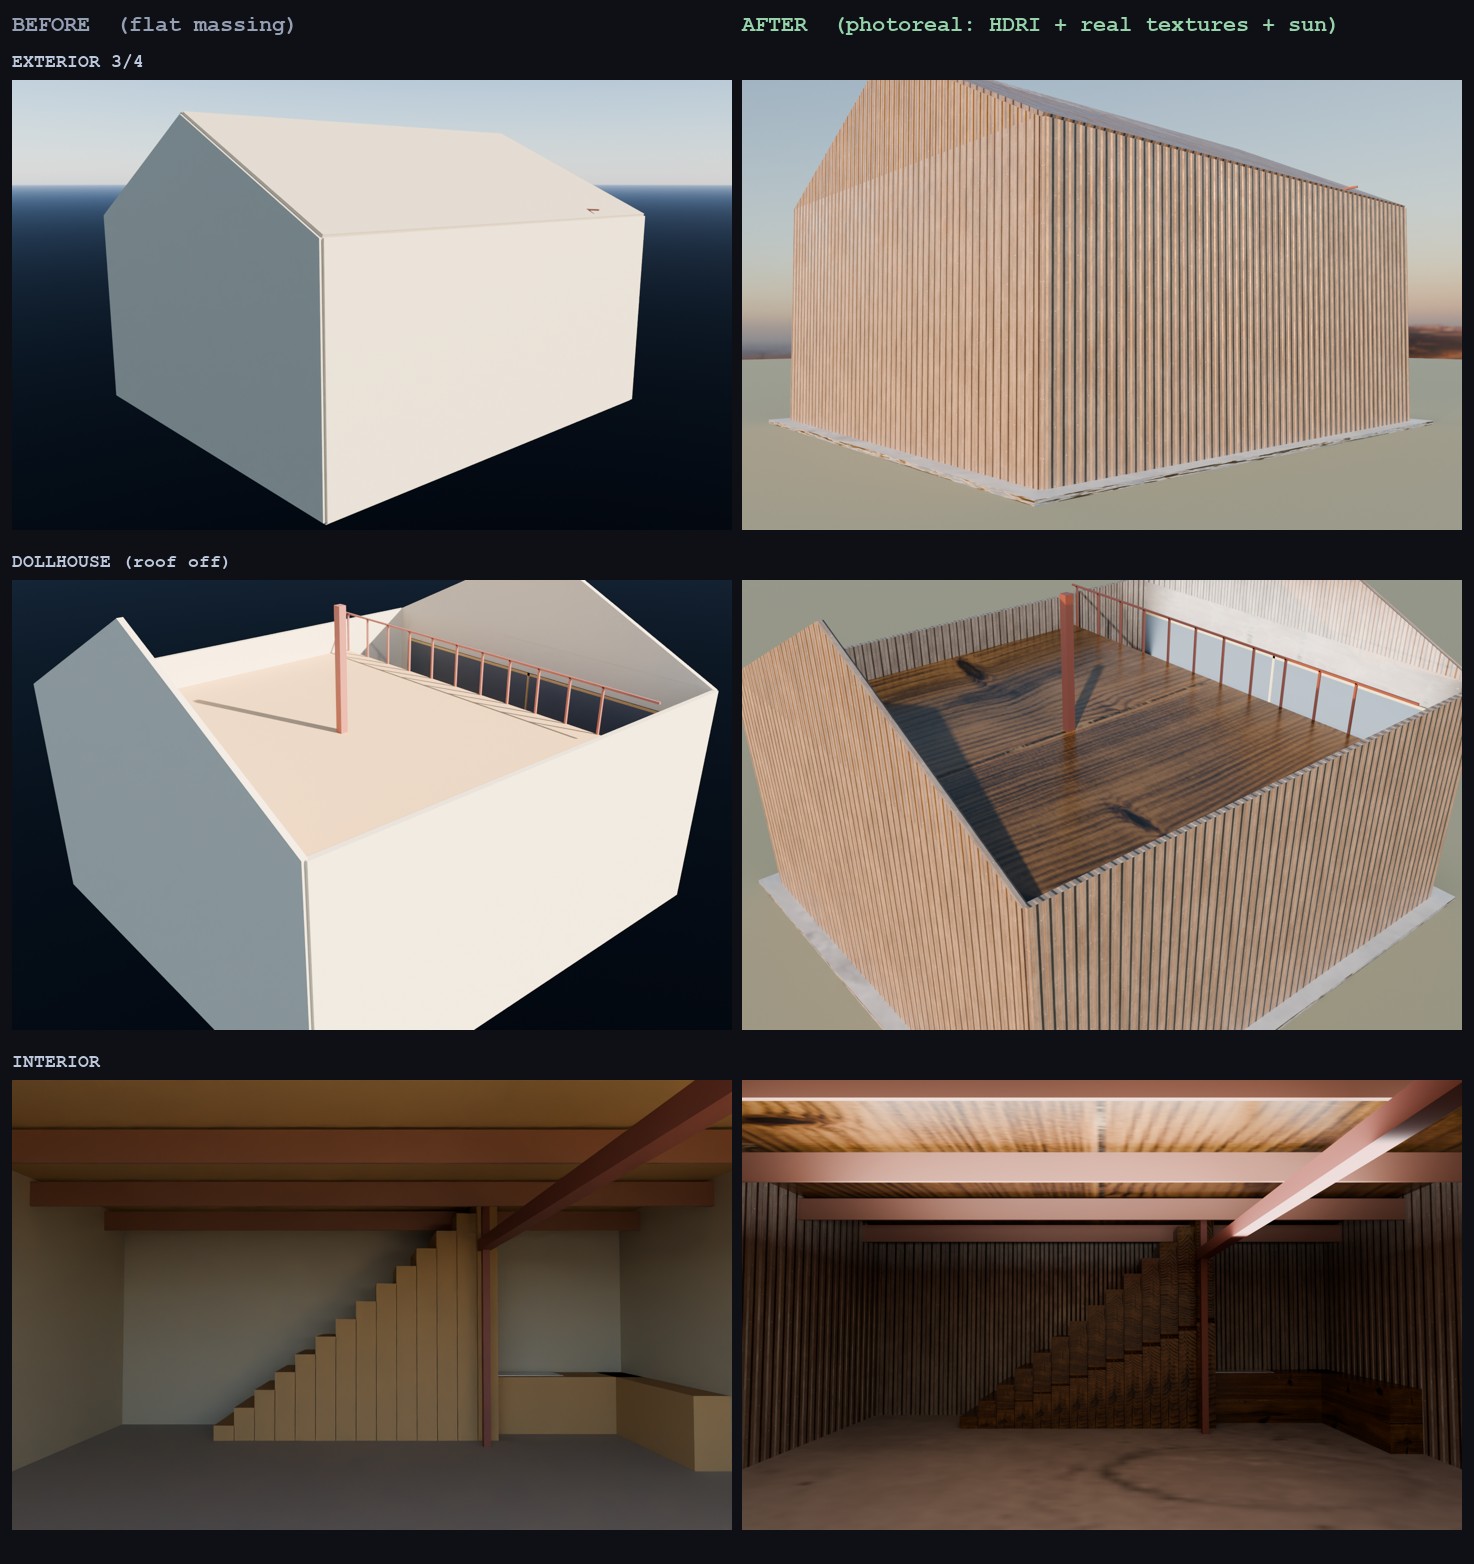
Live model above (needs internet). On a phone: drag to spin, pinch to zoom. ORBIT = look around · WALK = first-person fly (W/A/S/D, look up/down to aim).
v1 massing, accurate geometry + simple materials, good for layout review and showing the space. Not a final/engineered model. Field-verify items still open: window sill heights, the eave/knee-wall height, exact loft depth. A higher-fidelity render is the next step.
4The three rooms
Control room, top priority
The room you mix and master in. Built first.
- Symmetrical left-to-right, non-negotiable for accurate stereo.
- Speakers on the short wall, firing down the long dimension.
- Free-standing, swappable monitors for now, no permanent soffit holes yet (keeps options open).
- Heavy, airtight, decoupled from the barn shell as much as budget allows.
Vocal booth / controlled dead room
For vocals, voiceover, acoustic overdubs, amp isolation, quiet takes while others use the live room.
- Splayed / widening shape (pentagon-ish), NOT a square closet.
- Singer faces the short window wall; big treated wall behind the singer.
- Strong door seals, no direct air holes, quiet supply + return air.
- Thick absorption + some adjustable treatment so it isn’t dead-flat.
Live room
For full-band tracking, drums, amps, room sound.
- Keep the most useful open volume and the most ceiling height.
- Keep some life in the room, don’t kill it.
- Movable panels / gobos to change the sound per session.
5The plan taking shape: 1st floor (rough)
This is where David's head is at right now for the first floor. It's a rough direction, not final, exact placement waits on real measurements + the 3D CAD model, and it all gets run by Dad before anything is built.
Run a long wall with windows and a sliding door across the rear of the building. It does three jobs at once:
- Marks off the kitchen + stairs, turns the rear (under the loft) into its own zone instead of being open to the studio.
- Buffers sound toward the house, knocks down any studio noise heading at the house side (the rear/human-door wall faces the house).
- Creates a comfortable guest space, a green room / lounge for bandmates, managers, directors, or guests to hang while a session runs, so nobody has to walk all the way to the house or the trailer.
The windows keep sightlines + light between the two zones; the sliding door is the pass-through. The studio (control room, booth, live room) lives in the front + main floor; the lounge + kitchen live behind the wall.
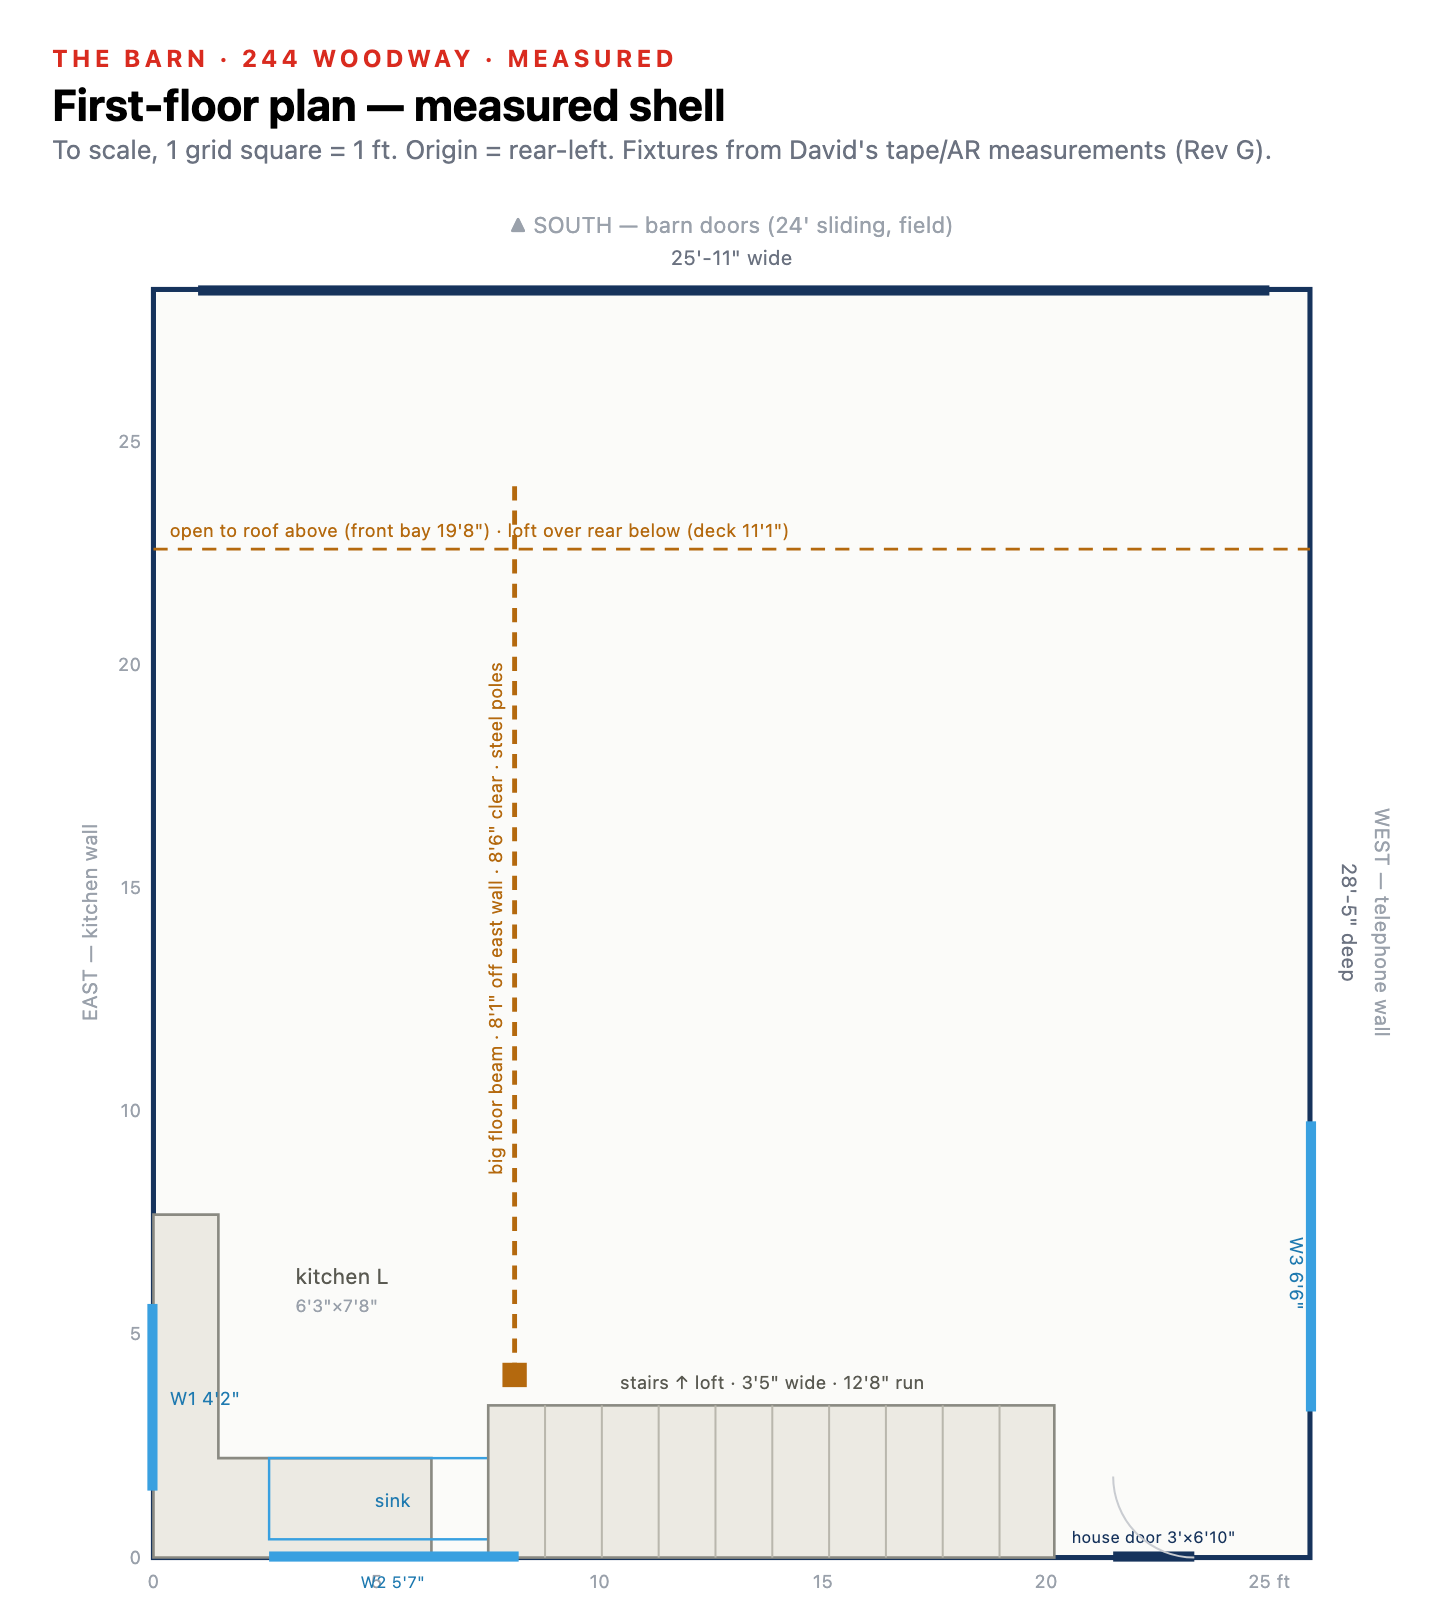
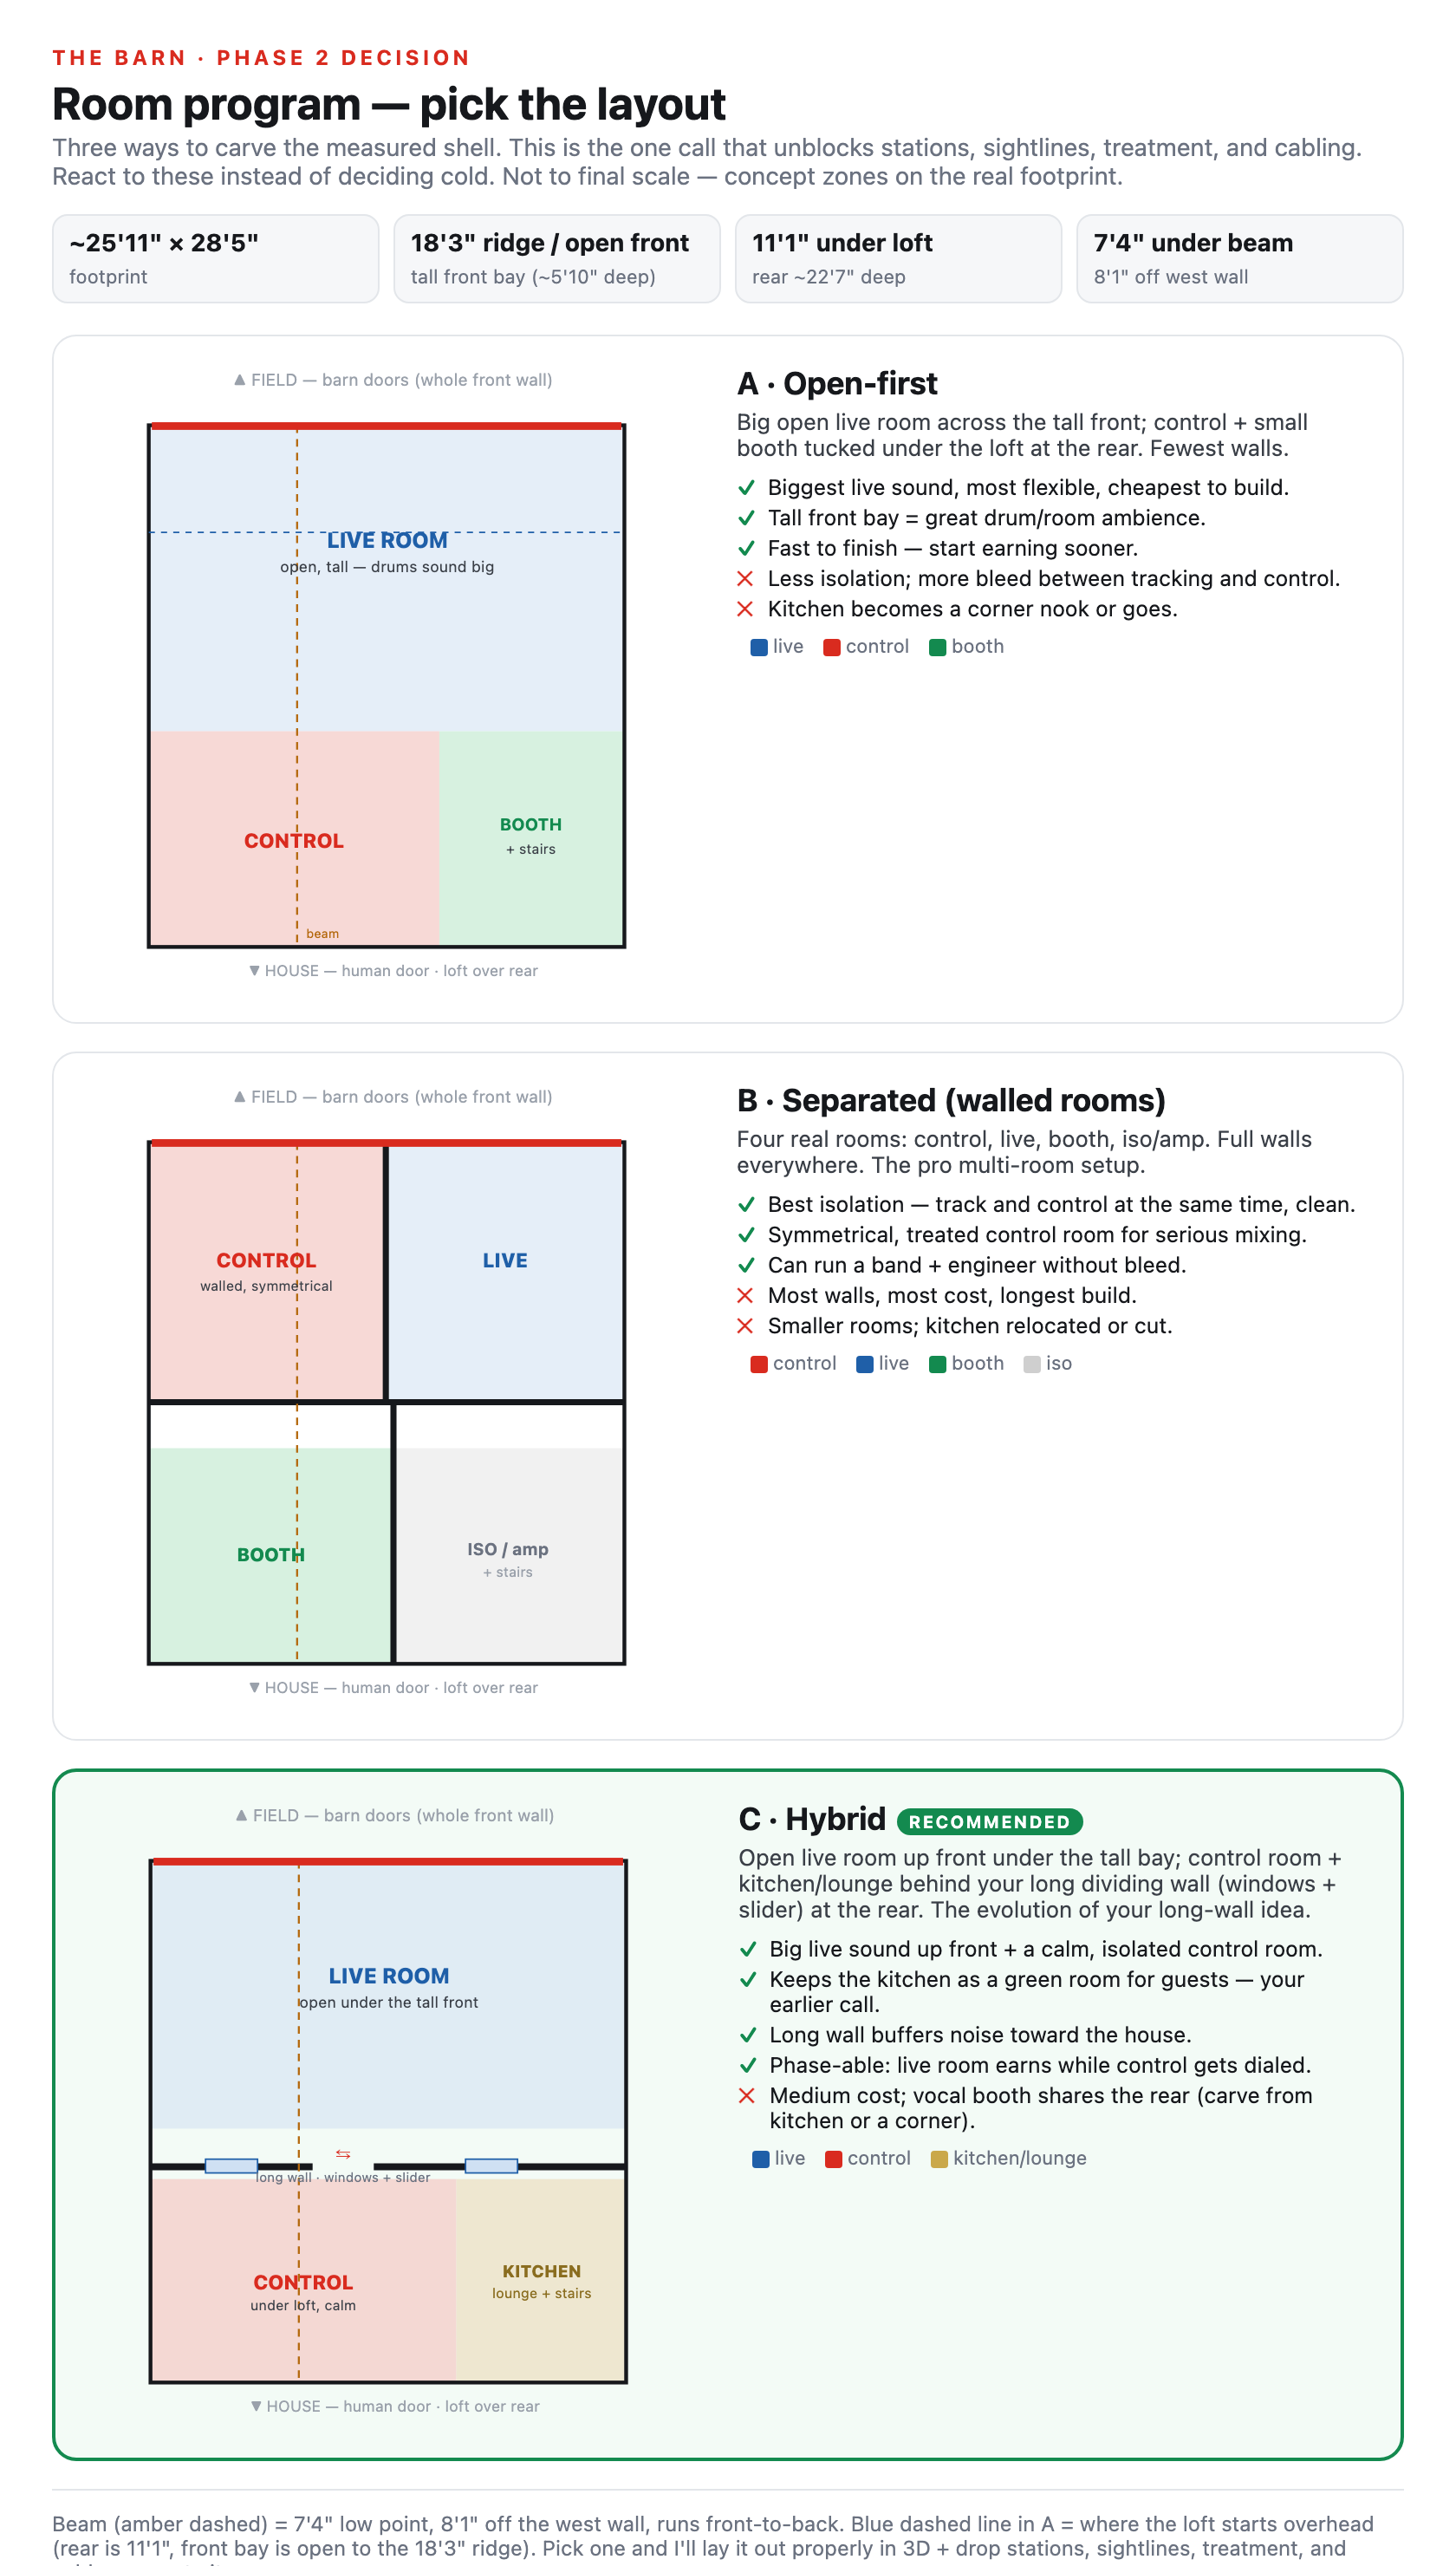
- The loft, keep it, change it, or use it differently. Not locked.
- Exact wall placement, how far back the long wall sits (drives studio depth vs lounge size). Needs real measurements.
- First floor has a good rough direction; final vision gets walked through with Dad once it's strong. Close.
6Control room: sized + measured
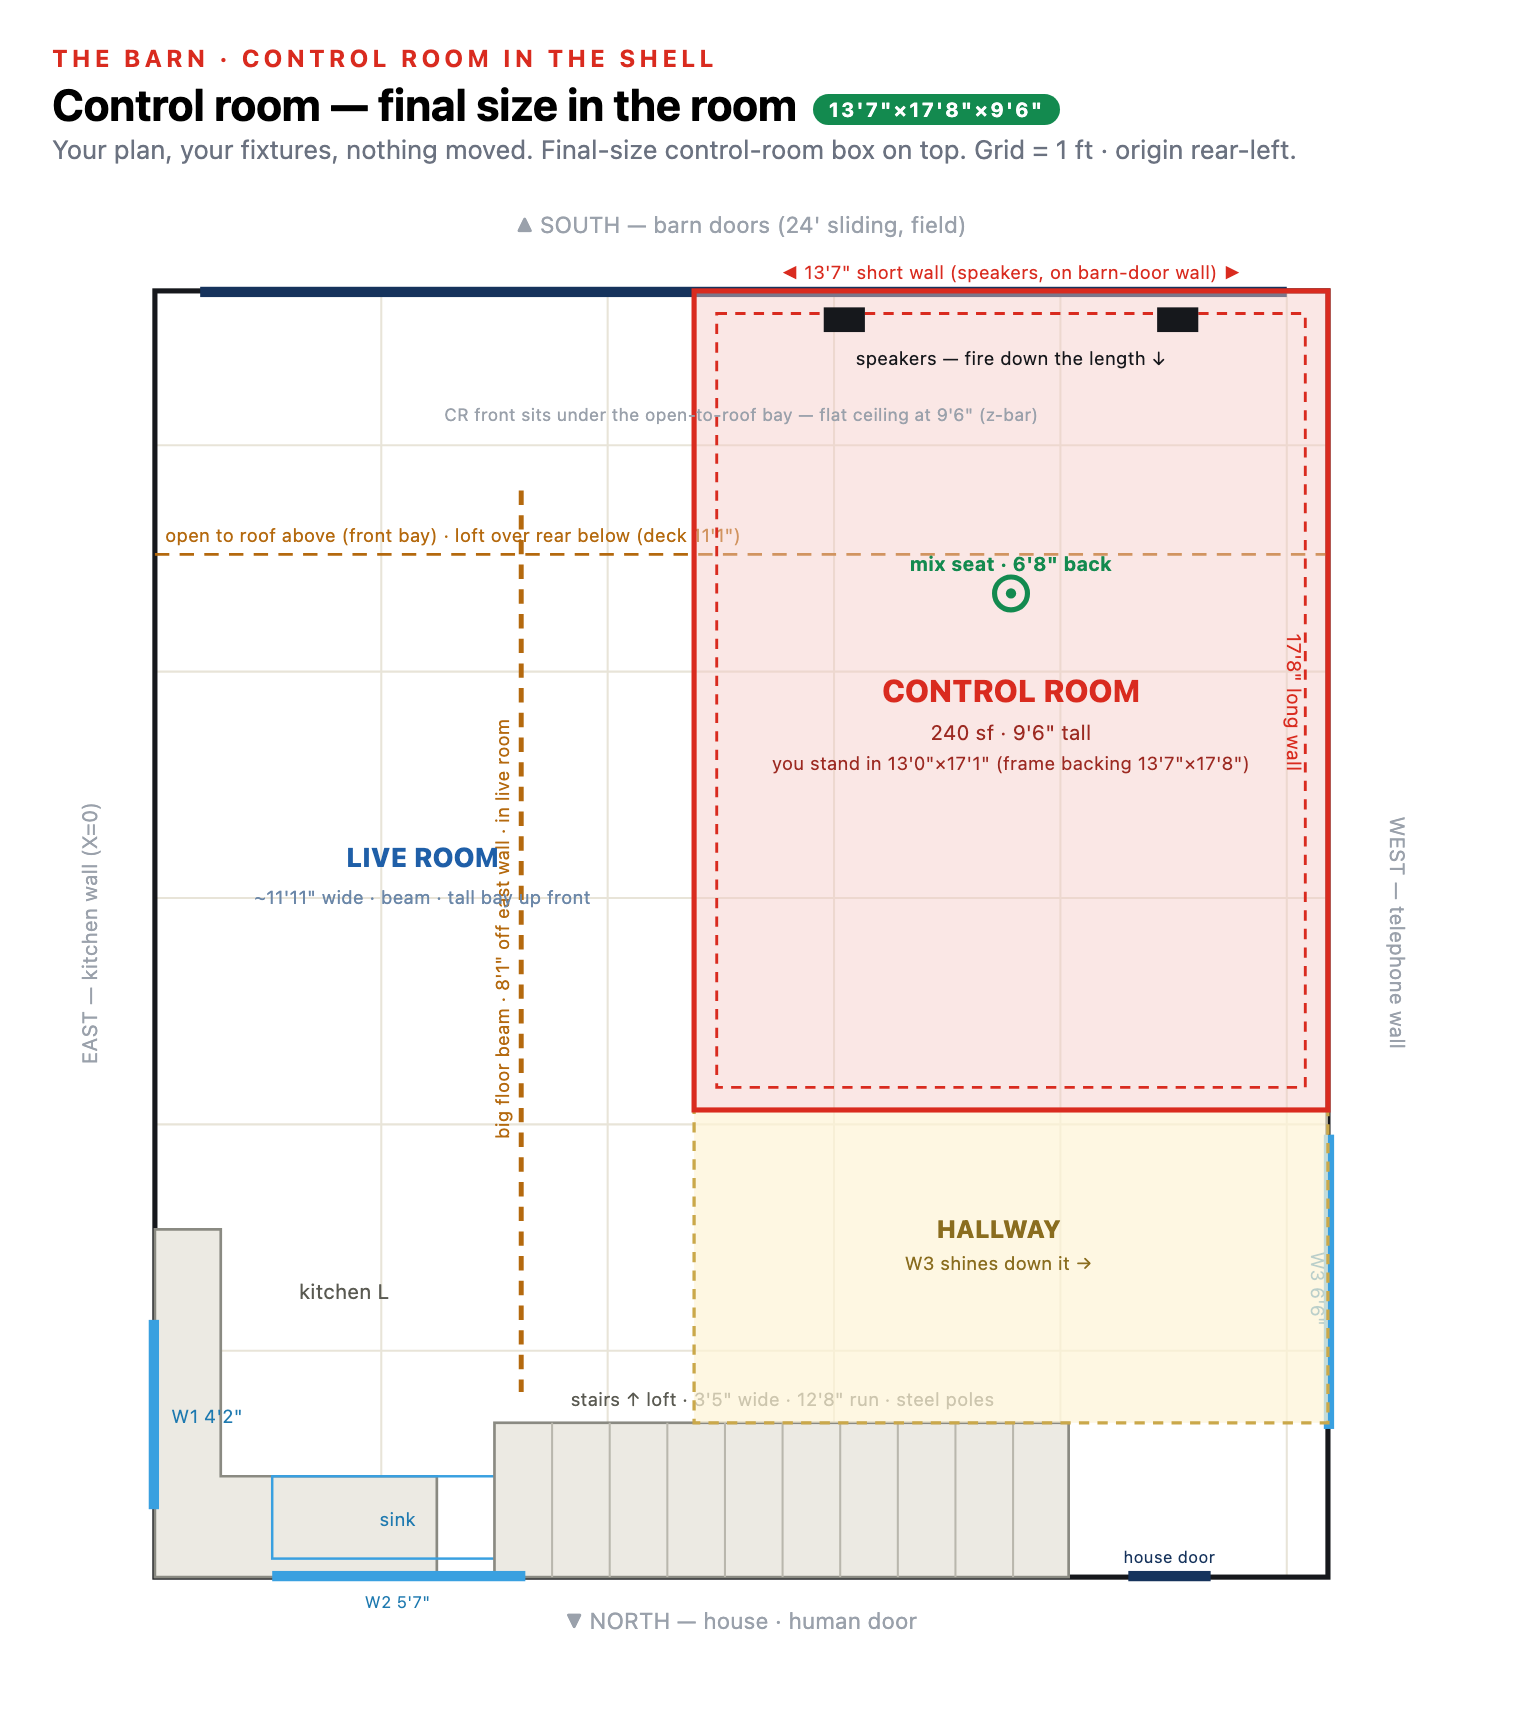
The control room is sized like a speaker box: pick the proportions so the room's resonances spread out evenly instead of stacking and booming. Of every rectangle that fits under the z-bar ceiling, this one has the cleanest room-mode spread, the flattest, most trustworthy low end. Built on the west side, under the loft, starting past the telephone window (W3) so the window lights the hallway.
Bass reflects off the hard backing (drywall/plywood), not the soft fabric. So the room has two sizes: the fabric face you stand in (~13'0" × 17'1") and the acoustic size the bass sees (13'7" × 17'8"), ~3.5" bigger each side. Frame the backing to 13'7" × 17'8"; the fabric lands ~3.5" inside each wall. Height = z-bar 9'8" minus the 3 ceiling drywall layers = 9'6".
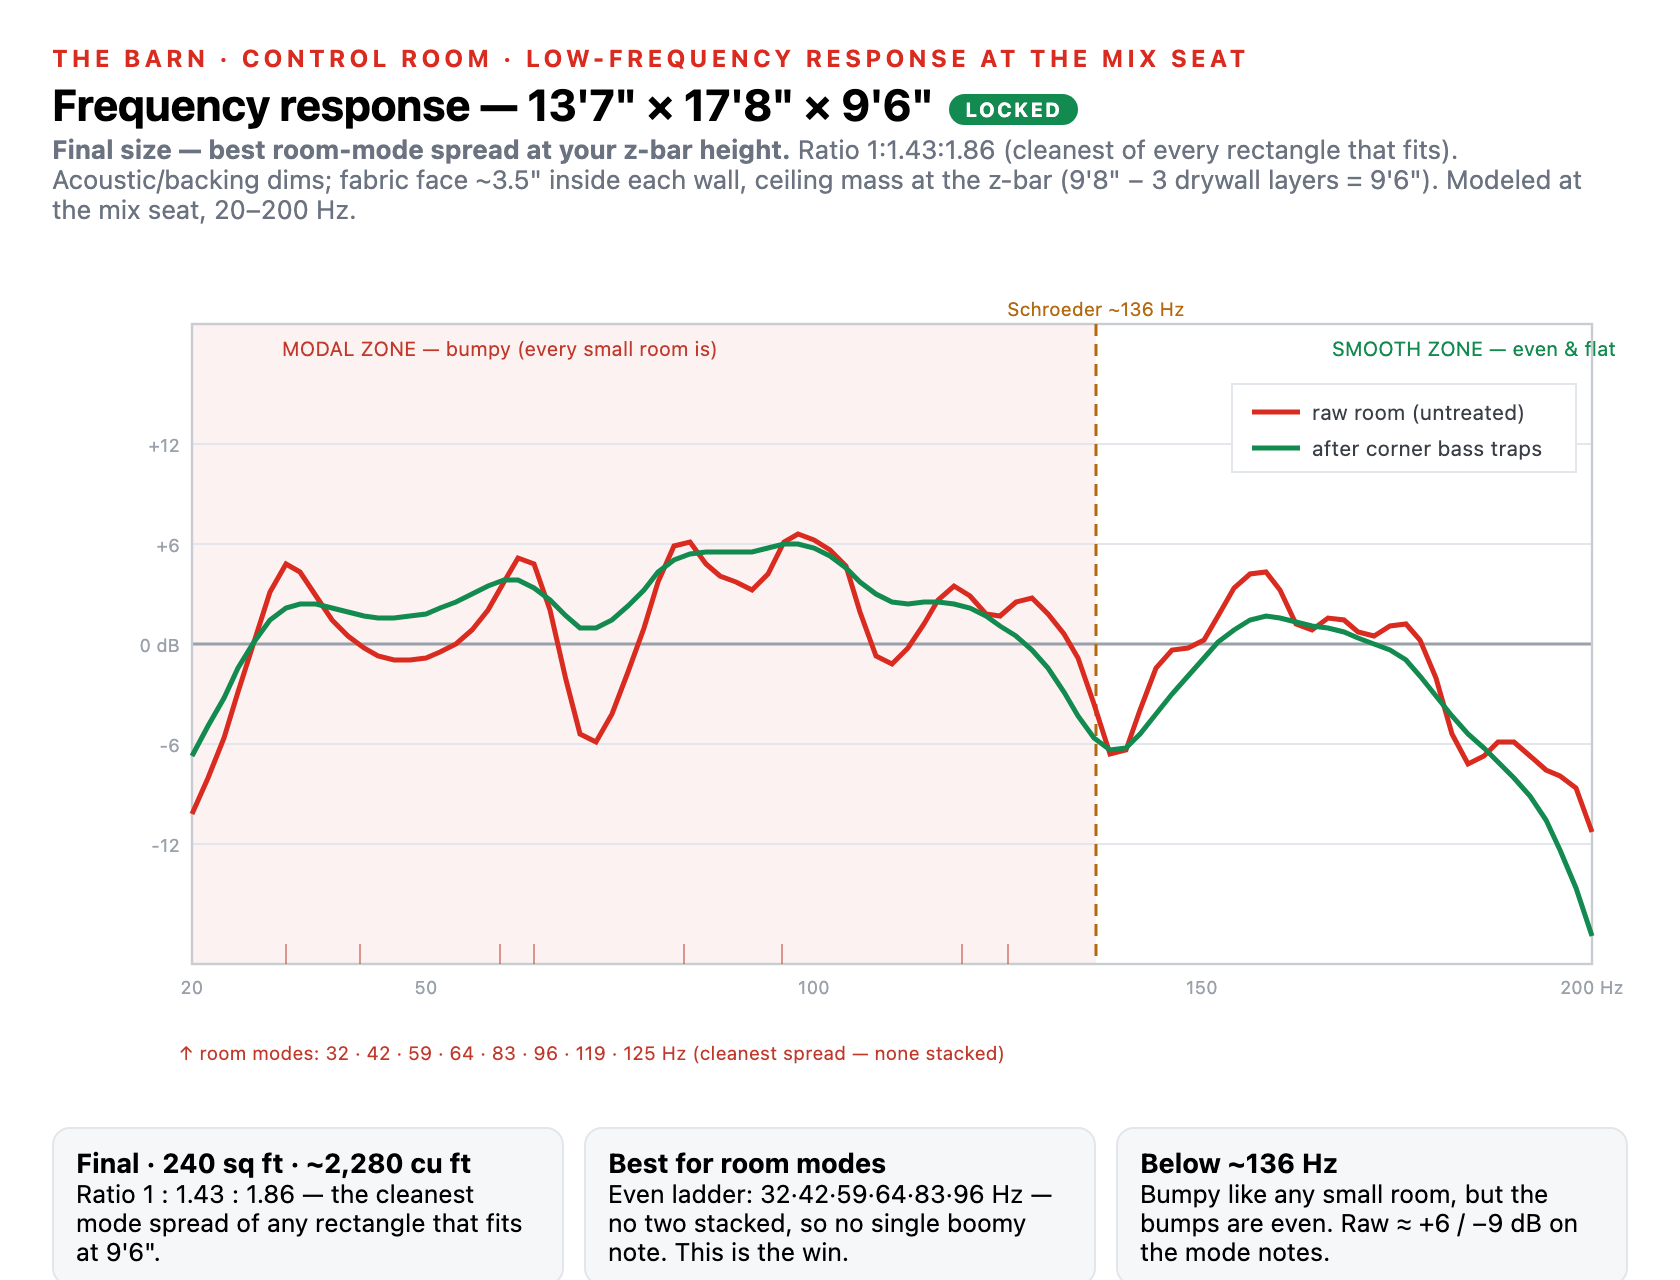
The 1 : 1.43 : 1.86 ratio spreads the modes more evenly than any other rectangle that fits, no two land on the same note, so no single boomy frequency. They step up in a clean ladder: 32 · 42 · 59 · 64 · 83 · 96 · 119 · 125 Hz. We chose this even spread over the ~6 Hz lower crossover a bigger room would give, the right trade for a mix room, and it gives the live room more width.
⚠ These are calculated targets. Before you buy or commit to any treatment, re-measure the finished room with the desk and furniture in it and repeat the diagnosis (§7). Gear and furniture shift the modes. Full warning and the layered bass-trap plan are in §20.
Dead walls: all the mass on the outer face, 3 layers 5/8" Type X + Green Glue between each, then 2×4 studs packed with mineral wool, the room side left open and faced with acoustically transparent fabric over an encapsulation membrane (so no fibers can be breathed in). ~6" thick. Mass isolates, the soft face deadens. Full detail in WALL_ASSEMBLY_SPEC.md.
• Size 8.3"W × 13.1"H × 11.2"D · ~18 lb each
• 6.5" woofer + 1" tweeter · 95 W (LF 60 / HF 35) · crossover 2 kHz
• Frequency response 43 Hz – 30 kHz · XLR + ¼" TRS in
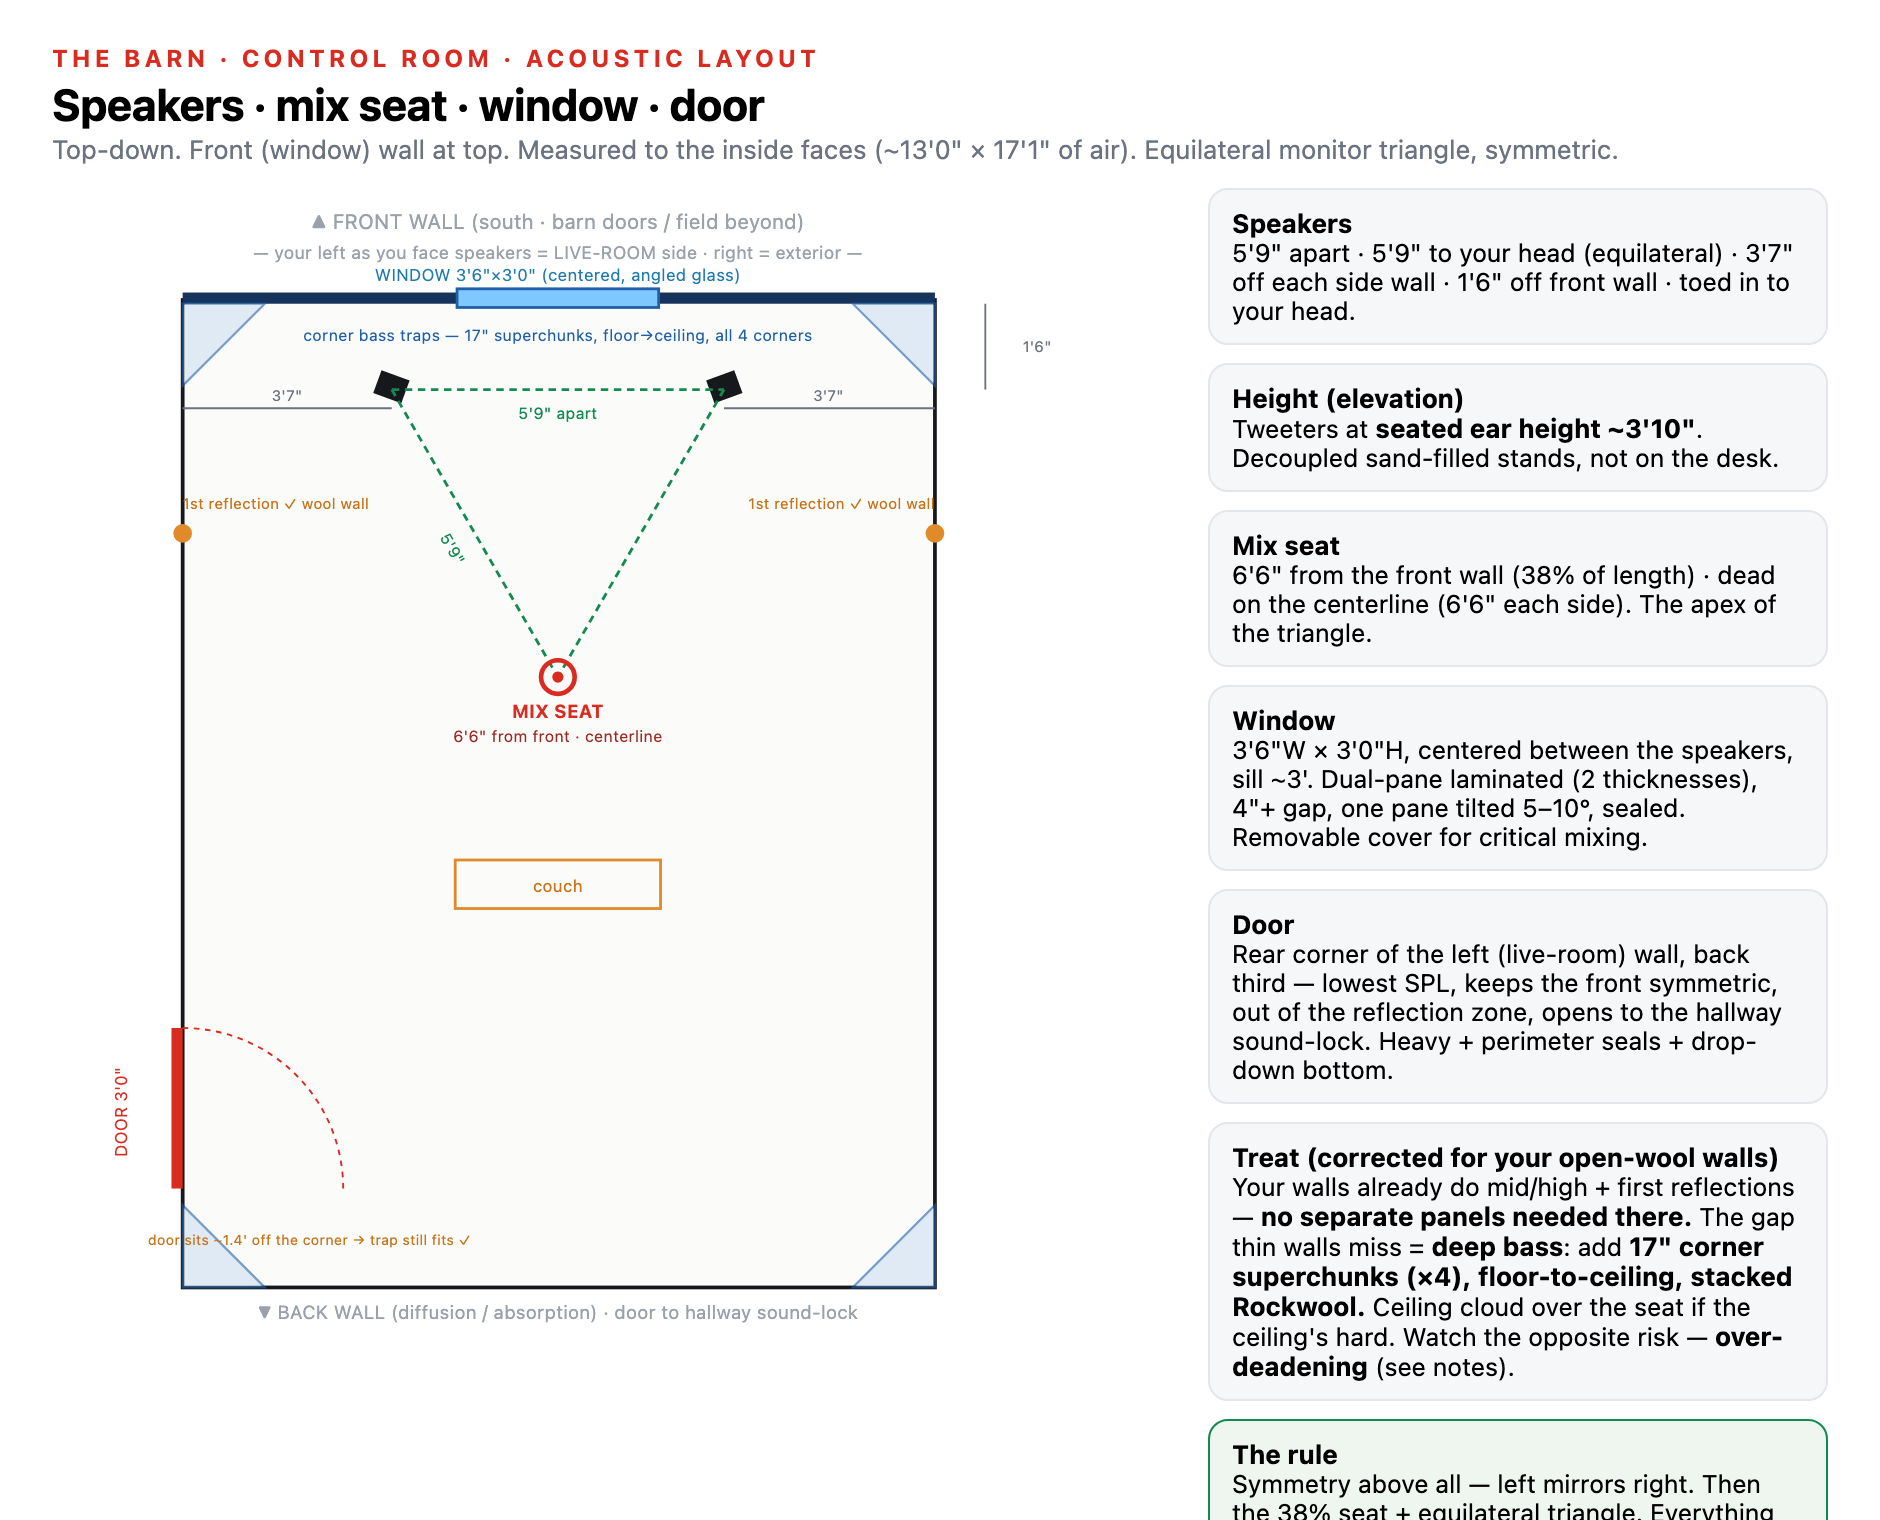
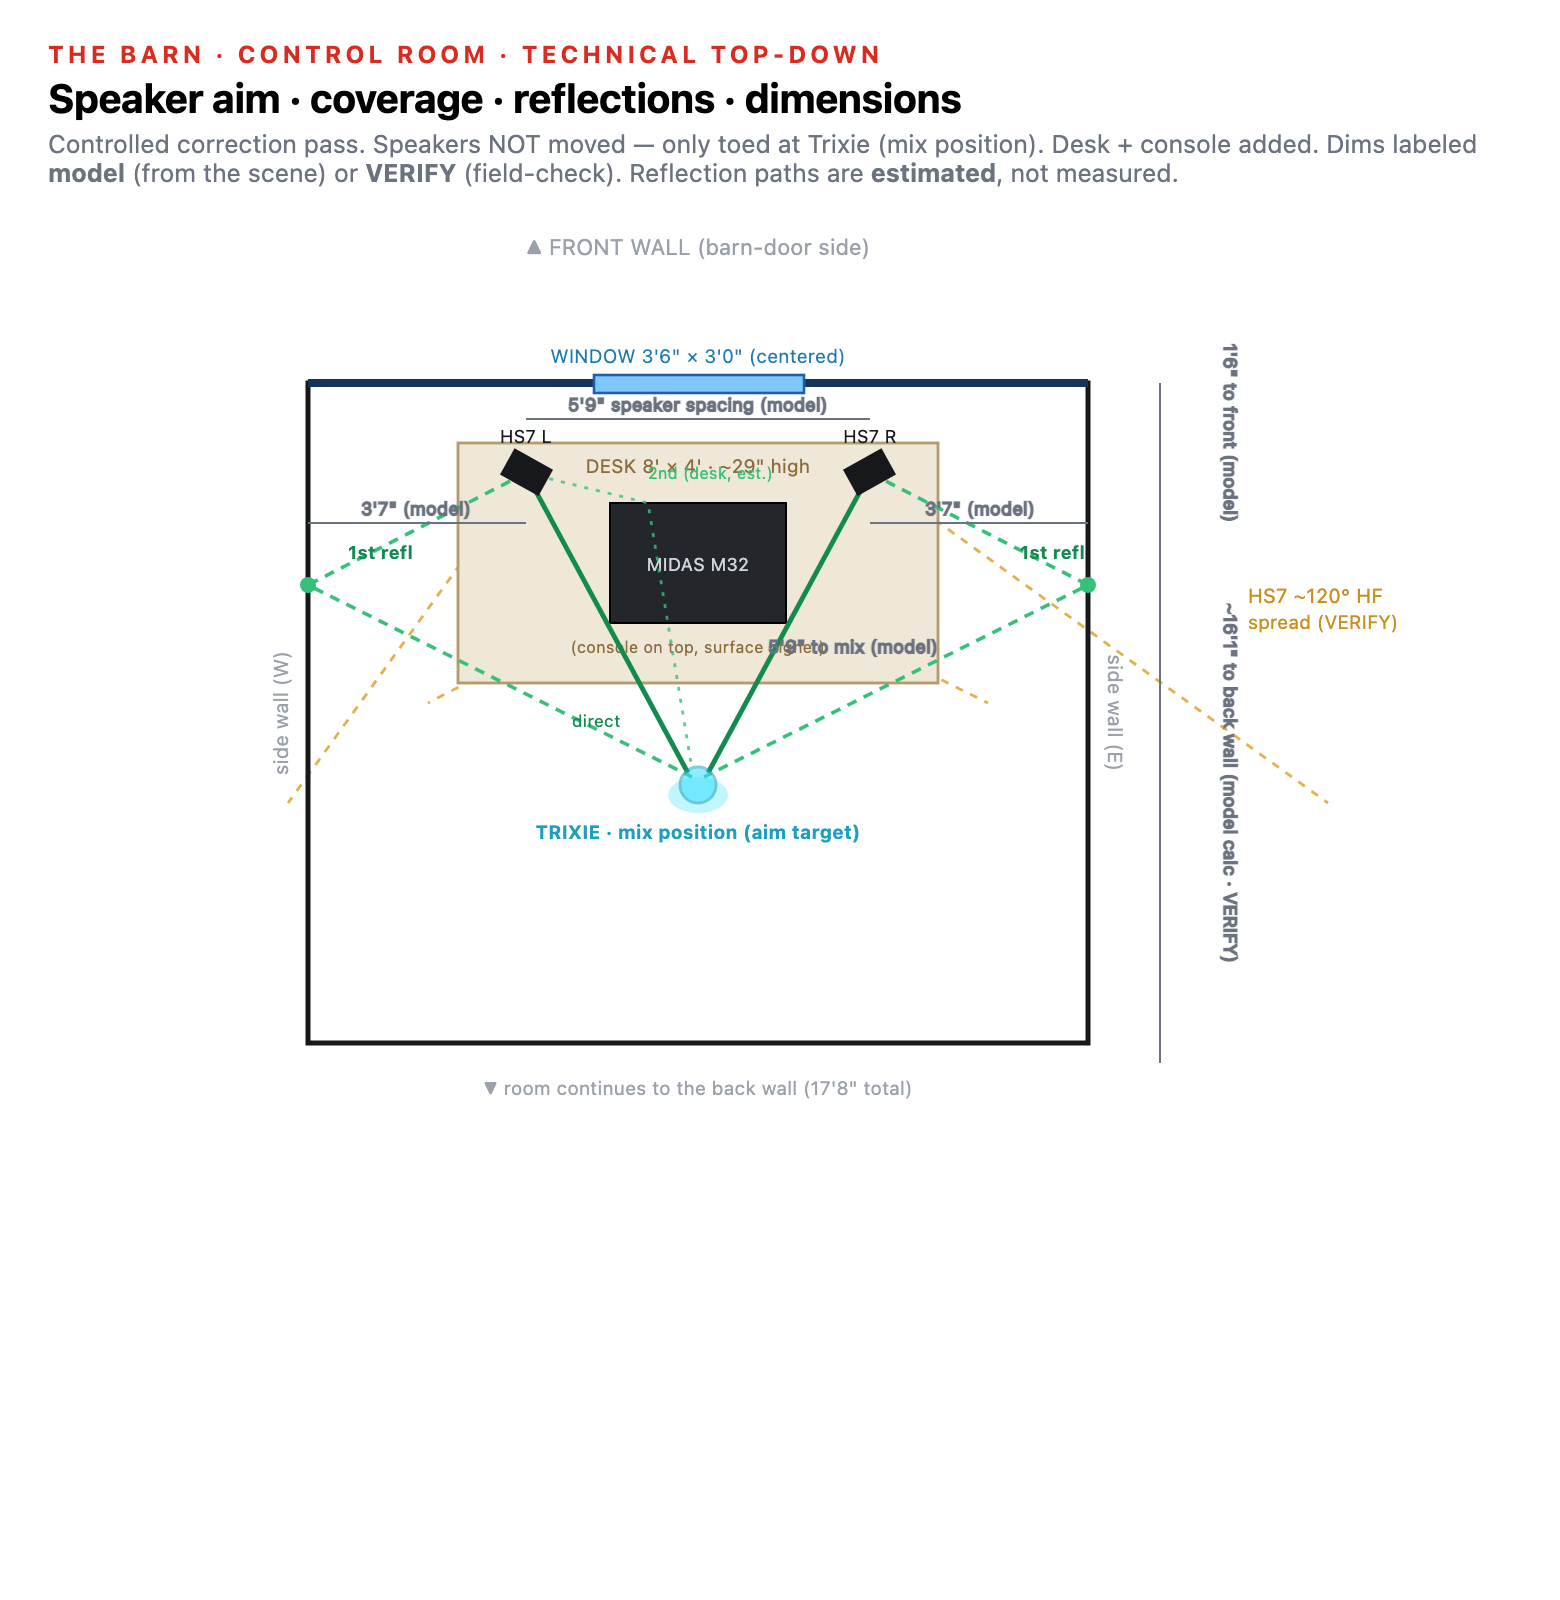
• Place: tweeters at ear height ~3'10" on decoupled stands · 5'9" apart · 3'7" off each side wall · 1'6" off the front wall · toed in to your head.
That 43 Hz low end lands right where the room's first modes are, so the corner bass traps are what let you actually hear the HS7's real bottom end.
• 15"W × 17.65"H × 15.65"D · 34 lb · 200 W Class D · 113 dB peak
• 27 Hz low-frequency extension · crossover 80 Hz (to the HS7), XLF, or external
• Fills 27–80 Hz under the HS7 (which roll off ~43 Hz), so you finally hear the deep bottom.
Best placement, computed, not guessed. I scanned every floor position and calculated the bass response at the mix seat for each (a "sub crawl" done with the room-mode equations). The flattest spot: on the room centerline (6'9" from each side wall), ~7'6" back from the front wall, in line with / just behind your seat. Why: you sit on the centerline, so a sub on the centerline neither feeds nor lets you hear the side-to-side "width" boom (the 42 Hz mode), and mid-room front-to-back keeps it off the strong length-mode peaks at the walls. The front corner, the "subs go in corners" myth, was the worst spot here (≈25 dB swing vs ≈17 at the sweet spot). Down-firing + your hard floor = max output. Set the crossover to 80 Hz, then fine-tune by ear from this spot.

Options 1, 2 and 3 measure smoothest, but they sit at, under, or behind the chair, in your body space and the walkway. So the practical call is between #4 (front corner) and #5 (front wall, centerline).
The bass-trap catch (good catch): the corners get floor-to-ceiling superchunk traps, so a corner sub can't go in the corner. It sits in front of the trap. That actually works in your favor: the trap behind it soaks up some of the corner boom the sub stirs up. The downside is #4 is asymmetric (one side only), which spreads the bass unevenly across the room.
#5 keeps the centerline symmetry (the through-line of every good spot) plus the easiest cabling. On paper it's a hair boomier than #4 (26.4 vs 25.0 swing), but for a single sub, symmetric beats asymmetric.
The call: #5. Front wall, on the centerline, ~1.5' off the wall, tucked under the desk. Symmetric and easiest to cable, and it's now placed at #5 in the 3D walkthrough. Crossover 80 Hz, one corrective EQ band on the worst peak, and sub-crawl to confirm once the room is built. Nothing final until measured.
Build measurements, speakers + sub
Exact distances pulled from the 3D model, with the sub at position #5.


- Barn doors: the CR front wall covers the west part of the 24' sliding doors; live room keeps the east half for load-in. Pull the wall in if you want more door.
- Trim: shave the length ~3–6" for framing tolerance, nudges the ratio toward textbook 1:1.4:1.9, no real sound change.
- Treatment target: RT60 ~0.3 s, ~375 sabins. Corners-first bass traps, then first reflections + ceiling cloud.
7See the room modes (interactive)
A live 3D map of how bass behaves in the control room. Drag to spin, scroll to zoom, and slide the frequency, the grid pokes up red where bass piles up (boom) and dips blue where it cancels (a dead spot). The 2D analyzer below it tracks the frequency you're on. This is the same room-mode math the control room and the sub placement were designed around.
Live tool above (web version). On a phone: drag to spin, pinch to zoom, slide the frequency.
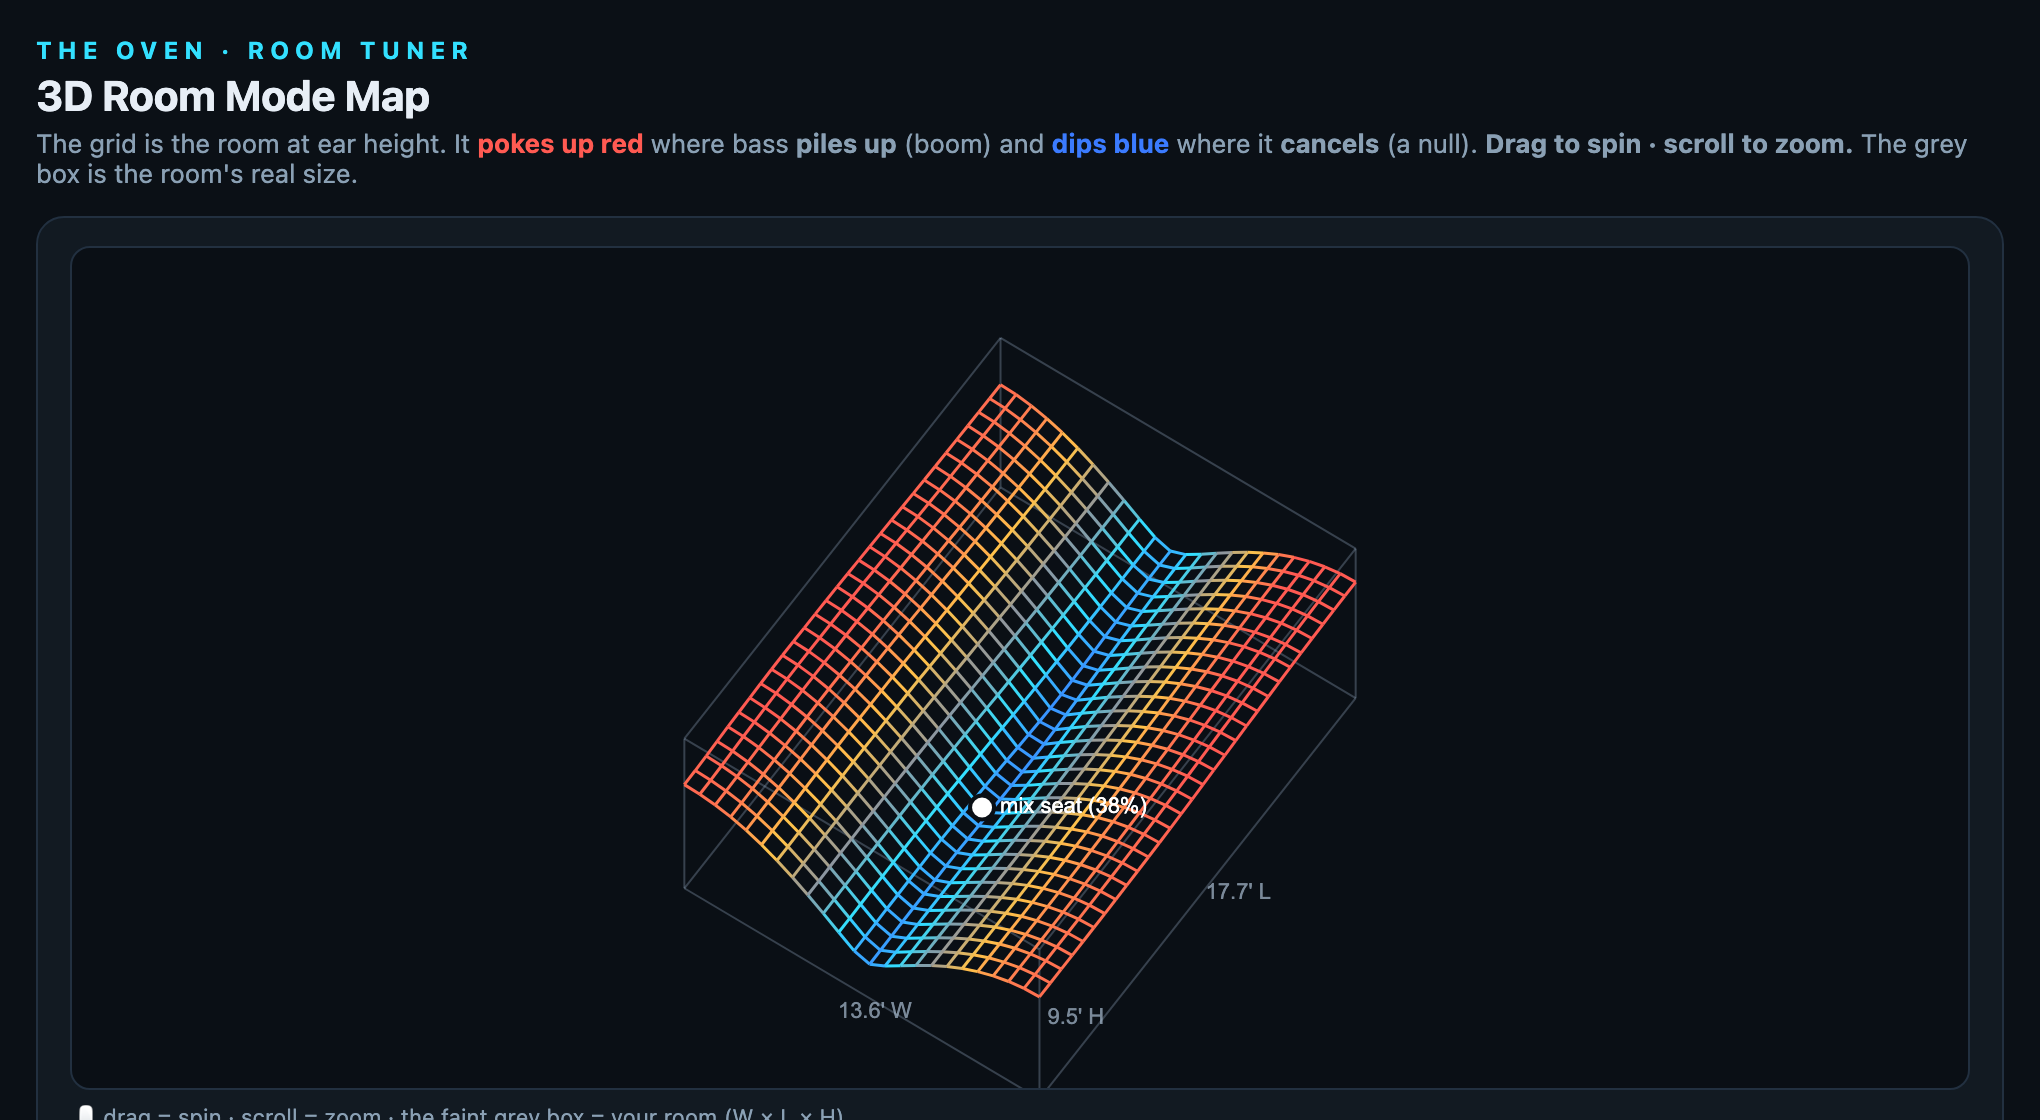
Your room's actual modes (calculated)
Run the numbers on the locked size (13'7" W × 17'8" L × 9'6" H, 2,280 cu ft) and the problem frequencies fall right out. The axial modes (straight bounces between two parallel walls) are the strongest, and the ones you'll actually hear:
| Freq | Mode | What it is / why it matters |
|---|---|---|
| 31.8 Hz | length (front↔rear) | Sub-bass. Lowest and hardest to tame; sits below a bass guitar's low E (~41 Hz). |
| 41.4 Hz | width (side↔side) | Kick and bass fundamental zone. The one that makes notes boom or vanish. |
| 59.2 Hz | height (floor↔ceiling) | Kick and low-tom body. |
| 63.7 Hz | 2nd length | Harmonic of the 31.8 Hz mode. |
| 82.8 Hz | 2nd width | Harmonic of the 41.4 Hz mode. |

The character of this room: the bottom end is sparse and lumpy. Wide gaps between 32, 41, 52 and 59 Hz mean some bass notes boom and others nearly vanish. Above ~95 Hz the modes pile up tight and the response smooths out. The Schroeder frequency is ~136 Hz, so the whole modal problem lives in the ~30–140 Hz band. That band is the target.
- Every axial mode peaks in the corners, all three stacked together. That's the physics reason the bass traps go in the corners.
- 31.8 Hz: loud at the front and rear walls, with a null (dead spot) through the middle.
- 41.4 Hz: loud at both side walls, null down the centerline.
- 59.2 Hz: loud at floor and ceiling, null at about ear height.
- Your mix seat at 38% back deliberately dodges the worst of the length-mode null.
You can't measure an unbuilt room, but the day the shell is sealed, measure before you finalize the traps:
- Rig: free REW (Room EQ Wizard) plus a calibrated UMIK-1 USB mic. Load the mic's cal file.
- Sweep: mic at the mix seat, ear height, one monitor at a time, log sine sweep at ~75 dB. Read the curve for peaks (the pile-up above 95 Hz) and nulls (the 32 to 95 Hz gaps where notes vanish).
- Waterfall: set Time Range to 300 ms and find which modes ring. Still ringing past ~600 ms means a real problem (tubby, one-note bass); ~450 ms is OK; ~300 ms is excellent.
- Corner maps: sweep in each corner to see the modes at full strength and confirm where to trap.
- Placement first: use the sub "crawl" plus a moving-mic average to pick speaker, sub and seat positions before trapping. Placement fixes the vanishing notes that absorption can't.
8Target dimensions
These targets were drawn before the barn was measured. They must be fit onto the Rev G shell (§2), especially ceiling height: a 12'-tall room only exists at the ridge in the front bay; the loft caps you at 11'1" and the beam at 7'4". Treat the table as a wish-list to reconcile, not gospel.
| Room | Target inside dims | Notes |
|---|---|---|
| Control room | 15'W × 22'L × 12'H (superseded, built to 13'7"×17'8"×9'6", see §6) | Original wish-list. The room was since measured + computed to the locked size in §6. Speakers on the short wall, firing down the length. |
| Listening position | ~8'4" from front wall | ~38% of the 22' length. Start the chair here. |
| Booth, window wall | 7' wide | Short wall with the studio glass. |
| Booth, depth | 9'6" | |
| Booth, height | 9'6"–10' | Avoid a low closet ceiling. |
| Booth, rear wall | 8'6"–9' wide | Wider than front; side walls splay 10–15°. |
| Booth, volume | ~650–800 cu ft | |
| Mic position | ~3'6"–4'3" from window wall | 38–45% of booth depth. Not against any wall. |
| Studio glass | 48"W × 30"H | Centered on the 7' booth front wall. |
| Glass height | ~42–44" to ~72–74" AFF | AFF = above finished floor. |
| Live room | open / TBD | Keep the tallest, most open volume. |
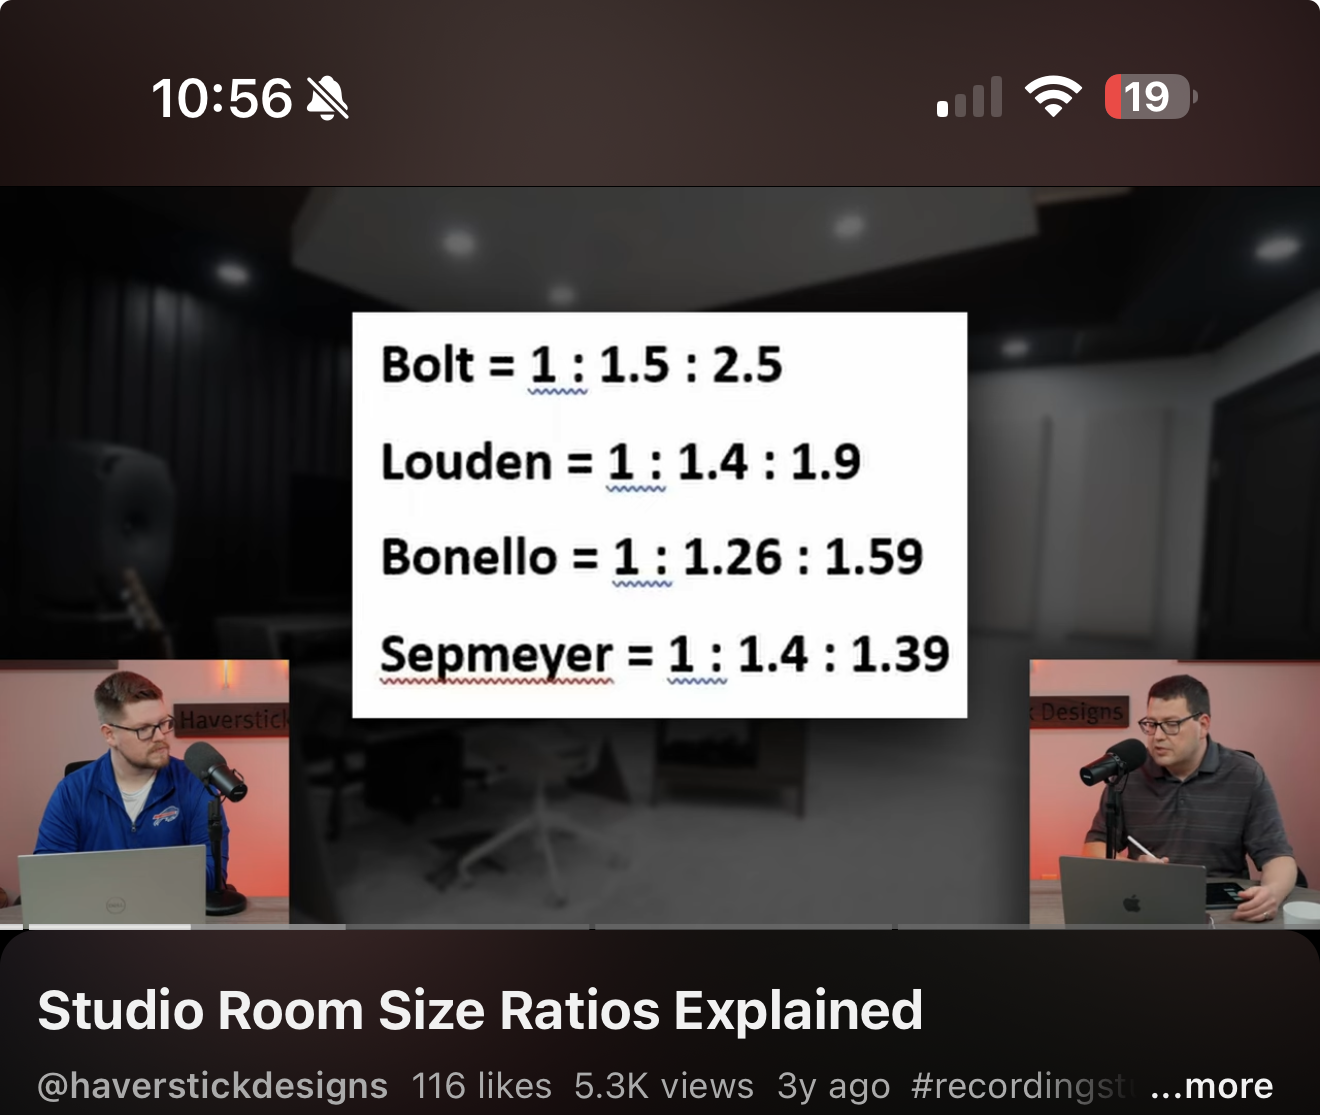
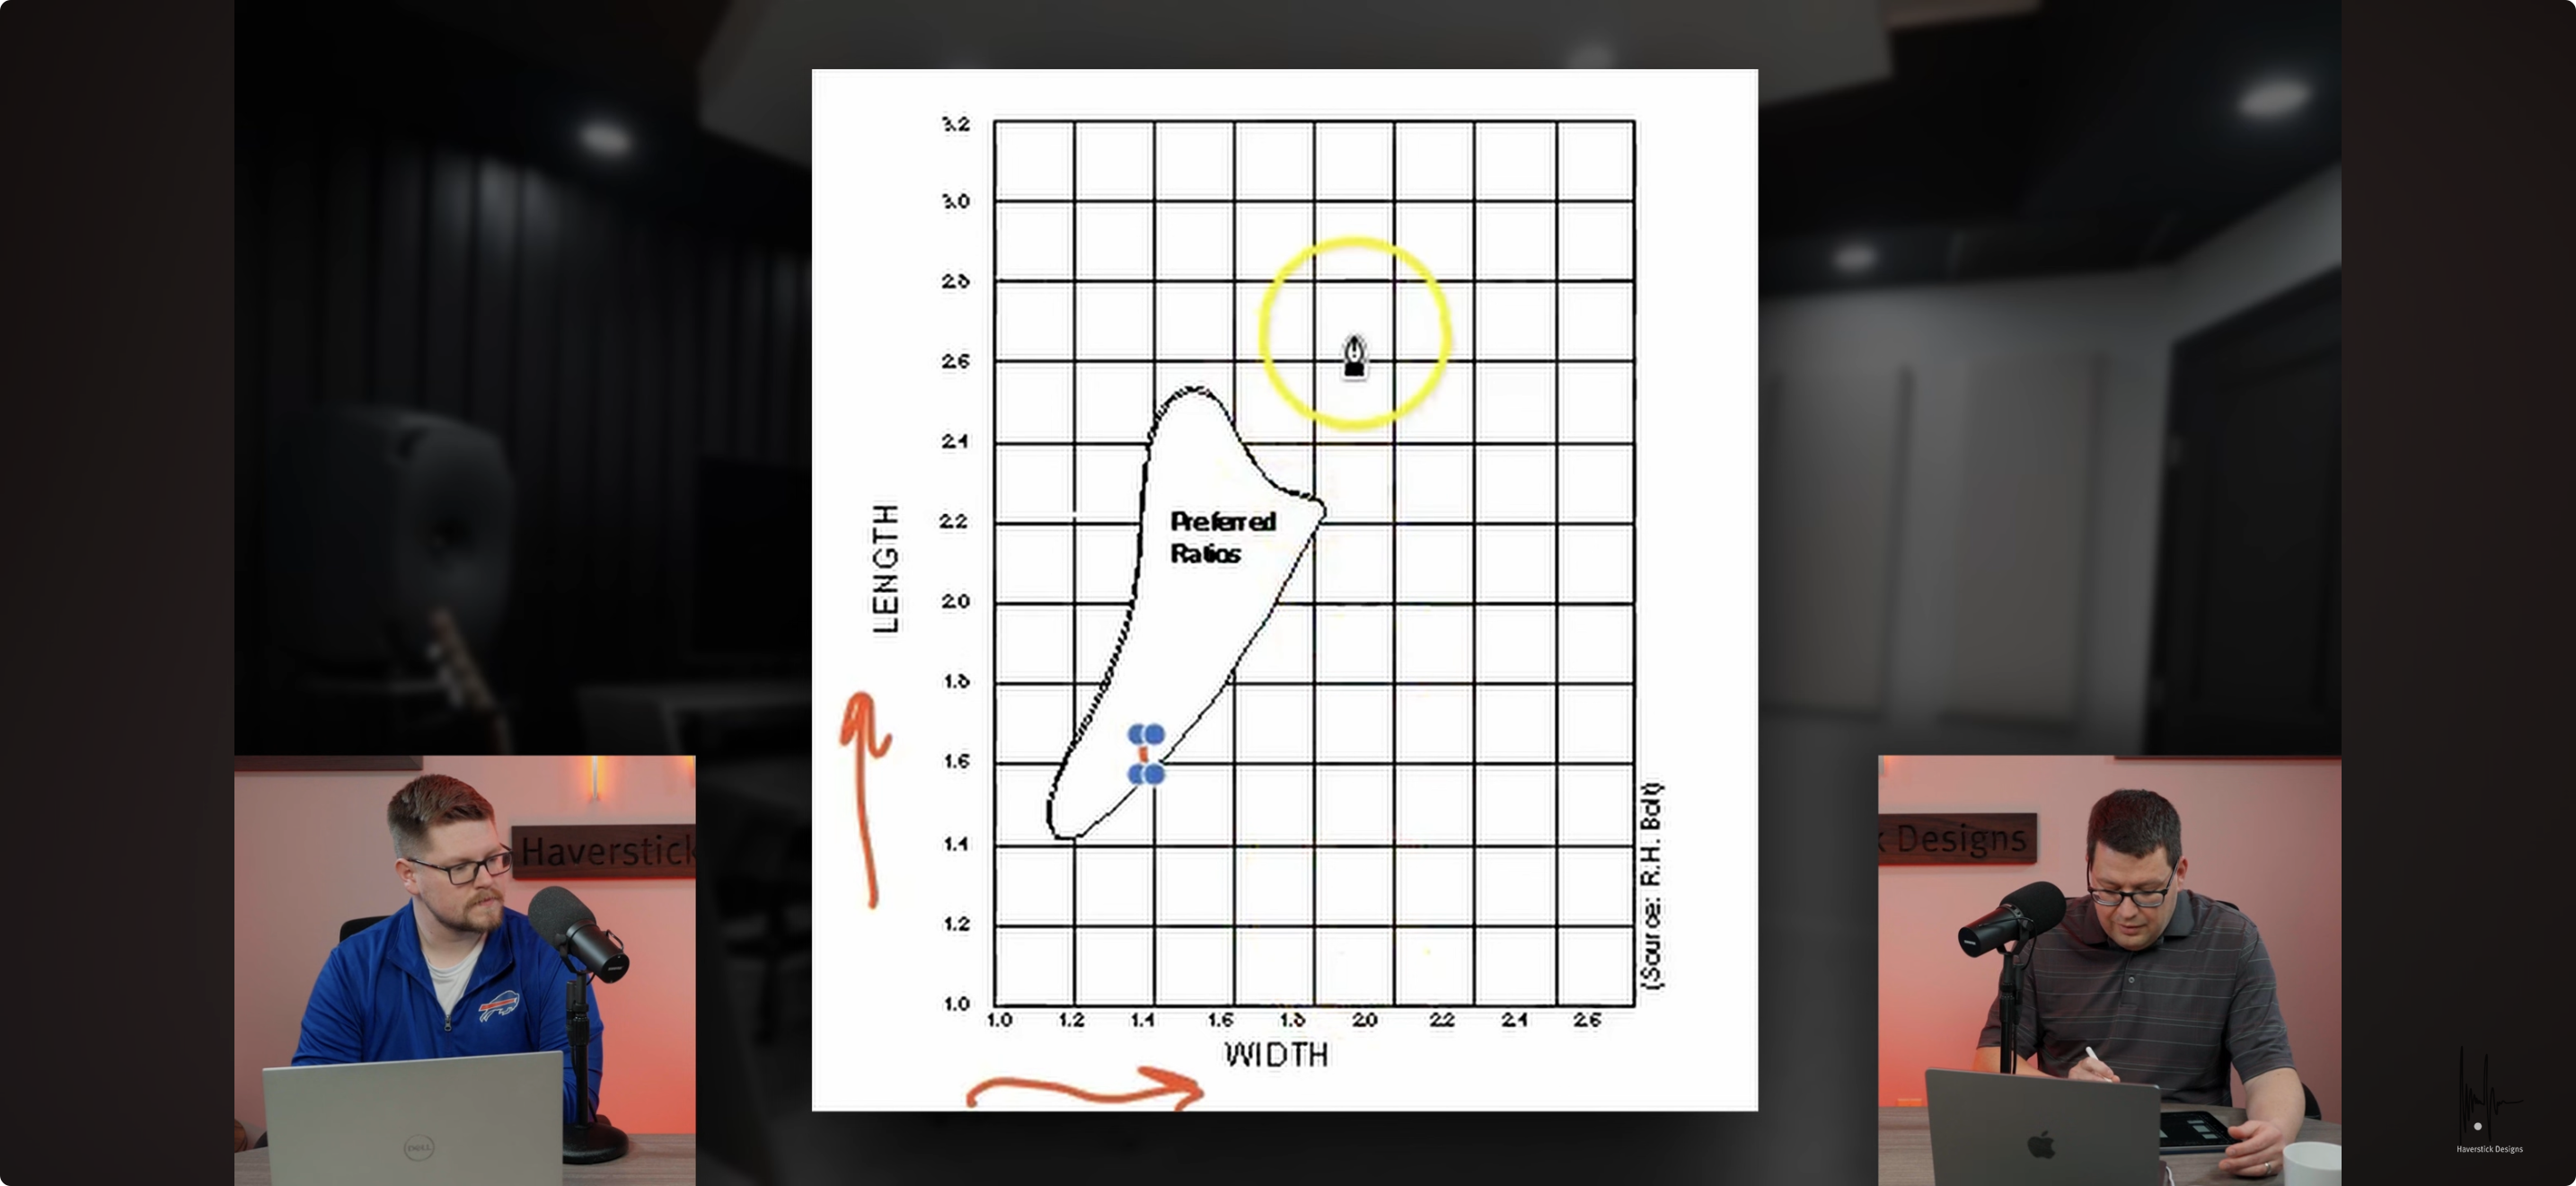
Reference: Haverstick Designs, "Studio Room Size Ratios Explained." The real mode math for our room is in §7 See the room modes.
9The one rule that matters most
Isolation is construction. Treatment is sound quality. They are not the same thing, and one does not do the other’s job.
Isolation / soundproofing keeps outside noise out and studio noise in. It comes from mass, airtight sealing, decoupling, damping, heavy doors/windows, and quiet HVAC paths. Built into the structure, you can’t add it later without tearing walls open.
Acoustic treatment makes a finished room sound good inside: bass traps, broadband absorption, ceiling clouds, diffusion, gobos, rugs. Goes in after construction and is tunable.
Do not rely on insulation alone for soundproofing. Foam on the wall does nothing for isolation.
The five things that actually buy isolation
- Mass, heavy, dense walls.
- Decoupling, inner room not hard-connected to the barn shell.
- Air gaps, separation between leaves.
- Sealing, airtight everywhere; sound leaks like water.
- Damping, Green Glue between layers to kill resonance.
Weak points that ruin good walls: doors, windows, outlets, HVAC ducts, unsealed cracks. Spend the money there.
★Vocal booth: where to put it (tips)
The big open live room is one of the barn's best assets, so don't eat it with a permanent booth. Better move: three different vocal environments, none of which block the open floor or the loading side.
A gutted ~16' Airstream parked off the west wall, near the control-room window, converted to a vocal booth. Completely isolated, the coolest visual in the building, and artists remember it. This is the marketing piece and the main booth. (Full plan in the Airstream concept.)
Tuck a permanent booth under the loft, behind the stairs. It uses otherwise awkward dead space, is naturally separated from the main room, has an easy cable run to the control room, and doesn't block sightlines or eat prime floor. Great for quick overdubs, podcasts, acoustic guitar, and voiceover.
Not the main booth (stairs every session, heat buildup, harder cable runs), but a small ~4×6 narration / podcast / songwriter booth fits the Attic's writer's-layer vibe. For lessons, narration, and demo vocals upstairs.
The garage-door / loading side. Keep it open: that's your drum + amp load-in, vehicle access, and future stage access. If you need to track there, use movable gobos around the mic, not a permanent build. And don't make the Attic your main booth.
Phase 1: Airstream booth. Phase 2: under-stairs booth. Phase 3: tiny Attic writing booth. Three vocal spaces, and the big live room stays open the whole time.
10Three build options
Pick per room and per budget. You can mix, e.g. a room-in-room control room with a lighter live room.
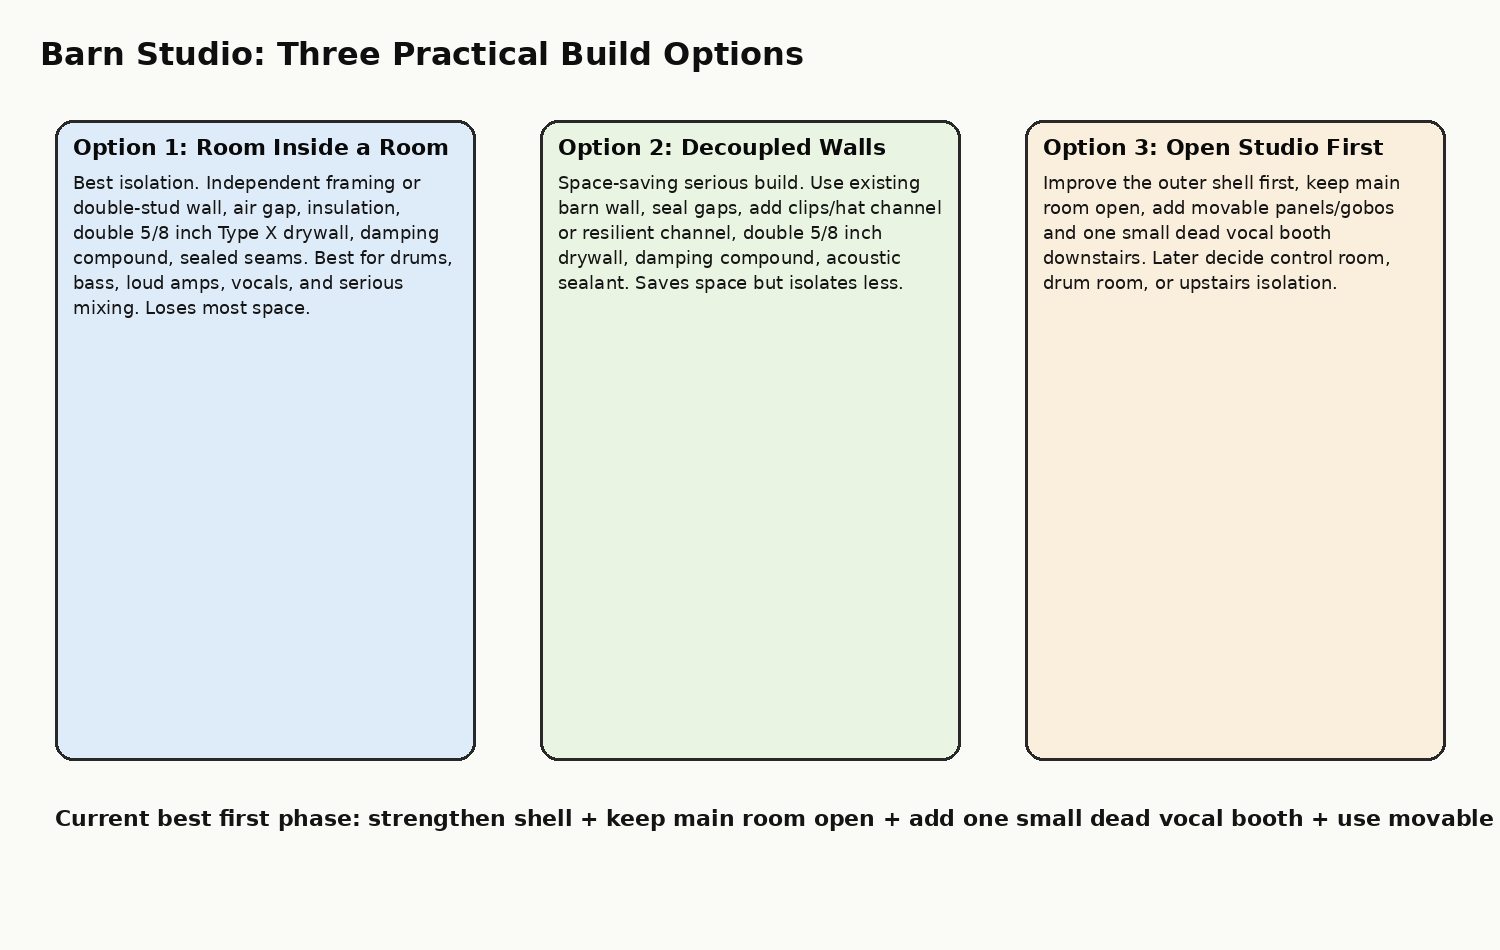
Option 1, Full room inside a room (best isolation)
True room-within-a-room or double-stud. Pros: best isolation, drums, bass, loud amps, vocals, serious mixing. Cons: highest cost, loses the most floor space + height.
Option 2, Space-saving decoupled walls (serious but tighter)
Staggered studs, isolation clips + hat channel, double drywall + Green Glue. Pros: strong isolation, saves space. Cons: not as good as fully separated leaves; clips/channel must be done right.
Option 3, Open studio first (phased / earn while you build)
Treat the open barn well, start recording, build hard rooms over time. Pros: cheapest start, fastest to first session. Cons: little isolation early; loud sources bleed.
Build the control room to Option 1 / strong Option 2 first (it’s the priority and benefits most from isolation), keep the live room flexible (Option 3 thinking) early, and build the booth as a proper small decoupled room. Confirm against budget once the shell is locked.
11Ideas to steal (build these in)
Tips pulled from a tour of 150+ recording studios (STUDIO TIME). The thread through all of them: everything on, everything ready, everything in arm's reach. The gear that's already patched and levels-set is the gear you actually use. The song is the master, not the rack. Several of these have to be framed in before the walls close, those are flagged.
Run steel pipe across the ceilings as a working grid. It keeps the barn's industrial look and earns its keep: clamp on grip clamps + boom arms to hang microphones and cameras anywhere, wide, mono, way up, low, over the kit, over the room. Swap and reposition in seconds, no floor stands eating space. Proven to hold a heavy ribbon mic with no sag.
- Frame it into the ceiling structure while it's open, this is a build-in, not an add-on. Tie it to the steel, not just drywall.
- Pipe in the drum room first (overhead mic + camera angles), then the live room and over the control-room desk for camera coverage.
- Pair with one modular clamp/mount ecosystem (e.g. Triad Orbit) so the same clamps move between pipe, stands, lights, and cameras.
- "Everything on" workflow, every source (drums, amps, bass, synths, keys, a desk vocal mic, piano) stays patched, levels set, always audible on the monitors and every headphone mixer in the building. Touch an instrument in any room, hear it instantly. Kills the setup tax so you chase the part, not the patchbay.
- Enough I/O to make that possible, size the converter + input count and the patchbay now; it's the spine of the whole build. (Reference rig ran 64 I/O.)
- Headphone-mixer drops in every room, so any space can track into the "everything on" rig.
- The pipe grid (above), framed into the ceiling steel.
- Cable runs for a mic closet + an amp/reamp room, plan the conduit for instant grab-and-go and cross-room miking.
- Removable panel hooks, not glued-in treatment, keep every room tunable (see acoustics below).
Control room
- Hardware-insert hybrid mixing, outboard gear patched as permanent hardware inserts, zero latency, but still mixing in the DAW so automation saves with the session.
- Tactile control surface (SSL UF8/UF1 or similar), mix with fingers and feel, jump between writing / tracking / mixing in one day.
- Guitar / amp wall on a switcher, multiple amps on one switcher + one power conditioner; one guitar cable + pedalboard, one button flips amps through the monitors (via a load box). Second output feeds a miked cab in another room.
- Reamp box wired to the pedalboard, pipe DI guitars from a mix back out through a real cab and re-mic them.
- Synth switcher, one stereo DI feeds many synths; flip between them using only two DAW inputs. Same trick as the amp wall: many sources, few channels.
- Proper speaker stands, decoupled + positioned, heavy, sand-filled, decoupled (e.g. Sound Anchors). Makes monitors "sound like different speakers." Don't cheap out here.
- A loud combo amp left out for fun + a studio fridge with cold drinks for clients, energy and hospitality are part of the room.
Drum + tracking rooms
- Drummer's "side rig", a second monitor + Bluetooth mouse/keyboard at the kit, linked to the main computer over an IP/USB-over-ethernet extender. Drummer punches in, solos, and tweaks their own headphone mix without leaving the kit.
- Drum closet, a stash of snares/drums that each sound different, organized and ready to grab. Big sound = big drum, tight = the punchy one.
- The pipe grid for overheads + room mics + camera angles (above).
Mics
- The "everything mic", keep a mic next to the desk, on and ready, always. "On and ready" matters more than which mic. Catch ideas and vocals the second they hit.
- Mic closet / locker, each mic on a quick clip, ready to grab-pop-plug. Because it's easy, you'll actually A/B mics instead of settling.
Acoustics, his hard-won lesson
Start with the least treatment you can, add only if you need it. Over-treated, fully built-in rooms often sound worse and you're stuck with them. This lines up with §3 / §11: isolation is structure, treatment is tunable.
- Removable panels on hooks,2'×4' absorption, a little deeper (depth matters), some with scatter diffusers; move them per session.
- Control room: first-reflection points + ceiling clouds first, that's the treatment that actually counts in the mix room.
- Rugs, cheap and effective.
- Skills > gear > acoustics, the biggest difference is knowing how to record and getting the right part. Save money on treatment, spend it on getting better.
The room as a place
- Make it special, framed photos of real moments, tasteful art, records on the wall. Pull from rooms that inspire you.
- A project / focus board, a board of active artists + projects, by the door or the kitchen pass-through, to keep an easily-distracted brain anchored on what matters that day.
Distilled from "10 Great Ideas I Stole from Over 150 Recording Studios" (STUDIO TIME). Sponsor segments skipped. Working checklist lives alongside this manual as STUDIO_IDEAS_CHECKLIST.md.
12Build order: the master sequence
The order that actually works. Three rules drive it: do the dirty and overhead work first (clean, steel prep, the dark spray) so it can't wreck a finished floor, everything that lives inside a wall or ceiling goes in BEFORE the wall closes, and you finish the floor and treat the room LAST. The outdoor accessories run in parallel and never block the studio.
- Clean the barn (empty, sweep/vac, pressure-wash if needed, pull dead wiring, seal leaks, fix metal).
- Closed-cell spray foam: exterior walls + roof deck only. NOT the attic floor or between the loft joists.
- Fire-protection finish: approved intumescent over the foam, finished matte black so the shell disappears.
- Design & layout: lock exactly where every room goes (control, live, booth, machine, storage, electrical, HVAC).
- Electrical & conduit: run everything before framing. Overbuild the conduit; opening walls later is the expensive part.
- HVAC: quiet supplies + returns + fresh air + dead vents + silencers + mechanical room, before drywall.
- Build the studios: floating floors where needed, room-within-room, isolation walls, windows, doors.
- Drywall: double 5/8" + Green Glue + acoustic caulk, seal every penetration. This is the isolation.
- Finish materials: walnut, cork, leather, lighting, furniture, glass, plants. The "holy shit" stage.
- Acoustic treatment: bass traps, clouds, diffusers, slat walls, broadband. Tune the rooms AFTER they are built.
The numbered phases below are the detailed version of this. One detail to preserve: the concrete floor's prep + base stain happens on the open slab before framing (you cannot grind or stain around walls); the final floor topcoat is a Phase-9 finish.
Don't buy yet: no Rockwool, drywall, Green Glue, studs, resilient channel, or flooring until the layout (Phase 4) is locked. Right now you only need the two spray contractors: foam + fire coating.
- Phase 0. Design + decide (on paper). Lock the floor plan and decide the attic use now: a chamber / amp room needs its cable + speaker lines run during rough-in, a lounge does not. Plan every system on paper: power loads + circuits, HVAC sizing + duct paths, cable routing (audio snake paths room-to-room), the wood-stove flue, plumbing, lighting. Measure twice. (Shell already mapped, Rev G.)
- Phase 1. Empty, inspect, weathertight. Pull everything out. Inspect before spending a dollar on finishes: roof leaks, rust at beam connections, slab moisture, loose conduit / open boxes, window leaks, rotted wood, pests. Fix leaks and seal the envelope, the barn must be bone dry (a leak ruins a stained slab and any finished work). Photograph everything first for the before/after record.
- Phase 2. The dirty work: clean + prep the steel, top-down. Dry-clean high to low (ceiling deck, trusses, beams, conduit, fixtures, walls, ledges, then the floor). Then prep the metal: degrease first (SSPC-SP1, solvent or TSP-substitute, rinse, dry), then remove loose rust (SSPC-SP2, wire brush / sanding). Never the other way, mechanical cleaning over oily steel drives the contamination in. Spot-prime bare and rusty steel with a rust-inhibitive primer.
- Phase 3. Spray-foam the metal shell (the condensation barrier). Onto the cleaned, dry, prepped steel: closed-cell spray foam (2–3") on the underside of the metal roof deck + the wall bays. This is the air + vapor + thermal barrier that stops the cold steel skin sweating against conditioned interior air, the #1 failure in a hot-humid Central-TX metal building (condensation → rust, mold, rot). It also seals every corrugation gap and tames the metal drumming. This is the SHELL barrier, not the room insulation: the decoupled room-in-a-room cavities get open mineral wool (Rockwool) later (Phase 9), never closed-cell, closed-cell in the cavity shrinks the decoupled air gap and kills isolation. Avoid the hot-humid double-vapor-barrier trap: never sandwich Rockwool between two vapor-tight layers. Foam the steel before the dark paint, then paint only the visible bays. Exposed foam needs a thermal / ignition barrier (drywall or an intumescent coating), code + welding safety.
- Phase 4. Rough floor prep (the dusty step). On the bare open slab: scrape blobs and adhesive, degrease oil spots, repair cracks, grind / profile where needed, vacuum every speck. Saw-cut any floor conduit chases or core any slab penetrations now, before the stain. Run your stain test samples. This is the dustiest job, so it goes before any finish, while there is nothing nice to ruin.
- Phase 5. Spray the shell dark + finish the wood. Mask the floor, windows, and outlets. Spray the ceiling, beams, and conduit, then the wall panels (and any visible foam), a warm dark matte (soft iron-black / charcoal-brown / blackened bronze, never cold gloss black). Metal primer / DTM paint. Then stain and darken the wood trim, benches, cabinets, and slats. This messy overhead spray goes before the floor stain so nothing oversprays a fresh floor.
- Phase 6. The floor: stain + base seal. Overhead is done, so the hero goes down on the open slab. Final deep clean, test porosity, apply the layered patina (black/brown base, rust movement, turquoise / oxidized-copper accents), neutralize and rinse if acid-stained, then a base seal. Protect it with ram board for the rest of the build. The final topcoat waits for Phase 10. Full how-to: the floor section.
- Phase 7. Rough-in (last chance before walls close). Everything that lives in a wall or ceiling, over the protected floor: power (subpanel, circuits, every run), HVAC + ventilation (unit, silent ducts, supply / return), cable routing (audio conduit control↔live↔booth↔attic), the wood-stove flue penetration, plumbing (sink + future hot-tub line). If the attic is a chamber / amp room, run its lines now. Putty-pad the boxes.
- Phase 8. Frame the rooms + cut the openings. Frame the control room first (decoupled, on the protected floor), then the booth, then define the live room, sill gasket under all framing. Cut and frame the windows + the angled control-room glass (non-parallel so it never reflects into the mix). If the control room gets a floated floor (see Floor isolation), build it now, isolation pucks + floated deck, before the walls close over it.
- Phase 9. Close + seal. Insulate the cavities with open mineral wool (Rockwool), never closed-cell (closed-cell shrinks the decoupled air gap and hurts isolation). Hang double drywall + Green Glue (mass outboard), seal every seam, edge, outlet, and penetration. Nothing rattles.
- Phase 10. Final finishes + the floor topcoat (the beautiful coat goes on LAST). Final power + the track lighting, HVAC registers, the angled glass, the doors. Then, after all the dusty work is over: a final deep clean of the floor + the final satin / polyaspartic topcoat (anti-slip near the doors). Satin, not high-gloss, gloss shows every scratch and footprint.
- Phase 11. Audio in + TEST. Install the console, monitors, gear, and all wiring, get every audio + power line live. Measure the room (Smaart / REW): first the isolation, then the mix-position response.
- Phase 12. Sound treatment (tuned, not guessed). Bass traps, first-reflection panels, clouds, diffusion, movable gobos, tuned to the measurement, then re-measure and adjust. Treat what you measured.
- Phase 13. Install + style (cured floor only). Once the floor has cured: furniture pads under everything, then lighting, rugs, sofas, amps, signs, the guitars and gear. No dragging on the new floor.
- Phase 14. Accessories (parallel, never blocking). Hot tub (slab + its own heater), Airstream booth, dome, the outdoor / site work runs alongside the studio or after it is earning. See Accessories.
Do not lay the beautiful floor coat and then paint the ceiling over it. Ladders, overspray, ceiling dust, and steel grime will beat up a fresh finish. So: clean + prep + spray the shell first, stain the floor and base-seal it and protect it (ram board), and save the final satin topcoat for last. On the steel, the standard order is degrease before de-rust (SSPC-SP1 then SSPC-SP2), mechanical cleaning over oily steel just drives the oil in. Stained concrete needs a sound, clean, dry slab, so test porosity before you stain.
If you leave the closed-cell foam exposed (the industrial look) instead of covering it with drywall or metal, you coat it. Three reasons, three levels. Full source: Spray Jones video in §26.
- Acrylic or urethane coatings only, never solvent-based. A rattle-can or heavy solvent paint eats closed-cell foam like glue on styrofoam. Enamel, epoxy, urethane, or acrylic are safe.
- Level 1, plain UV paint: stops the foam discoloring (UV turns bare foam yellow / orange / gray), brightens it, lasts 20+ years indoors. No fire protection.
- Level 2, elastomeric (15–20 mil): UV + weather + animal + washable (pressure-wash soot off). The top grade hits Class-1 flame spread (not every code).
- Level 3, intumescent coating: the real fire / thermal barrier (puffs up like meringue when fire hits, shielding the foam). This is what lets us keep the exposed foam AND satisfy code. Can cost as much as the foam install.
- ⚠ Insurance, not just code: even with no building code on your own land, the insurance underwriter can refuse to cover the building if foam is left exposed without a fire barrier. Call them before deciding to leave it bare.
- For our dark look: tell the crew to lay a smooth pass (rough foam costs 25–35% more to coat and shows bare "freckles"), then plan a primer + two coats of the dark / charcoal intumescent so the deep color does not bleed through.
13The patina floor: prep early, finish last
The acid-stained copper / turquoise / rust patina floor is the hero of the whole studio, it holds the identity and everything builds out from it. It goes in before any framing, walls, or gear: you need the full slab open and clean, and you can't grind or stain around walls. Get the order right and you build on a finished floor.
The exact productized recipe (named Direct Colors products, the spec sheet, and a buy list for the test board) is the Verdigris Rust Floor section right after this one. This section is how it works; that one is what to buy and the order to do it in.
"First" means the floor prep (grind the open slab) and the stain go in early, before you frame the room-in-room walls, so the patina runs continuous. But the messy dark shell spray happens before you stain (no overspray on fresh stain), and the final seal / topcoat is the LAST wet finish, after all the dusty work, with the floor protected (ram board) in between. Prep early, finish last.
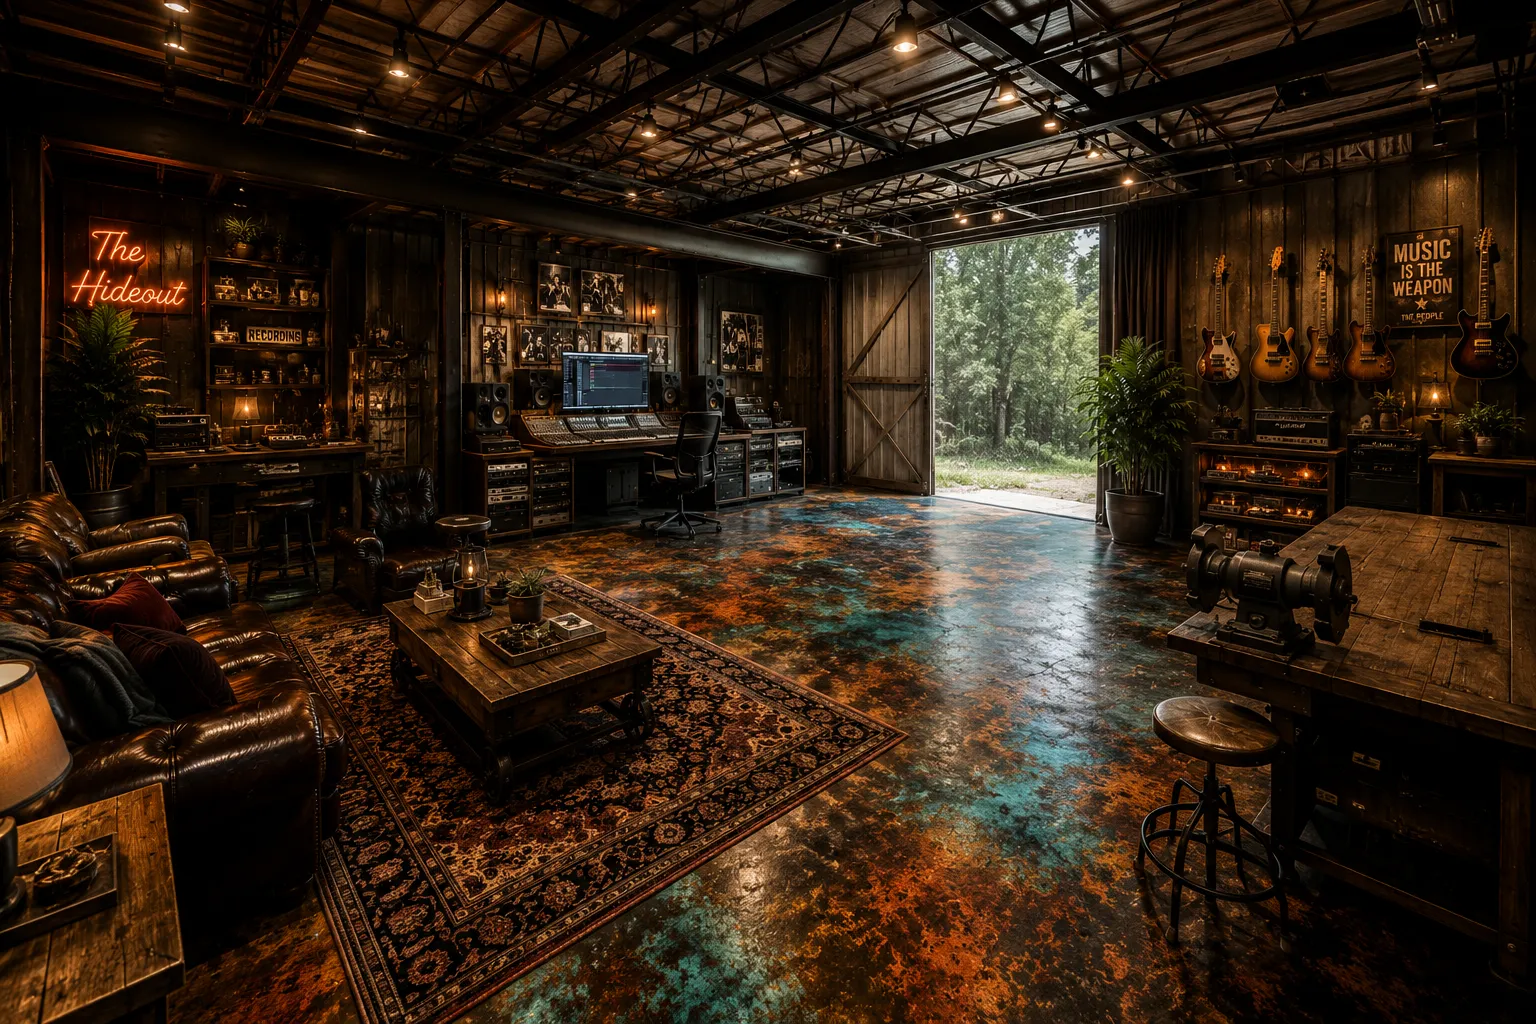

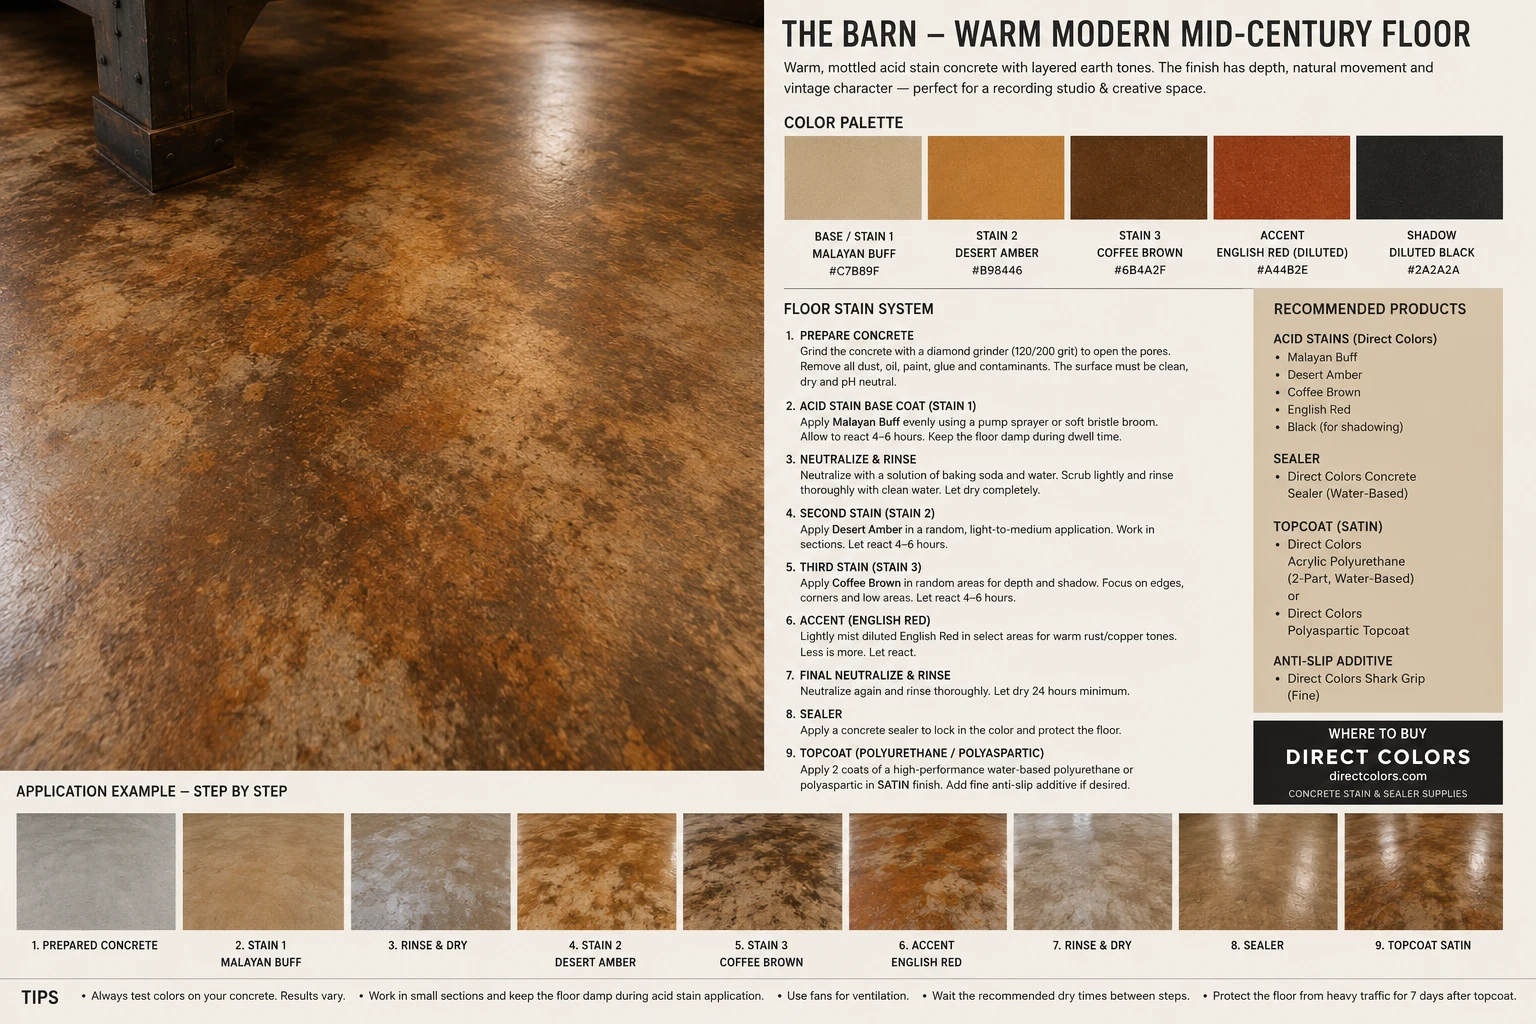
Acid stain reacts chemically into the concrete, it can't peel. What peels is the coating on top, and only for six reasons: moisture from below, no mechanical bond, acid-etching, leftover stain residue, sealing damp, or incompatible coats. Every step below kills one of those. Test board first, non-negotiable.
The sequence
- Clear + clean. Empty the barn. Sweep, scrape, and strip all debris, oil, old paint, glue, and red chalk (permanent). The slab must be bare.
- Power-wash,⚠ KILL THE POWER FIRST. Before any water touches the floor, shut off the barn's electrical at the subpanel. Water + the GE panel / 220 V circuits is lethal. Then pressure-wash the slab to lift embedded grime and oil. Dry fully (overnight+, longer in humidity).
- Moisture test (the #1 cause of failure). Tape a 2'×2' clear plastic sheet flat to the slab for 24 h. Condensation or a dark patch under it = moisture → use a breathable / penetrating sealer or a moisture-mitigation primer. The slab sits ~1 ft proud (drier), but an old pour may have no vapor barrier, test anyway.
- Grind / profile (non-negotiable on an old slab). Diamond-grind to an open CSP profile so stain penetrates and sealer grips. NEVER acid-etch, it leaves salts that wreck the bond. Scrape control lines, then vacuum every speck of dust.
- Open the pores. SurfPrep at 3:1 water, broom in figure-8s, rinse, let dry.
- Test patch, always. In a corner or a spare slab chunk, run the full process including sealer, you won't see the true color until it's neutralized, washed, and sealed. Dial the recipe here. Acid stain is permanent and only goes darker.
- Stain the patina. Two routes for the vivid copper/turquoise:
- Acid stain (the flake-proof base): warm brown/amber base → drop turquoise/aqua in while wet (wet-on-wet drifts) → a touch of black/ebony in the lows for aged-metal shadow → optional copper highlight. Pump-spray, agitate with a broom, then mist water so colors flow into organic blooms, never brush lines. React 4 h min (overnight = darker).
- For the ELECTRIC vivid look (the reference photo): acid stain alone can't hit it, layer reactive metallic (Modern Masters Metal Effects copper + iron paint, then a green/blue patina + rust activator → real verdigris + rust) or a metallic epoxy (mica copper/teal/rust, alcohol spritz + torch for molten cells) over the stained base. A dark underlayer first makes turquoise pop; salt / solvent spritz makes crystalline blooms; sponge and dab, never brush.
- Neutralize + rinse + DRY. 8 oz ammonia : 5 gal water, broom it, then rinse/mop repeatedly until the cloth comes up clean, leftover residue is the #1 peel layer. Dry fully, overnight+.
- Seal (the depth + protection). Thin cross-rolled coats. Satin/matte breathable in the tracking rooms (less acoustic reflection + thinner film = less peel risk); high-gloss (epoxy flood coat or polyaspartic, 2+ coats) in the lounge / control room for the wet-glass 3D depth. Polyaspartic = toughest + UV-stable. Skip thick high-gloss urethane, first thing to peel.
An aged copper / turquoise / rust patina under a clear coat, aged metal under glass, the hero the whole barn builds out from. Full research + the 5 video sources: FLOOR_ACID_STAIN_PLAN.md.
Floor 2: the loft (cork, not cement)
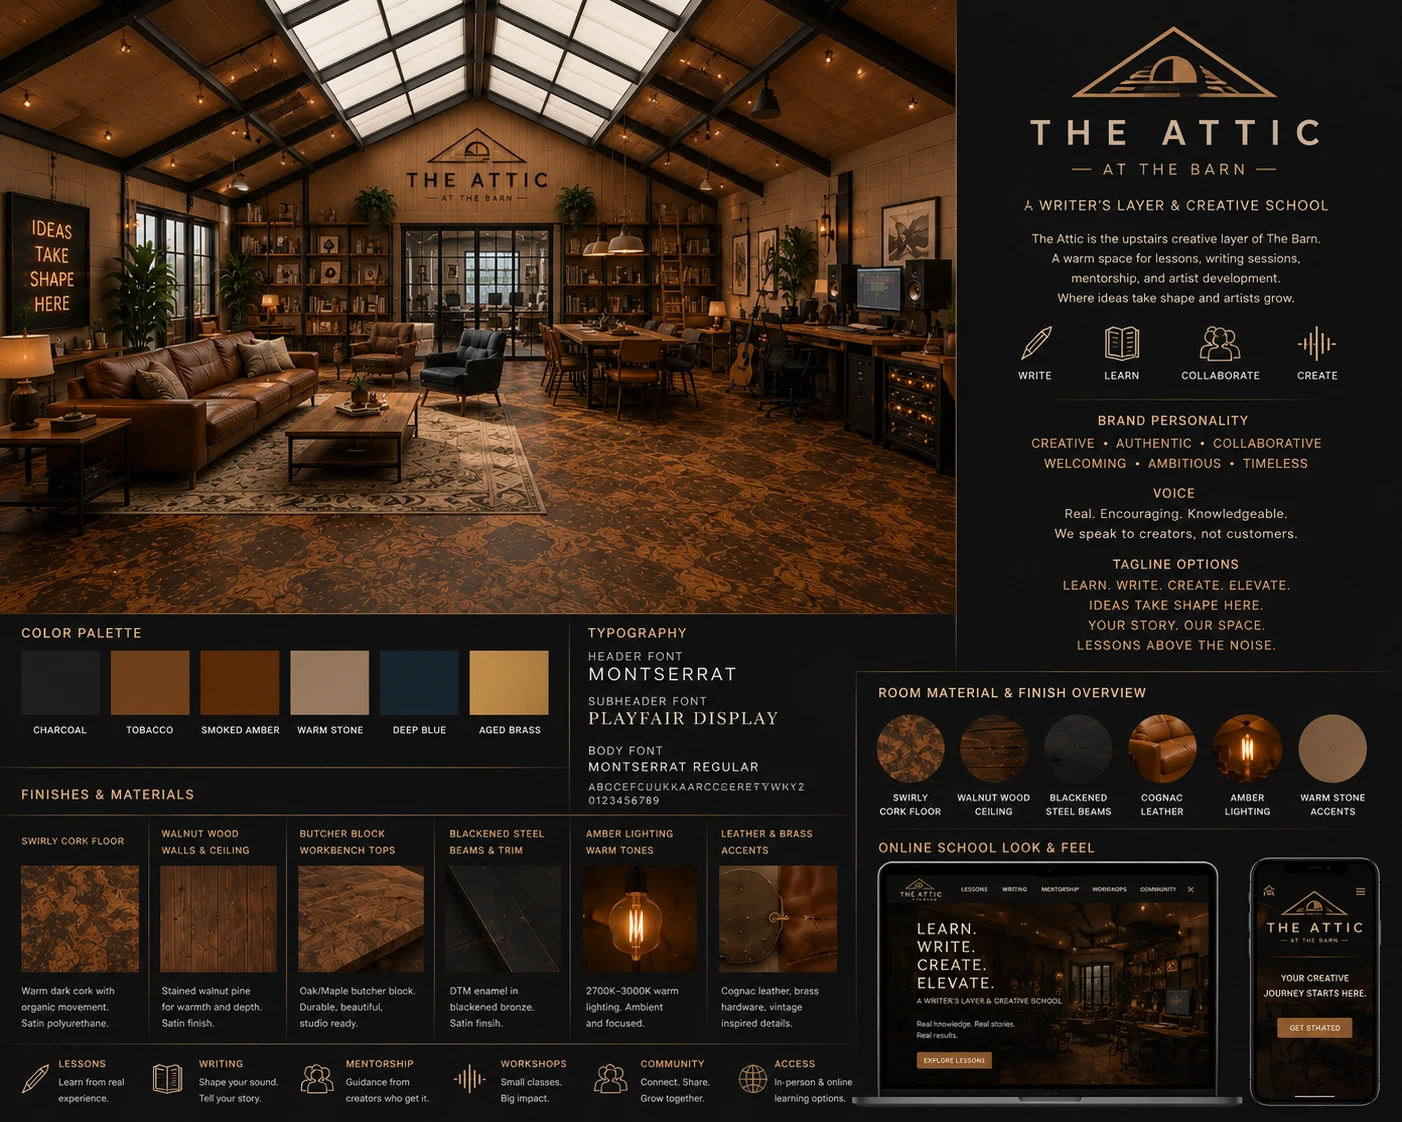
THE_ATTIC_DESIGN.md.The loft floor is a different problem from the slab. It is plywood on joists that flexes, and it is also the ceiling of the rooms below. Two rules follow: don't put a brittle finish on a moving floor, and remember the real soundproofing is the assembly, not the finish.
Decision: dark swirly cork with a matte commercial finish, upstairs. Cement, microcement, and skim coats are brittle: on a flexing wood deck (people walking, gear rolling, the building vibrating) they crack, chip, or separate unless the structure is engineered and prepped perfectly. Cork flexes with the deck instead of fighting it, so it will not crack. It is also warm, quiet, and soft underfoot (right for a crash / lounge loft), and it naturally damps footfall, since it is the same stuff sold as acoustic underlayment.
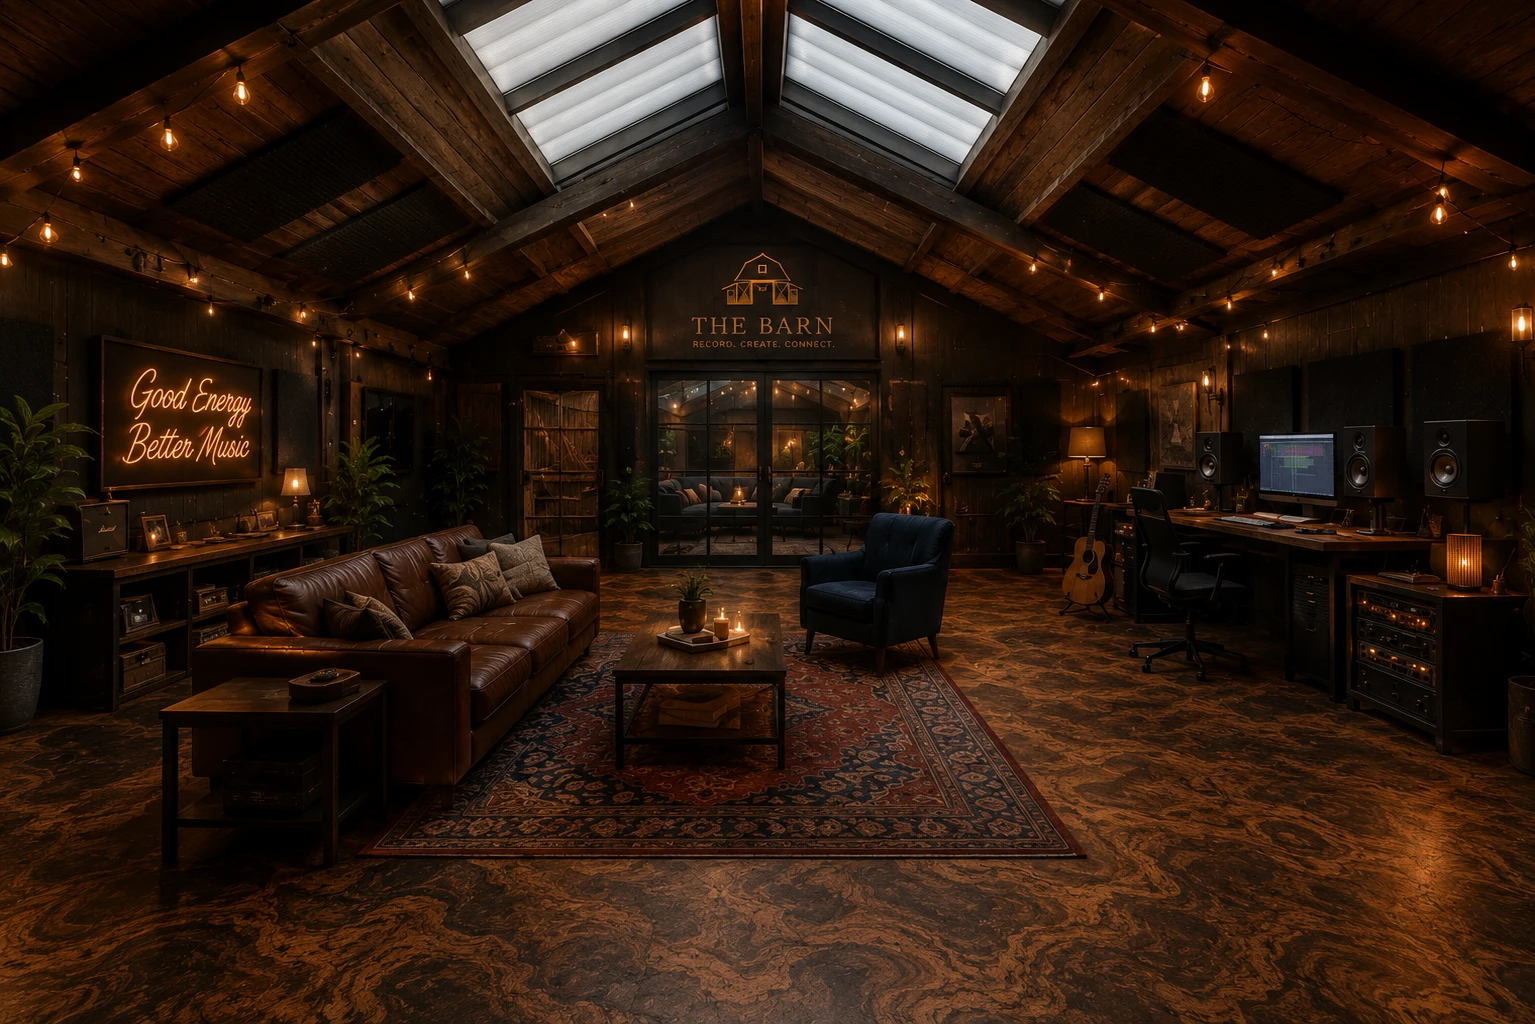
Cork handles impact noise (footsteps, rolling chairs) plus comfort plus crack-proofing. On its own it does little for airborne sound (voices, music), because it is thin and light. Since this floor is the ceiling over the control and live rooms, the isolation lives in the build-up, top to bottom:
- Cork finish: comfort + impact, the part you see.
- Resilient acoustic underlayment (cork or rubber mat): decouples the floor.
- A mass layer (second subfloor / plywood + mass-loaded vinyl): the airborne block.
- Joist cavity packed with mineral wool: absorbs inside the floor.
- A decoupled ceiling below: resilient channel or isolation clips + double 5/8" drywall with Green Glue, in the rooms underneath.
That is mass where you record applied to the loft floor (it is the studio's ceiling). Build the sandwich; the cork is the warm top layer.
Which finish, ranked for no-crack / no-chip
| Floor type | Crack / chip risk | Take |
|---|---|---|
| Swirly cork | Low | Best fit. Warm, quiet, artistic, flexes with the deck. |
| Commercial LVT / concrete-look vinyl | Very low | Safest and most durable, less luxury. |
| Rubber flooring | Very low | Pro-studio / gym feel, practical. |
| Engineered wood | Medium | Beautiful, but dents and scratches. |
| Microcement over plywood | Medium / high | Cool look, risky on a moving deck. |
| Real concrete | Too heavy | No. Weight plus cracking, not for a loft. |
Floating vs glue-down cork
- Floating / click cork: easier upstairs, less mess, repairable, has an attached underlayment (more impact isolation), needs an expansion gap. Best for the soundproofing priority and a DIY install.
- Glue-down cork: the seamless art-floor look (best for a marbled swirly pattern), feels solid and permanent, but transmits impact more directly unless glued over a resilient underlayment, and it needs a very smooth substrate and careful adhesive.
- The lean: floating cork for isolation plus easy install and repair, unless you find the perfect marbled pattern and want the permanent art-floor look, then glue-down over a cork / rubber acoustic underlayment for the best of both.
How it's made + the swirly look
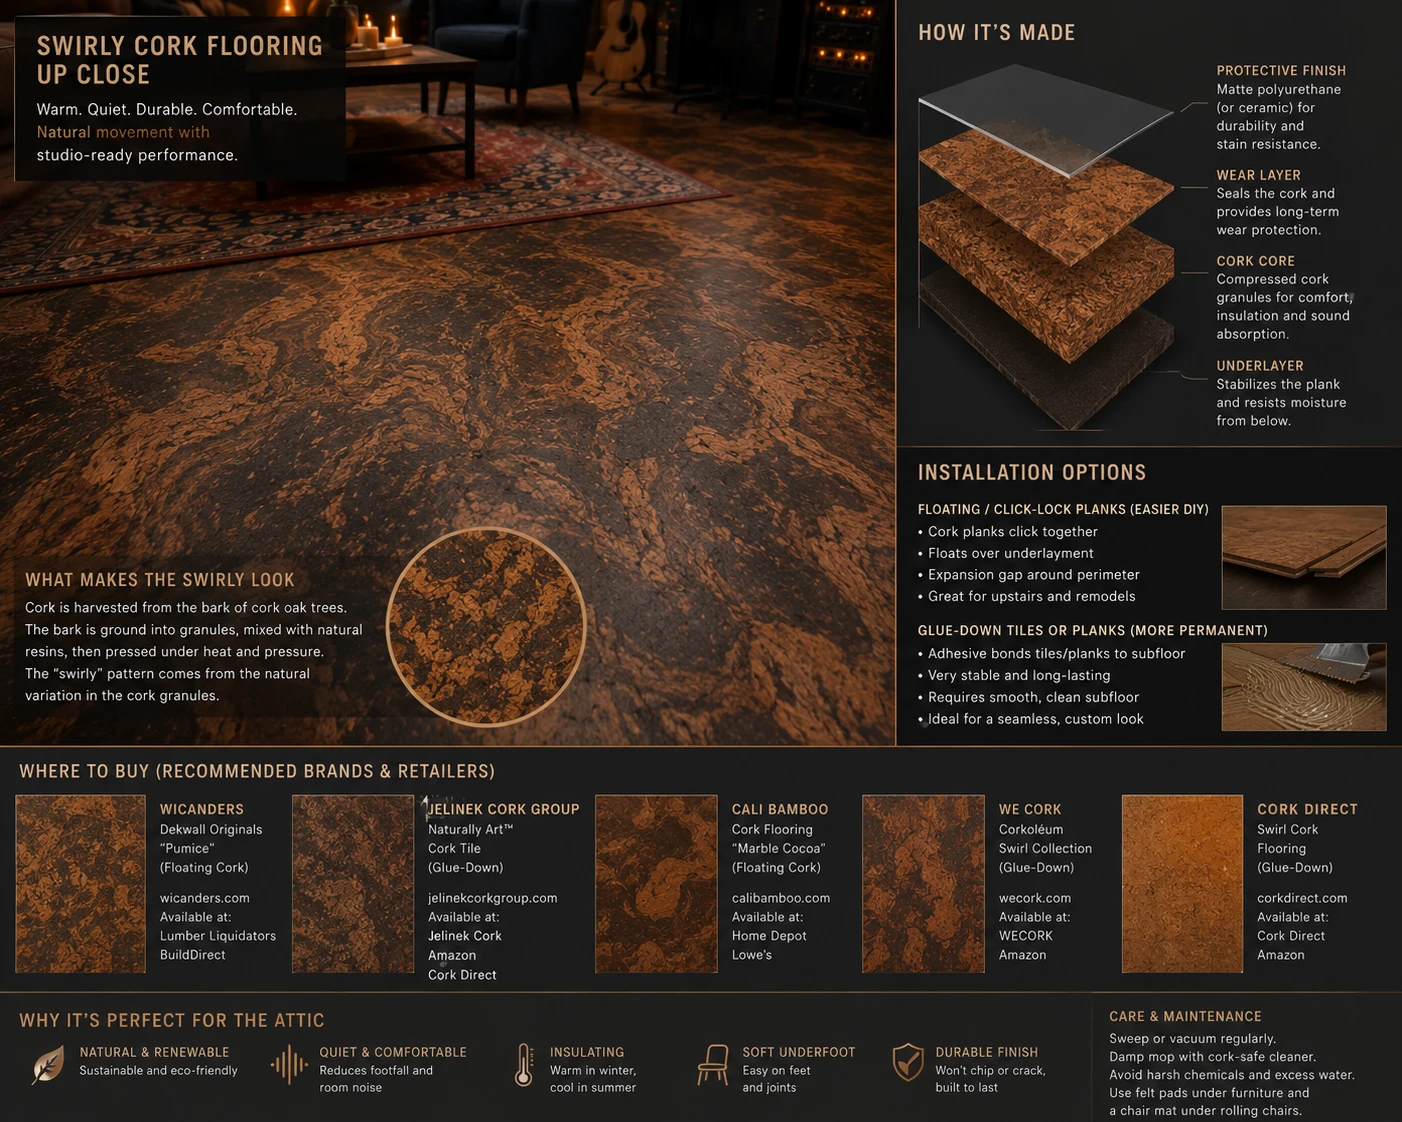
Cork is the bark of the cork oak, harvested without killing the tree (it regrows), then ground into granules, mixed with binders, and pressed under heat and pressure into tiles or planks. The swirly / marbled look comes from larger organic granules with color variation, not the tiny speckled bulletin-board cork. A finished plank is four layers: a matte polyurethane (or ceramic) protective finish, a wear layer that seals the cork, the compressed cork core (comfort + insulation + sound), and an underlayer that stabilizes it and resists moisture from below.
Where to buy (local Austin first)
Cork board and cork wall tile look cool but have no real floor wear layer, so they will not take chair wheels, racks, couches, and foot traffic. Buy cork flooring planks or tiles with a proper wear layer. Say it to every vendor: "flooring-grade cork, not wall cork."
CALI Cork at Home Depot (Austin). Reclaimed wine-cork, "Ceramic Shield" scratch resistance, dark marbled / dark-brown options, plank or tile, local pickup and cheap samples. The fastest cheap-and-good route. Cali is also at Lowe's.
| Source | Type | Note |
|---|---|---|
| CALI Cork | Home Depot / Lowe's (local pickup) | Cheapest local + quality. Dark reclaimed cork, scratch-resistant, plank or tile. |
| Austin Fine Floors | Local showrooms (S + N Austin) | Best local cork lead, carries cork (APC, Lauzon). S: 4301 W William Cannon Dr 78749, 512-954-9343. N: 3010 W Anderson Ln F 78757, 512-339-9590. |
| Schroeder Carpet | Local (704 S Lamar Blvd 78704) | Oldest Austin flooring shop, carries cork + engineered + LVP. 512-462-1151. Bring your design boards, ask for a cork sample book. |
| AmCork | amcork.com (ships samples) | Order sample sets to test color in the actual attic; it shifts a lot under the skylight light through the day. |
| Austin Floor Pros | Local (78729, 512-953-9000) | Cork selection + install. |
| Lone Star Carpet | Local (Austin / San Antonio) | Cork options + service. |
| Globus Cork | corkfloor.com (ships) | The art-floor option: custom colored / marbled glue-down tiles, very controllable. |
| Wicanders (Amorim) | Dealers / corkflooringsupply.com | Best marbled "Originals." Cork GO (floating click) or Cork PURE (glue-down, you sand + seal it). |
| WE Cork | wecork.com (best first samples) | Floating (Avant Garde / Serenity) + glue-down (Classic / Corkoleum). Order samples before committing; locator finds a dealer. |
| Jelinek / Cork Store USA | jelinekcorkgroup.com | Cork tile + wine-cork mosaic for a distinctive patterned surface. |
| iCork Floor | icorkfloor.com (online) | Click-lock floating planks + cheap mail samples. |
Color target: charcoal / espresso base, tobacco-tan and smoked-amber movement, warm brown-black variation. Finish: matte or low-satin commercial polyurethane or a factory wear layer. Not glossy, not yellow, not basic bulletin-board tan.
- Order 6 to 10 samples online first: WE Cork, Jelinek, and AmCork (plus a cheap CALI sample from Home Depot).
- Take them to the attic and look under daylight, amber lights, and dim evening light, the skylight will shift the color all day.
- Call Austin Fine Floors and Schroeder Carpet to source similar dark swirly cork locally.
- Pick floating click-lock unless the perfect pattern is only glue-down.
- Matte or low-satin finish, never glossy.
"I'm looking for flooring-grade cork, not wall cork. I want a dark marbled or swirled cork floor for an upstairs recording studio lounge: a charcoal / espresso base with tobacco-tan or smoked-amber movement, matte finish, preferably floating click-lock, suitable over plywood. Please send samples that do not look like basic bulletin-board cork."
Note: go by the brand and ask for the dark marbled visual. Some exact product names floating around are easy to mix up (for example "Dekwall" is Wicanders' wall line, not a floor).
- Commercial-grade cork planks or glue-down tiles, with a factory matte wear layer or a water-based polyurethane topcoat.
- Wide felt / rubber pads under racks, sofas, and tables. No sharp metal feet on bare cork.
- Chair mats under rolling chairs; rugs in the lounge / listening zones.
Denting is easier to prevent than cement cracking. Wide pads under anything heavy and it holds up fine.
Install videos to study: glue-down (Jelinek Cork; WECORK Glue Down) and floating / click (WECORK Floating; Wicanders snap; This Old House cork guide). Watch one of each system before picking.
★The Verdigris Rust Floor (the exact recipe + buy list)
This is the signature floor, locked: a rust / copper / turquoise acid-stain patina that reads like oxidized metal, old copper, and weathered Texas steel. No two slabs come out the same. §13 above is how a patina floor works; this is the exact products, the order, and the buy list. Do not commit it across the room without a test board.
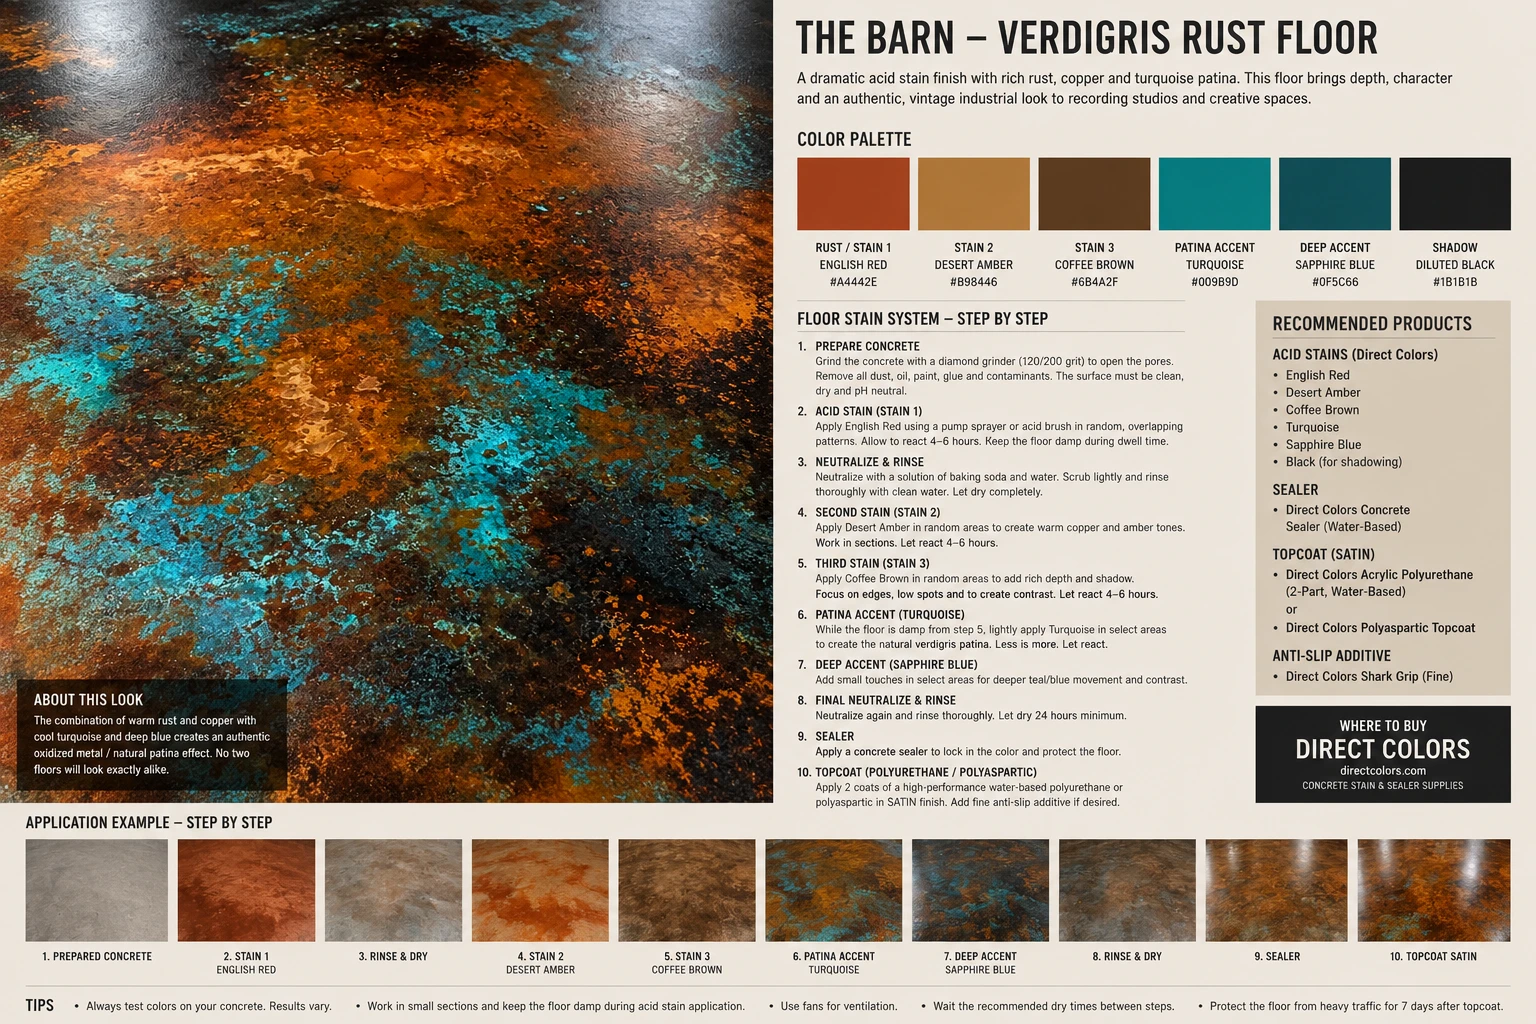
The palette
| Layer | Color | Product (Direct Colors) |
|---|---|---|
| Base / Stain 1 | Rust / brick copper | English Red (or Cola) |
| Stain 2 | Burnt amber / copper | Desert Amber |
| Stain 3 | Dark tobacco / coffee | Coffee Brown |
| Patina accent | Oxidized turquoise | Turquoise / Azure Blue (see the note) |
| Deep accent | Dark teal / blue-black | Sapphire Blue (or Azure + Blackish) |
| Shadow | Blackened steel | Blackish, heavily diluted |
Acid stain can do blue, but the bright electric turquoise / oxidized-copper look is hard to control with acid reaction alone. The reliable move: lay the rust/amber/brown with acid stain (the flake-proof reactive base), then add the turquoise patina with a water-based concrete stain or dye (Direct Colors ColorWave) layered over the acid base. Best look = 20–30% turquoise coverage, with lots of rust and dark still showing. Less is more.
The 10 steps
- Prepare concrete. Diamond-grind (120/200 grit) to open the pores. Remove all dust, oil, paint, glue, contaminants. Clean, dry, pH-neutral. (Never acid-etch; kill the power before any water, see §13.)
- Acid stain (Stain 1). English Red by pump sprayer / acid brush in random overlapping patterns. React 4–6 h, keep the floor damp during dwell.
- Neutralize + rinse. Baking soda + water, scrub lightly, rinse clean, dry fully.
- Stain 2. Desert Amber in random areas for warm copper/amber. Work in sections. React 4–6 h.
- Stain 3. Coffee Brown in random areas, focus on edges, low spots, under beams/tables for depth + contrast. React 4–6 h.
- Patina (turquoise). While damp, lightly apply turquoise in broken patches (water-based for control). Less is more.
- Deep accent (sapphire). Small touches in select spots for deeper teal/blue movement.
- Final neutralize + rinse. Neutralize again, rinse thoroughly, dry 24 h minimum.
- Seal. Concrete sealer to lock the color (Direct Colors water-based, or breathable if the moisture test flagged any damp).
- Topcoat (SATIN). 2 coats of water-based polyurethane or polyaspartic in satin. Add fine anti-slip (Shark Grip) in entry / work areas.
Do not use wood polyurethane. Use a commercial concrete polyurethane or polyaspartic, satin finish. Satin is the whole look: gloss makes it read like a showroom epoxy; satin keeps it looking like aged, polished metal. Polyaspartic = toughest + UV-stable.
Where to buy + the test-patch buy list
Start at Direct Colors (directcolors.com): EverStain acid stain, ColorWave water-based stain, neutralizer, sealer, topcoats. Some EverStain colors (Coffee Brown, Desert Amber, Black, Azure Blue) are also at Lowe's. Kemiko is a good pro alternative (acid stains + water-based poly + high-solids polyaspartic). Austin coating installers commonly finish with clear polyurethane / polyaspartic for UV, scratch, and sheen control.
- EverStain English Red
- EverStain Cola
- EverStain Desert Amber
- EverStain Coffee Brown
- EverStain Blackish
- EverStain Azure Blue
- ColorWave turquoise/blue (more control)
- Neutralizer + degreaser
- Concrete sealer
- Satin concrete poly or polyaspartic
- Fine anti-slip (Shark Grip)
The floor is the last step of the 2-week sprint (after foam + AC), so it never catches foam overspray. To hit July 14 and not gamble the whole slab:
- This week, in parallel: run the full test board (a spare slab chunk or a hidden corner) including sealer + topcoat. You do not see the true color until it is sealed. Dial the recipe here. Order the Direct Colors test kit now.
- After foam + AC: grind the open slab, then run the dialed recipe across the floor. Each stain layer wants 4–6 h dwell, the final neutralize wants a 24 h dry, then sealer + 2 satin topcoat coats.
- Protect 7 days after topcoat before heavy traffic or rolling racks. Gentle use is fine sooner. Plan light use the week after July 14.
Acid stain is permanent and only goes darker. The test board is how you do not fuck it up.
14Power / electrical
The barn already has the anchor: a GE panel + 100 A "Barn Subpanel" feed, plus the welder / air-comp / mill circuits. Plan the studio's power on paper in Phase 0 and rough it in (Phase 7) before any wall closes.
- Dedicated clean audio circuits, keep the console, racks, and monitors on their own circuits, separate from lighting / HVAC / fridge, so you don't get hum or sag when the AC kicks on.
- One technical / star ground, every audio device references the same ground point. This is what kills ground-loop buzz.
- Size the loads with headroom, sum the gear draw + AC + lighting, size the circuits up, and label every breaker.
- Generous outlets + conduit, plenty at the desk, racks, live-room walls, and the loft/attic, on conduit/raceway so you can pull more later.
- Isolate noisy gear, the welder, compressor, and mill stay on their own circuits, never shared with audio.
- ⚠ Licensed electrician + Bastrop County permit. Water + 220 V = licensed only.
15HVAC + airflow (the silent killer)
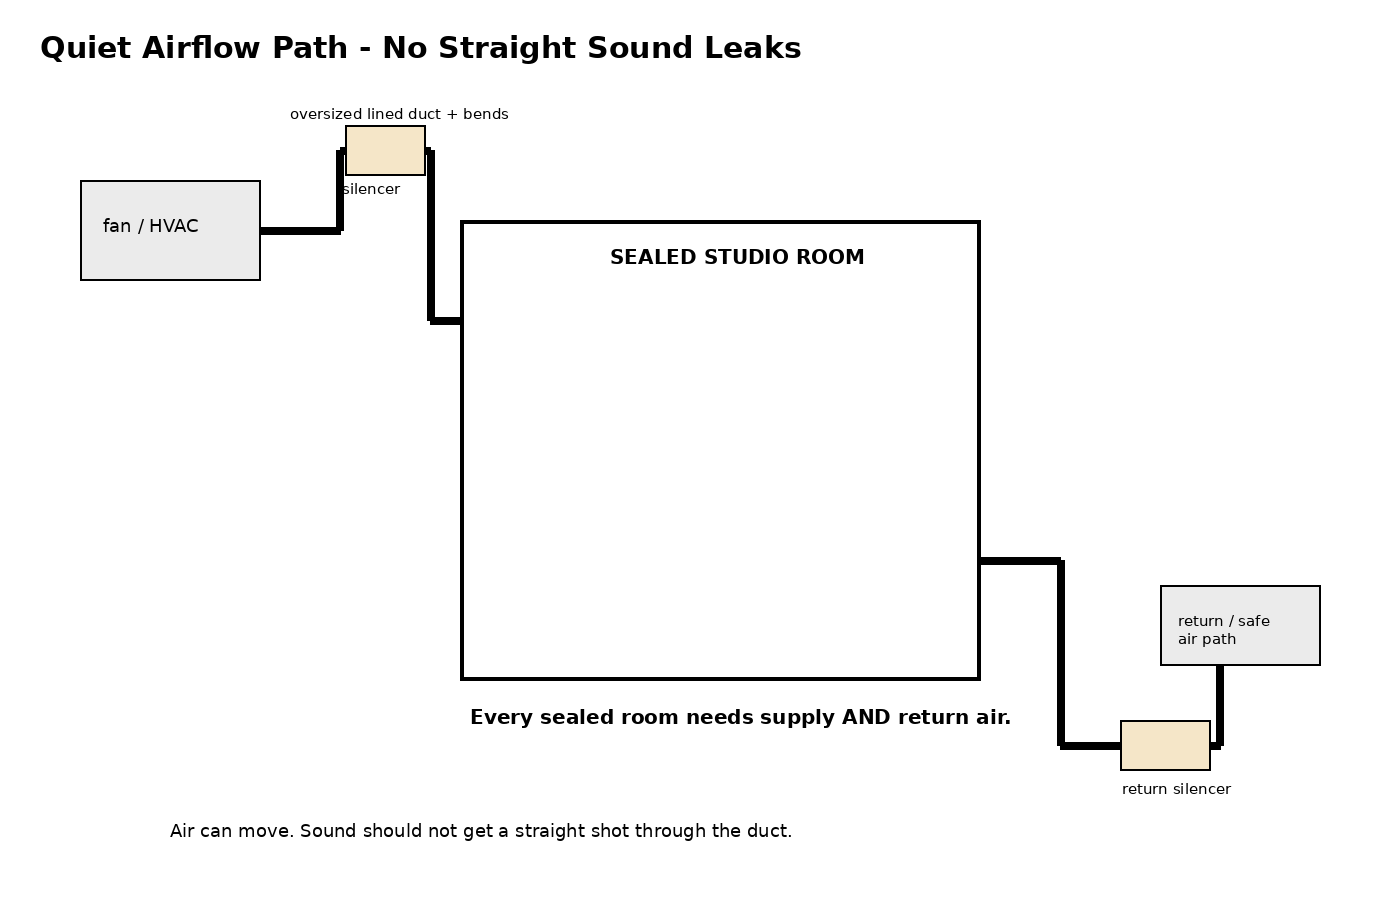
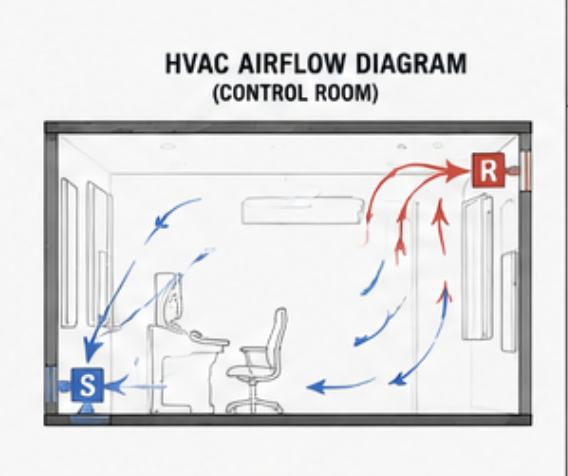
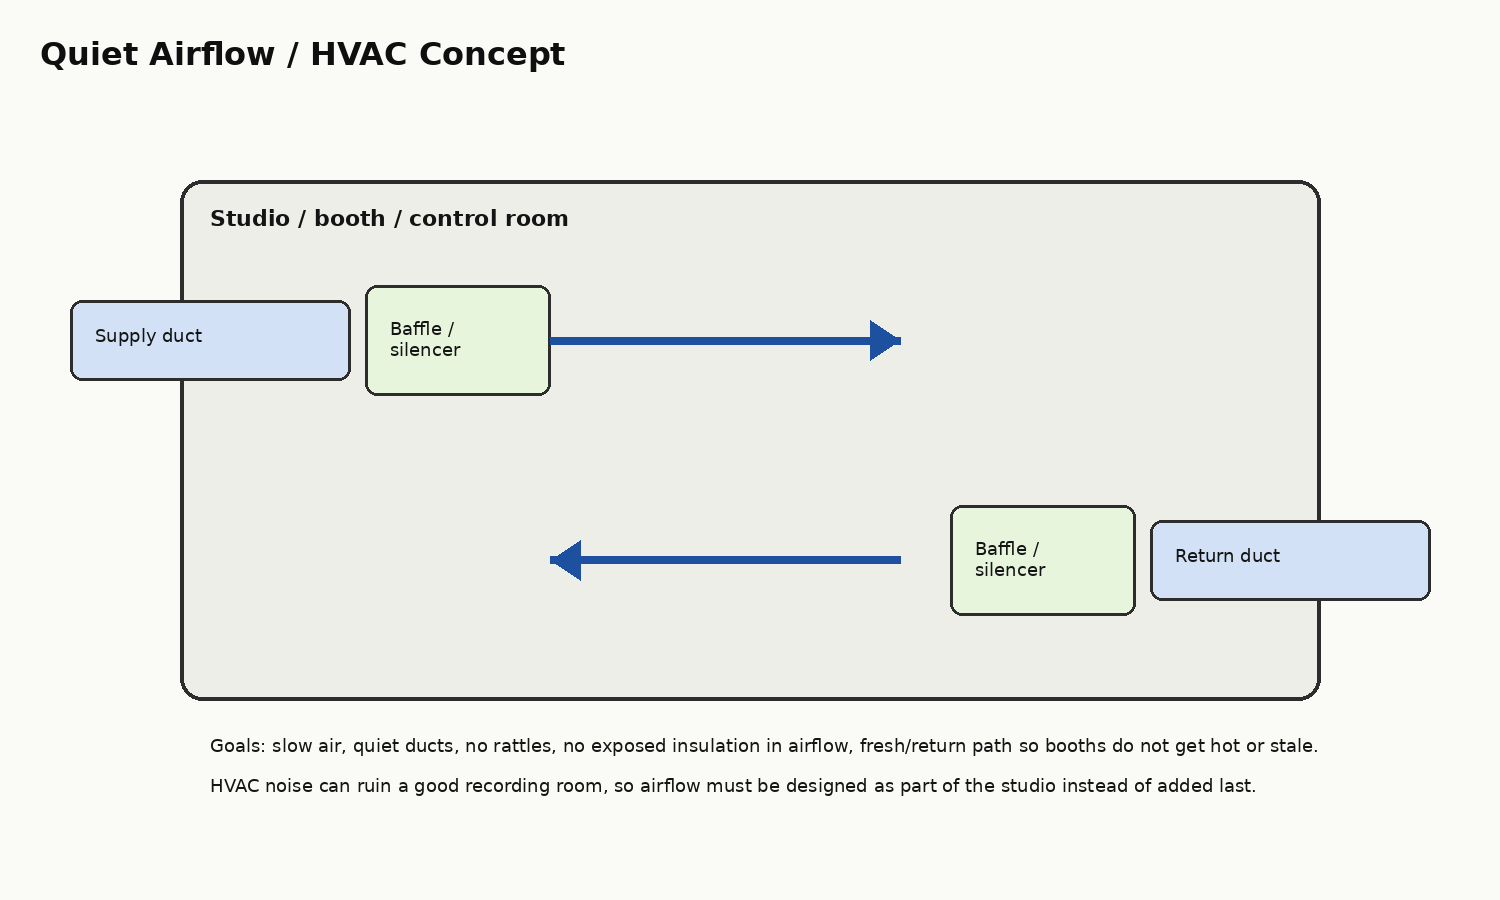
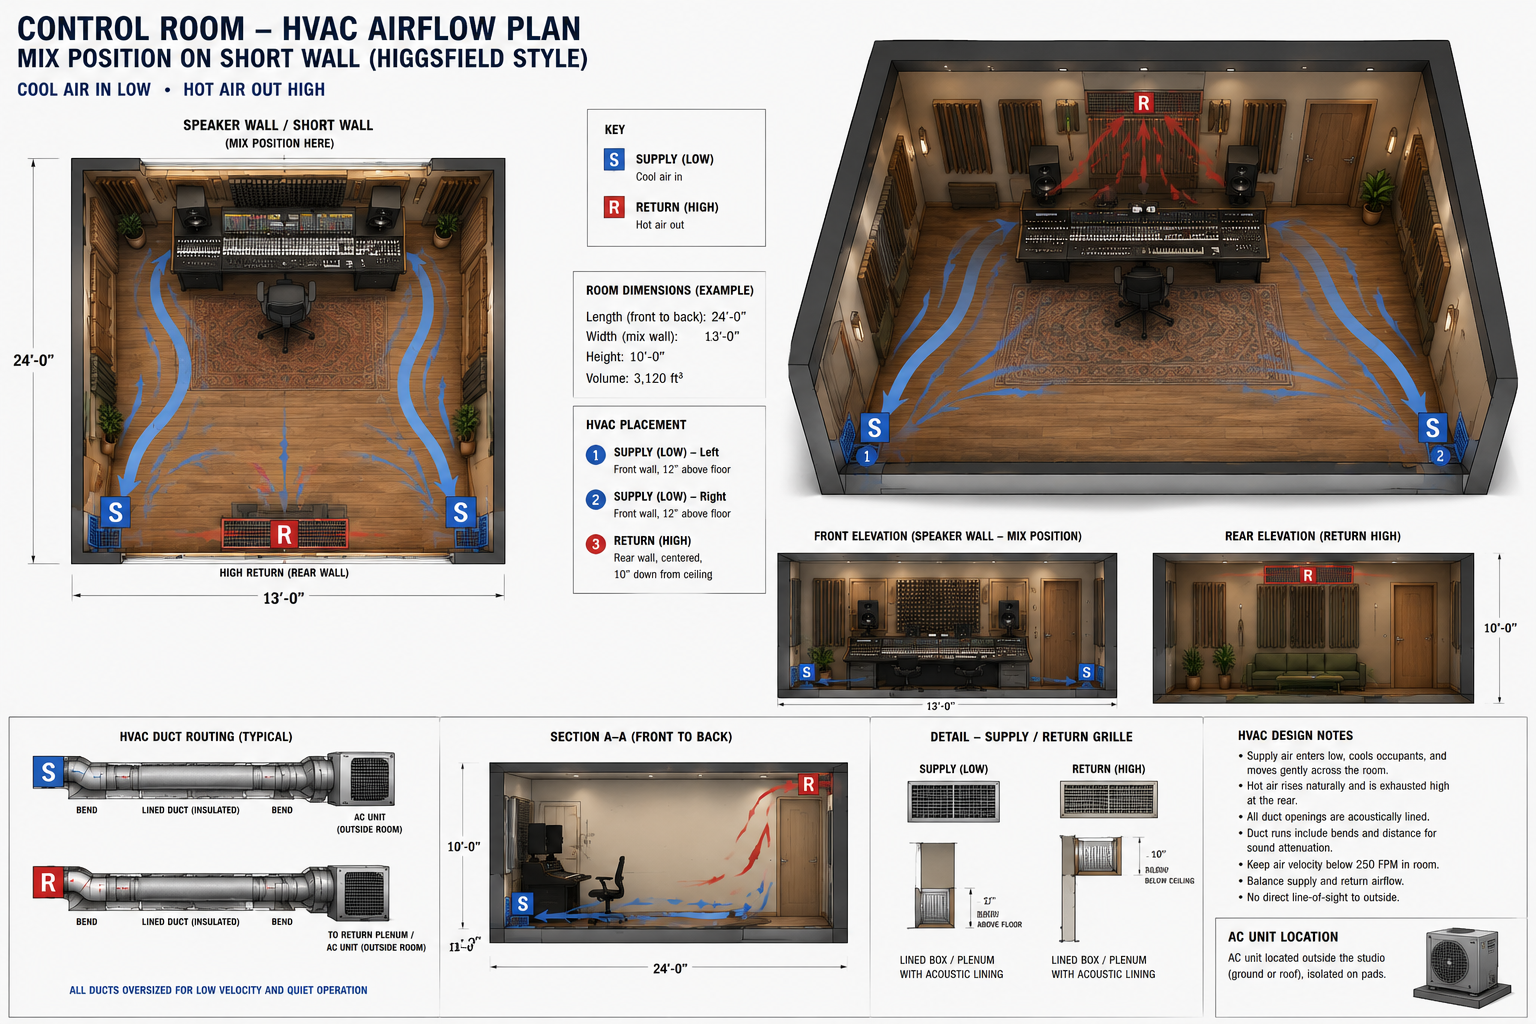
A sealed room with no air gets hot and useless fast, people, gear, lights, computers, amps all dump heat. But cutting a simple hole between rooms destroys your isolation. Solve both.
Design rules
- Low-velocity air (slow air is quiet air); oversized ducts when possible.
- Long duct paths with bends, not straight noise tunnels.
- Lined duct / silencer (muffler) boxes.
- Separate supply AND return for each occupied room; returns that don’t leak sound between rooms.
- Mechanical equipment (condenser, air handler) away from mics + the control room.
- Plan it all before framing closes.
The booth is the smallest, most sealed room and heats up fastest. It needs its own quiet supply + return. Don’t skip it because it’s small.
16Cable routing
The studio's nervous system. Plan it in Phase 0 and pull it during rough-in (Phase 7), once the walls close, you can't add a run without opening them back up.
- Room-to-room paths, conduit / raceway between control ↔ live ↔ booth ↔ attic for the analog snake plus any network/digital. Oversize the conduit so you can pull more later.
- Separate audio from power, run audio away from power, crossing at 90° rather than bundled parallel, to keep induced hum out.
- Recessed wall panels, XLR / TRS plates at the desk, live-room walls, and the booth so you patch cleanly instead of snaking cables under doors.
- The snake, a multicore / stage box from the live room to the control-room patchbay; spec the channel count for your biggest session + headroom.
- Attic sends, if the attic becomes a reverb chamber / amp room, run its speaker-out + mic-return lines now.
- Label both ends of every cable. Future-you will thank you.
17The studio glass
Window between control room and vocal booth.
- Visible glass: 48"W × 30"H, centered on the 7' booth front wall.
- Height: bottom ~42–44" AFF, top ~72–74" AFF.
- NOT a basic residential double-pane. Use two separate laminated panes in isolated, sealed frames.
Control room side: 1/4" laminated glass, near vertical
Booth side:        3/8" or 1/2" laminated glass, tilted 5° from vertical
For 30"-tall glass, 5° ≈ a 2 5/8" top-to-bottom offset. The booth-side pane tilts so it reflects sound down/away from the mic, not straight back. Use gasket tape, neoprene/EPDM setting blocks, removable stops, acoustical sealant. Panes must not touch the frame hard.
Sliding glass doors, the live-room divider (a whole class on glass)
The live room gets closed off from the kitchen + stairs with a 6" wall + a double sliding glass door (soft side facing the drums). Soundproofing a sliding glass door comes down to the big three: mass, airtight, air gap, plus picking the right glass. Float glass (standard window glass) is acoustically poor; use tempered or laminate, and ideally two different thicknesses (e.g. 3/8" + 1/2", one tempered + one laminate). Below are the three graphics from the study, each explained.
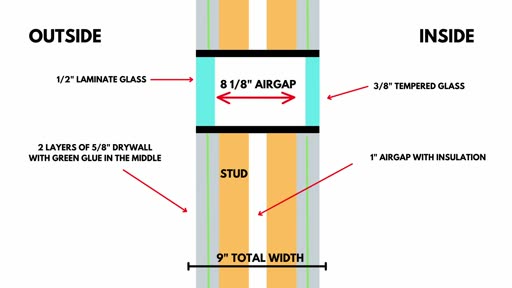
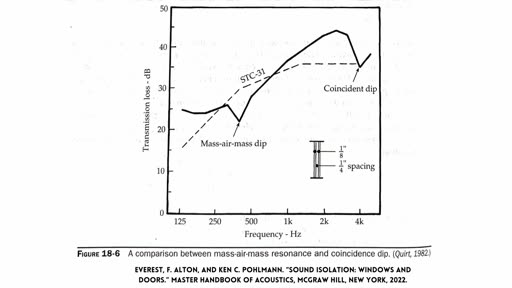
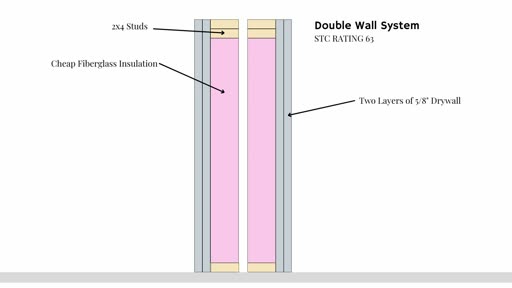
- Two sliding doors, not one, you need the air gap. Aim for an ~8" (200 mm) gap between them.
- Glass: 3/8" (10 mm) + 1/2" (13 mm), each tempered or laminate. Best combo = tempered on one side, laminate on the other. No float glass, if a vendor only offers float, walk.
- Airtight: acoustic sealant around the whole perimeter on both sides, plus gasketing + strips on the door itself so it seals shut when slid closed. The seal is the hard part with sliders and the #1 failure point.
- Target rating: STC / RW ≈ 50–60.
- Don't buy a $500–600 big-box (Home Depot / Lowe's) slider for isolation, it isn't built for it and you'll pay twice. Budget pick for a lighter need = Simonton 6500 + the laminated "Sound & Security" package; for serious isolation use a real soundproof-door vendor (see Sources).
Glass + glazing by location (the quick table)
Every transparent surface in the build: what goes there and why. The golden rule under all of it: no float glass anywhere acoustic. Use laminated (or tempered-then-laminated), and where two panes face each other, run two different thicknesses so their weak spots land on different frequencies.
| Where | What goes there | Why |
|---|---|---|
| Control room ↔ booth window | Two separate laminated panes, dissimilar (1/4" control side near-vertical, 3/8" or 1/2" booth side tilted 5°), in isolated sealed frames | Mass plus damping for isolation; the tilt aims reflections down and off the mic; dissimilar thicknesses dodge the coincidence dip. Detail above. |
| Kitchen ↔ live-room divider | Pending. David has one more idea (see the note below). Working default: double sliding glass door, 3/8" + 1/2", ~8" air gap, STC 50–60 | This wall has to keep kitchen noise out of takes; two doors with a deep gap behave like a double wall. |
| Front glass wall (fixed) | Laminated safety glass in an insulated double-pane, low-E unit, divided lites in a black steel grid | A fixed wall seals far better than a giant slider; laminated will not ring; double-pane handles Texas heat plus sound. |
| Barn-door moving leaves | Locked: a clear MARGARD leaf plus an opal multiwall leaf (polycarbonate). Alternative: laminated glass leaves | Polycarbonate is lighter on the track, unbreakable, and hurricane-rated. Full detail in Polycarbonate glazing. |
| Attic skylight | Opal multiwall for an insulated glow, or a real low-E glass skylight with a blackout shade for a star view | It sits over the lounge, not a tracking room, so the choice is about light and heat, not isolation. |
| North daylight bay | Opal multiwall (or caramel / bronze for warmer light) | Diffused daylight plus insulation, kept off the tracking envelope. |
The wall between the kitchen and the live room is not locked yet. The working default is the double sliding glass door above, but David has one more idea for this wall coming. Hold this spot until that idea is in, then lock the material here and in the table.
★Polycarbonate glazing
Polycarbonate is the barn's daylight + glass-substitute material: a low-cost, lightweight, virtually unbreakable alternative to glass for the lounge, the daylight bays, and the big door system. Three families, each with a job.
This section locks the look, the materials, and where each goes. It is not a structural spec. Before the build, the 24-foot moving door especially needs a local door / fabrication / structural pro to confirm span, wind load, track and hardware, frame, panel thickness, and attachment method.
The one rule: mass where you record, light where you hang
- Recording / control areas: heavier wall assemblies, insulation, acoustic panels, rugs, sealed doors, controlled glass. Polycarbonate stays off this envelope.
- Lounge / daylight areas: polycarbonate used strategically for light, vibe, weight savings, and that warm creative feel.
The three families
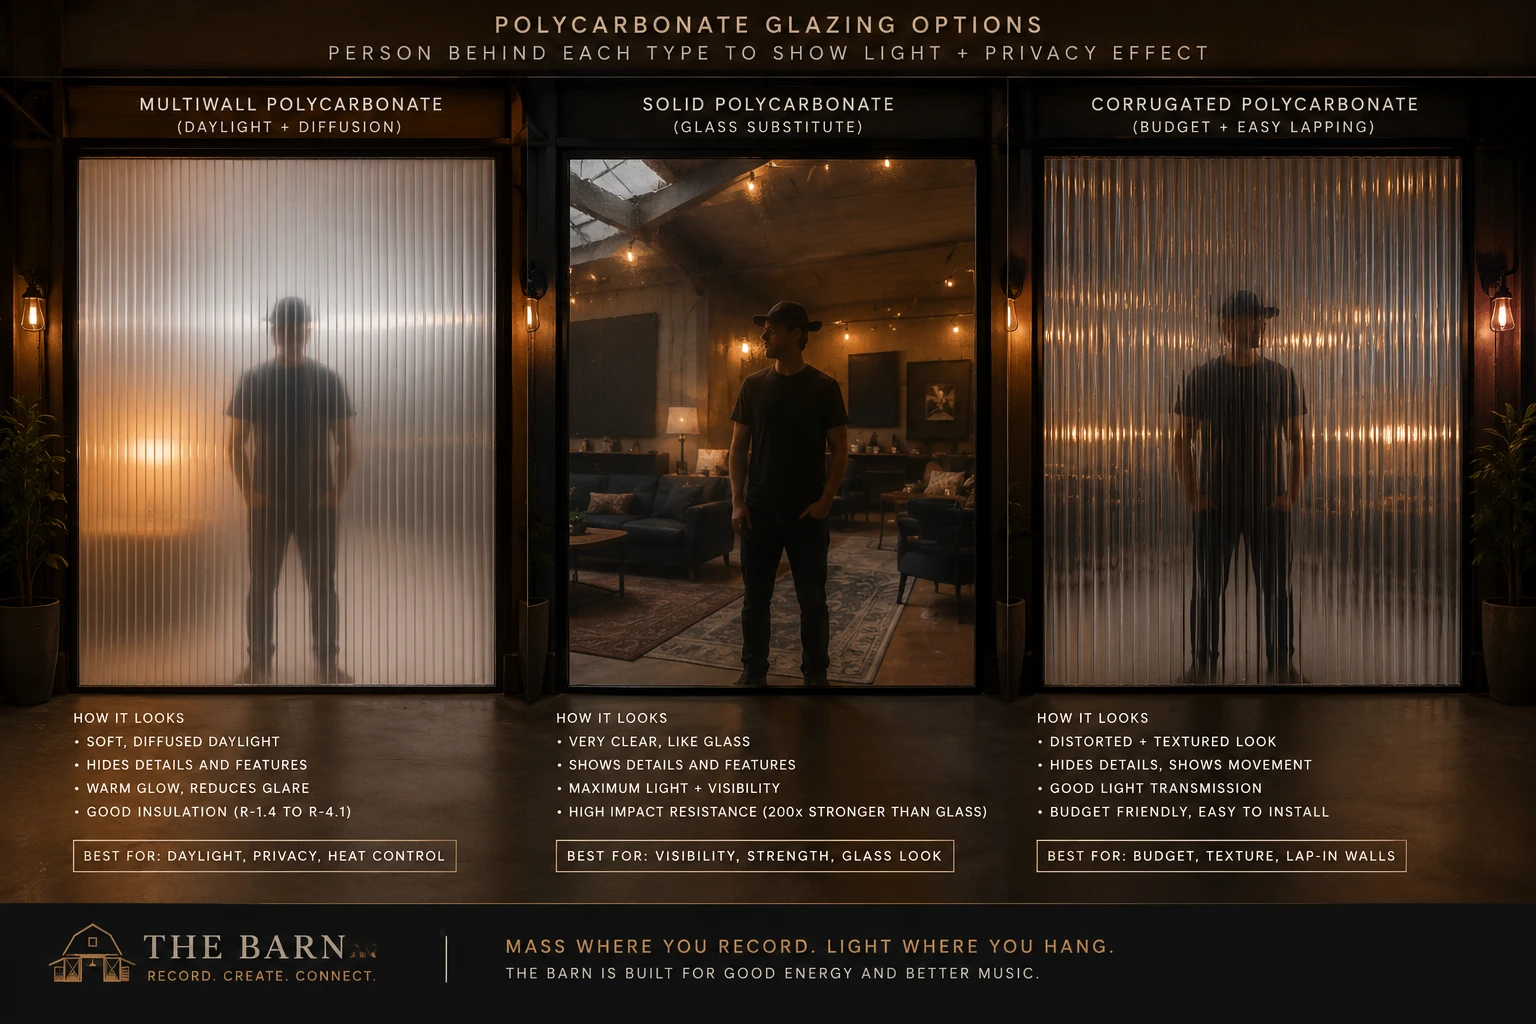
- Multiwall (fluted, air gaps) = the daylight panel. Diffused opal glow, insulated, lightweight. For skylights and daylight wall bays. Best for daylight, privacy, heat control.
- Solid sheet = the glass substitute. Clear looks like glass (~88–90% light), virtually unbreakable. Comes in clear / bronze / opal / obscure. The hard-coated grade (Lexan MARGARD) resists scratching and UV. Best for visibility, strength, the glass look.
- Corrugated (the "wavy" SUNTUF) = the cheap lap-in roof panel. Single-wall, thin, ~$2.50/sq ft. Only where it laps into corrugated metal watertight and is not a feature.
The numbers that matter
Meets Florida + Texas hurricane impact codes, which matters for big exterior panels and the barn doors (wind / storm). Premium daylight pick = Lexan Thermoclear Plus 25mm 5-wall X opal: R-3.7, 49% light, 0.70 lb/sq ft, Class A fire, 2-sided UV, 10-year warranty.
Sound: the honest version
Thick multiwall gives a real but moderate 15–23 dB reduction (the air gaps act like mini double-glazing; it is used in highway sound barriers). That is not studio isolation (a studio wall is ~50–60 dB, an observation window ~45–55). So polycarbonate is a sound barrier, never the critical isolation line. The real sound boundary stays a mass wall or the laminated-glass live-room divider (§17). Mass where you record, light where you hang.
Where each material goes
- Opal multiwall = daylight panels: the loft skylight strip (east roof bay; the barn's ~7.6:12 pitch is well over the 10% minimum) and a north-wall daylight bay (north = soft light, low heat; never a big translucent area on the west or south). Glows amber at night, a brand moment.
- Clear solid PC (MARGARD) = tough see-through where glass is overkill or risky: door vision panels, exterior windows, the dome.
- Laminated glass = the control-room / live-room observation window (mass = sound).
- Keep all polycarbonate off the tracking-room isolation envelope.
The attic skylight (locked spec)
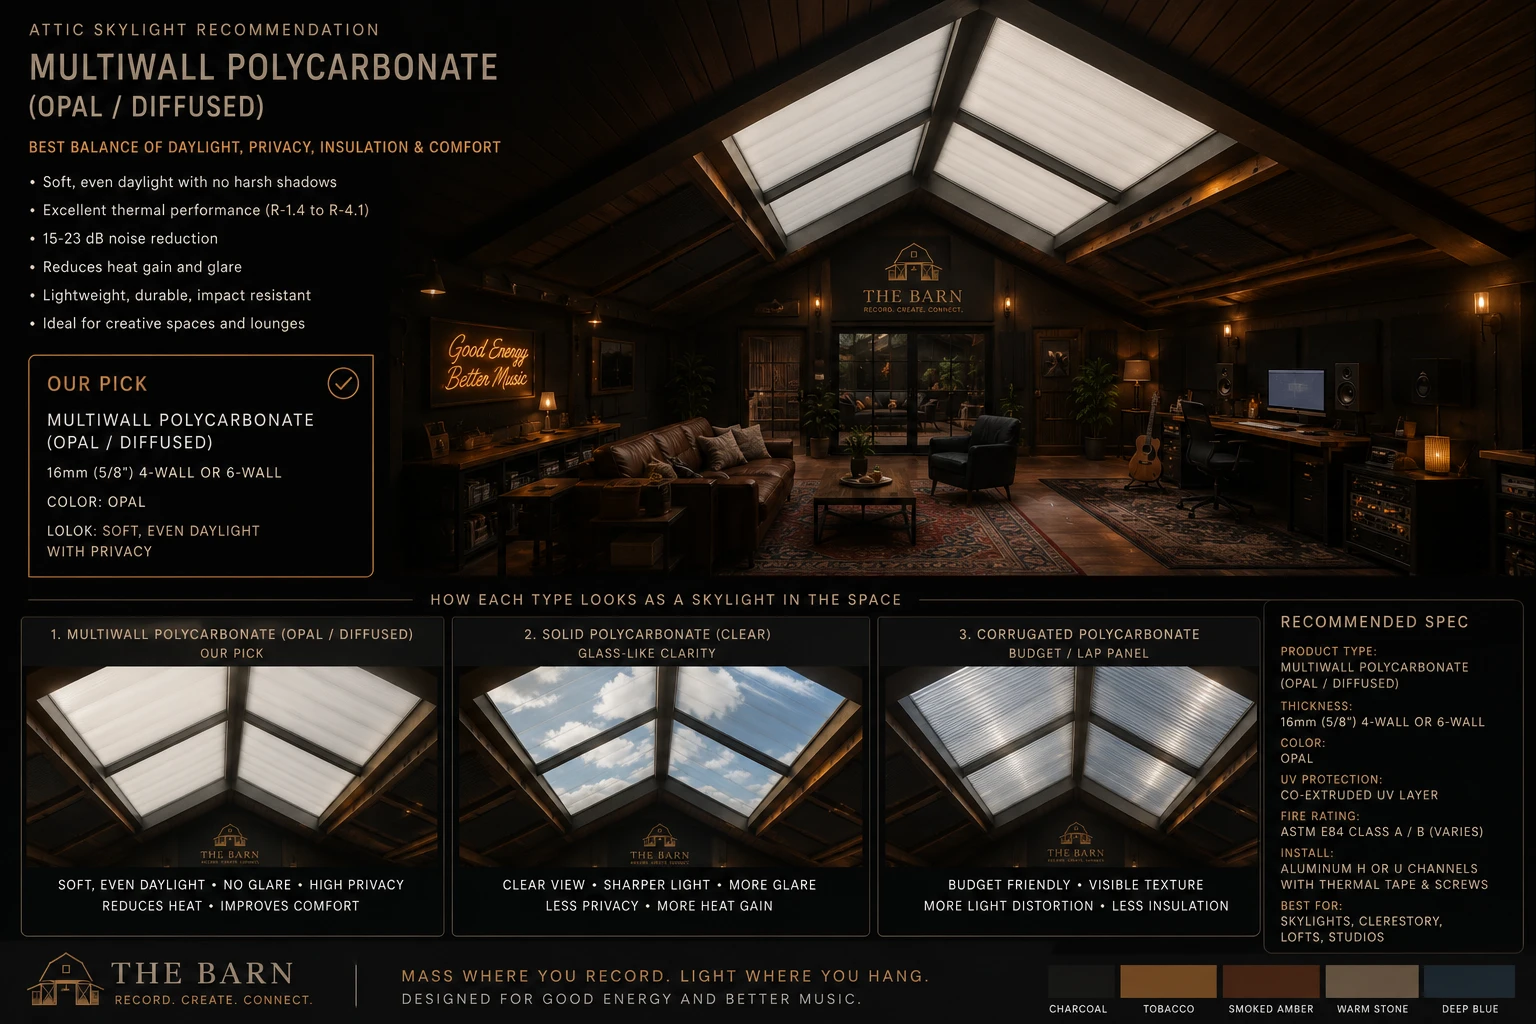
- Panel: opal / diffused multiwall polycarbonate, 16mm (5/8") 4-wall or 6-wall (the lighter, cheaper sensible pick; step up to 25mm 5-wall X for more insulation). Co-extruded UV layer, ASTM E84 Class A/B fire.
- Install: framed and curbed as a real skylight, set in aluminum H or U channels with thermal tape and gasketed screws, flute ends sealed, flutes running down-slope.
- Put it on the EAST roof bay (soft morning light, not the west afternoon bake). The barn's ~7.6:12 pitch is well over the 10% minimum, so it drains fine.
- Add an interior blackout shade for dark listening and filming, and to cut the afternoon heat load on demand.
The alternative, for a star view from the daybed, is a real low-E glass skylight with a blackout blind (heavier, pricier, a single penetration). For the lounge glow, opal multiwall wins.
Barn doors: the polycarbonate direction
This is the polycarbonate-leaf direction for the moving leaves. The next section (Barn doors) shows the wood-over-fixed-glass version. They are two options: David's call which to build, or how to combine them.
Two sliding leaves, ~12' × 11'-5" each. Run both materials, one per leaf. This beats a single giant 24' glass door: it solves the weight, heat, privacy, and cost problems at once.
- Leaf 1 = clear MARGARD see-through polycarbonate. The glass look without the glass weight. For visibility, daylight, impact resistance, a lighter moving door, a modern studio feel. Exterior 2-sided weatherable hard-coat grade (e.g. MR10).
- Leaf 2 = thick opal multiwall (25mm 5-wall X, or 32–40mm for more). For privacy, diffused daylight, insulation, glow, and less heat blast, plus the 15–23 dB sound, R-4-to-10, hurricane rating, and amber night-glow.
- Frame = steel perimeter frame in black / espresso / charcoal, so it ties to the beams and the acoustic-panel look. UV side out, sealed flute ends, gasketed screws, framed to let the panels move with heat.
- Sound isolation stays on the interior live-room divider, not the doors.
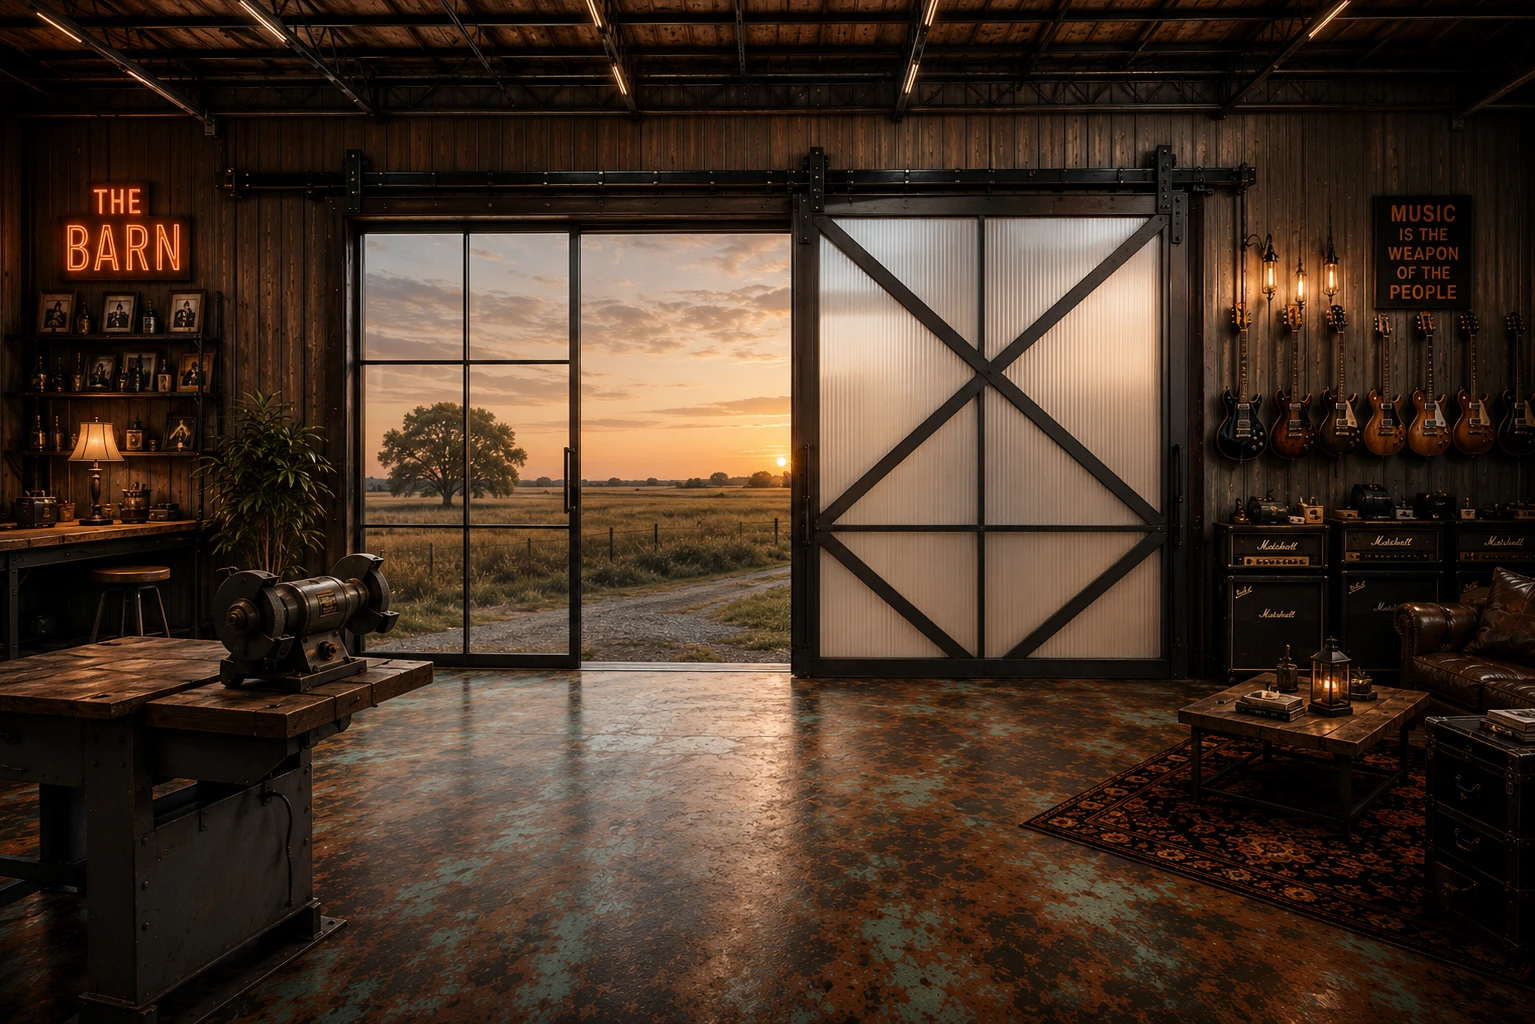
How to mount it
- Solid sheet (MARGARD) mounts like glass: captured in a frame channel on all four edges, floating on EPDM setting blocks and gaskets, trapped by a bolt-on removable stop. Never screw through the face. Size the pocket generous (~1/8" per foot of panel) with deep edge engagement so it moves with heat without popping out. Neutral-cure silicone only, never PVC against the polycarbonate. Same "glass floats on rubber" detail as §17.
- Multiwall mounts in base + cap profiles (glazing bars): UV side out (printed-film side), seal the flute ends with tape (solid on top, vented on the bottom), flutes run down-slope on a roof (10% minimum) or vertical on a wall for drainage, base profile screwed to the purlin near its middle, pre-drill oversized holes for thermal expansion (never pin it rigid or it oil-cans), EPDM-gasketed stainless screws, cap snaps on (PC) or screws down (aluminum). Peel the protective film immediately after install (sun bakes it on). Store under a non-PVC tarp, never step on the sheets.
The polycarbonate must not read as cheap greenhouse plastic. Treat it as an intentional architectural material: opal glow panels, clear smoked sections, dark steel framing, warm amber lighting behind and around it, charcoal ceiling and acoustic walls nearby. Done right it becomes brand language: smoked amber, black steel, soft daylight, industrial barn, recording lounge.
Where to buy
- Exact 25mm 5-wall X opal: Duralight Plastics (listed price ≈ $7.64/sq ft), Sheet & Film, AmeriLux (bulk), Greenhouses-Etc.
- Cheaper 25mm 3-wall opal: Plastic Building Supplies ($5–6/sq ft), ePlastics, Lowe's (Polygal).
- Local Austin (skip the freight, call for a quote): Polymershapes Austin, Laird Plastics Austin, Regal Plastics.
- Cheap corrugated opal: Home Depot SUNTUF White Opal.
★Barn doors
The front of the barn is the showpiece: a 24-foot opening that closes up dark and private, or opens to the forest. The design is a fixed glass wall as the sealed envelope, with sliding wood barn doors over it as the privacy and blackout layer. Privacy when closed. Open air when you want it.
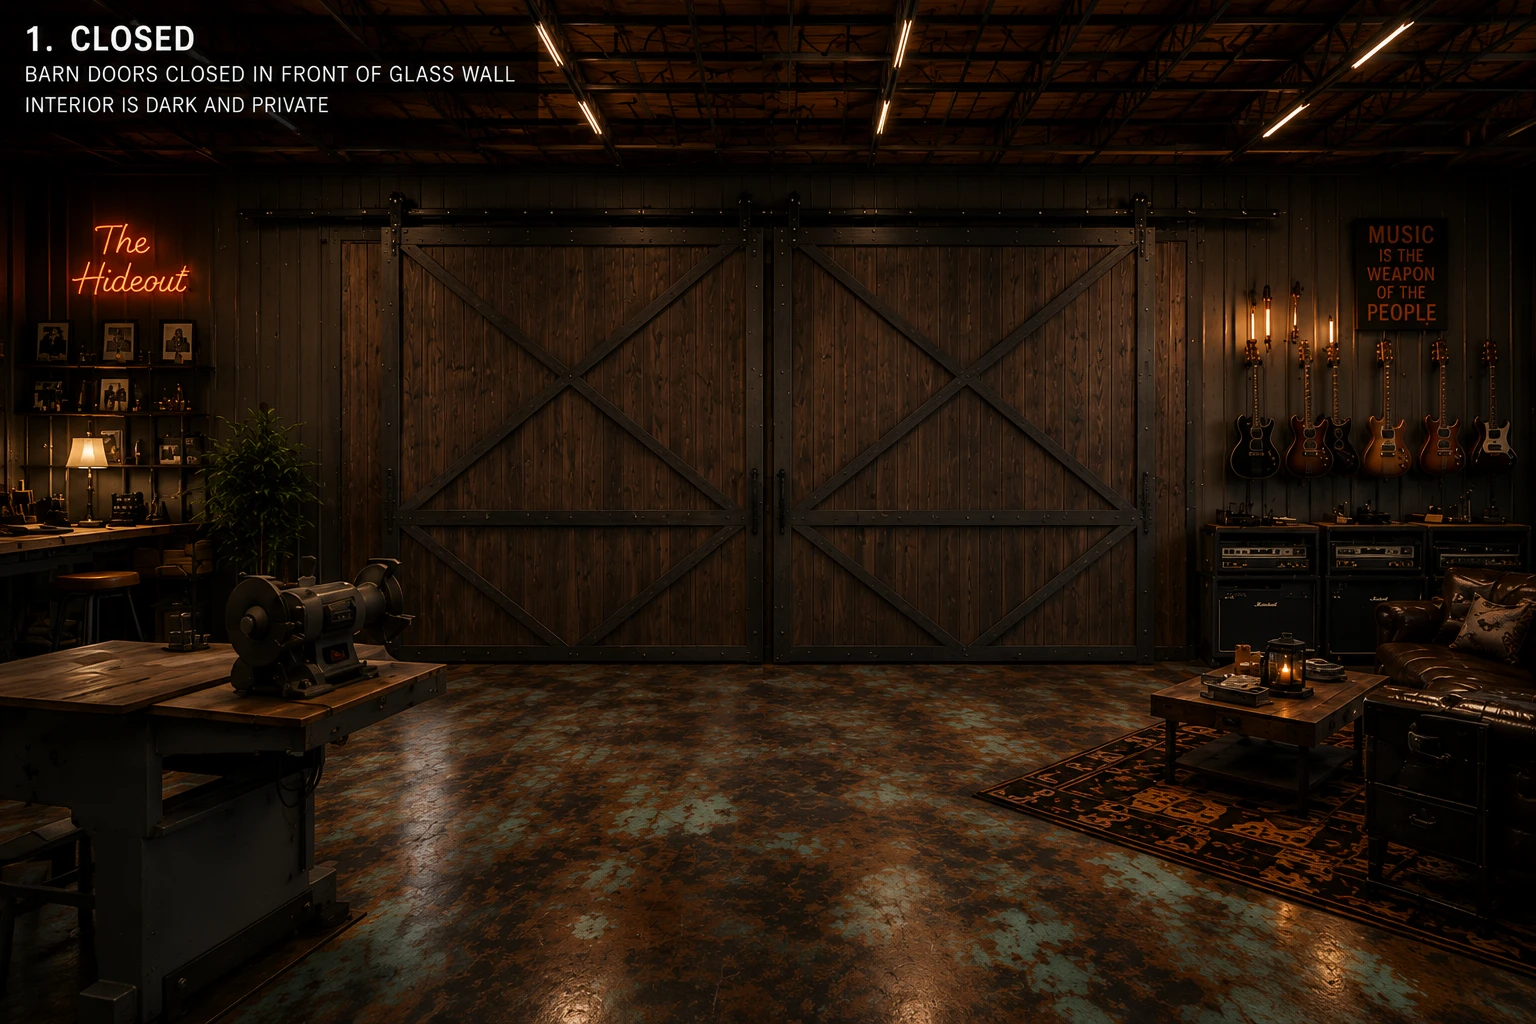
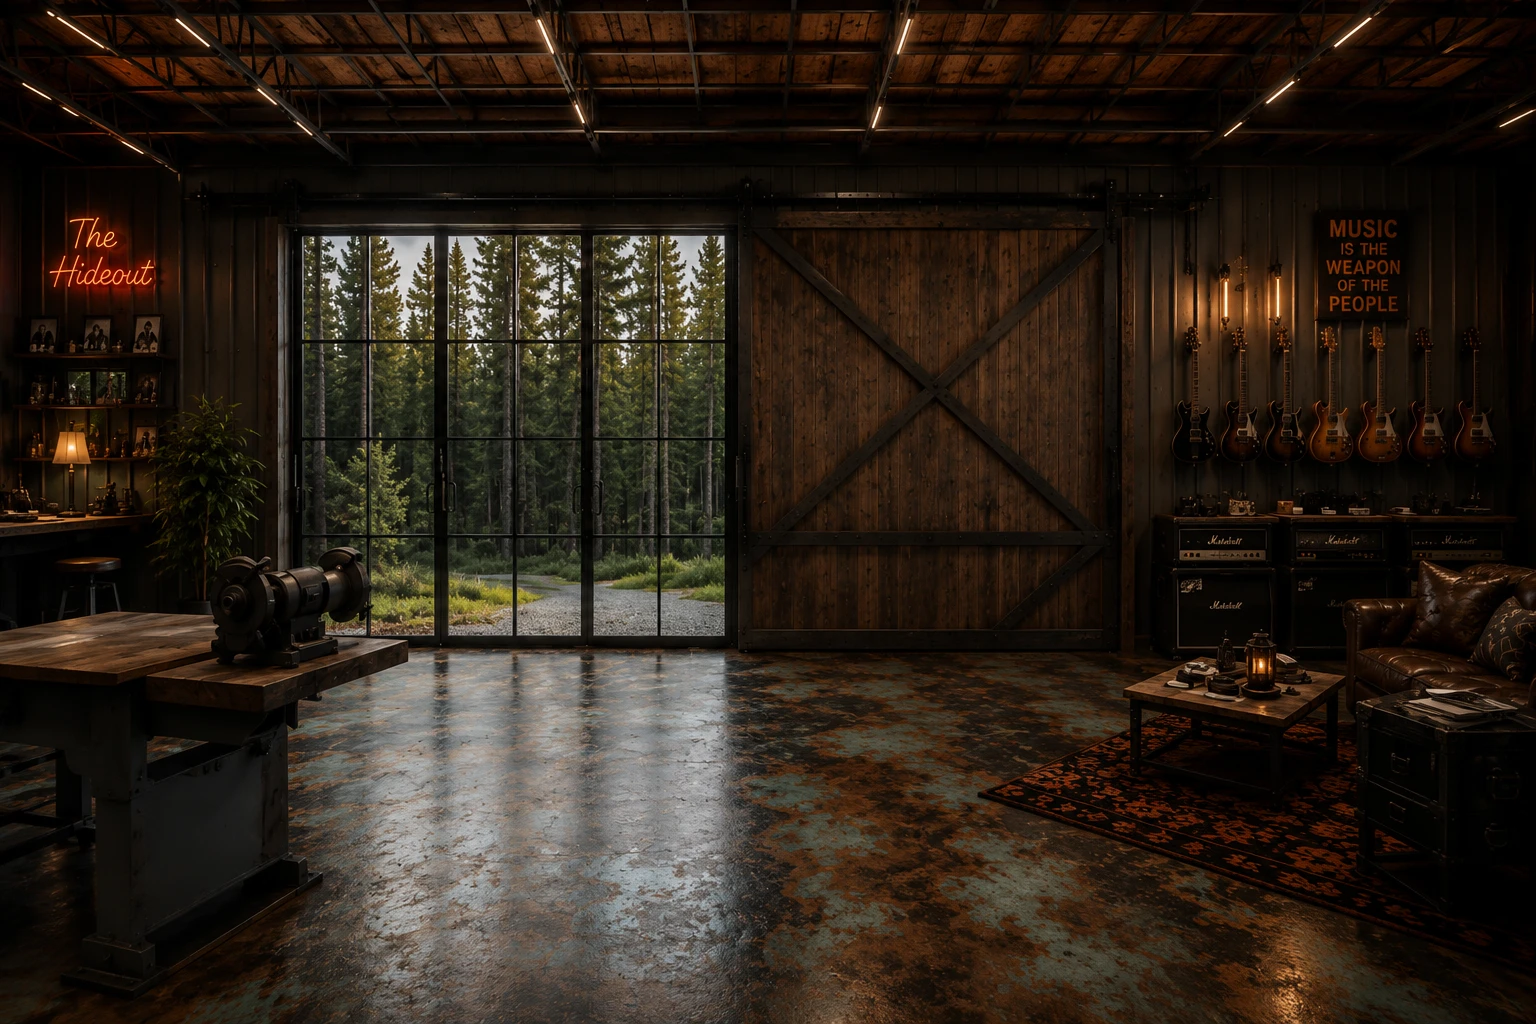
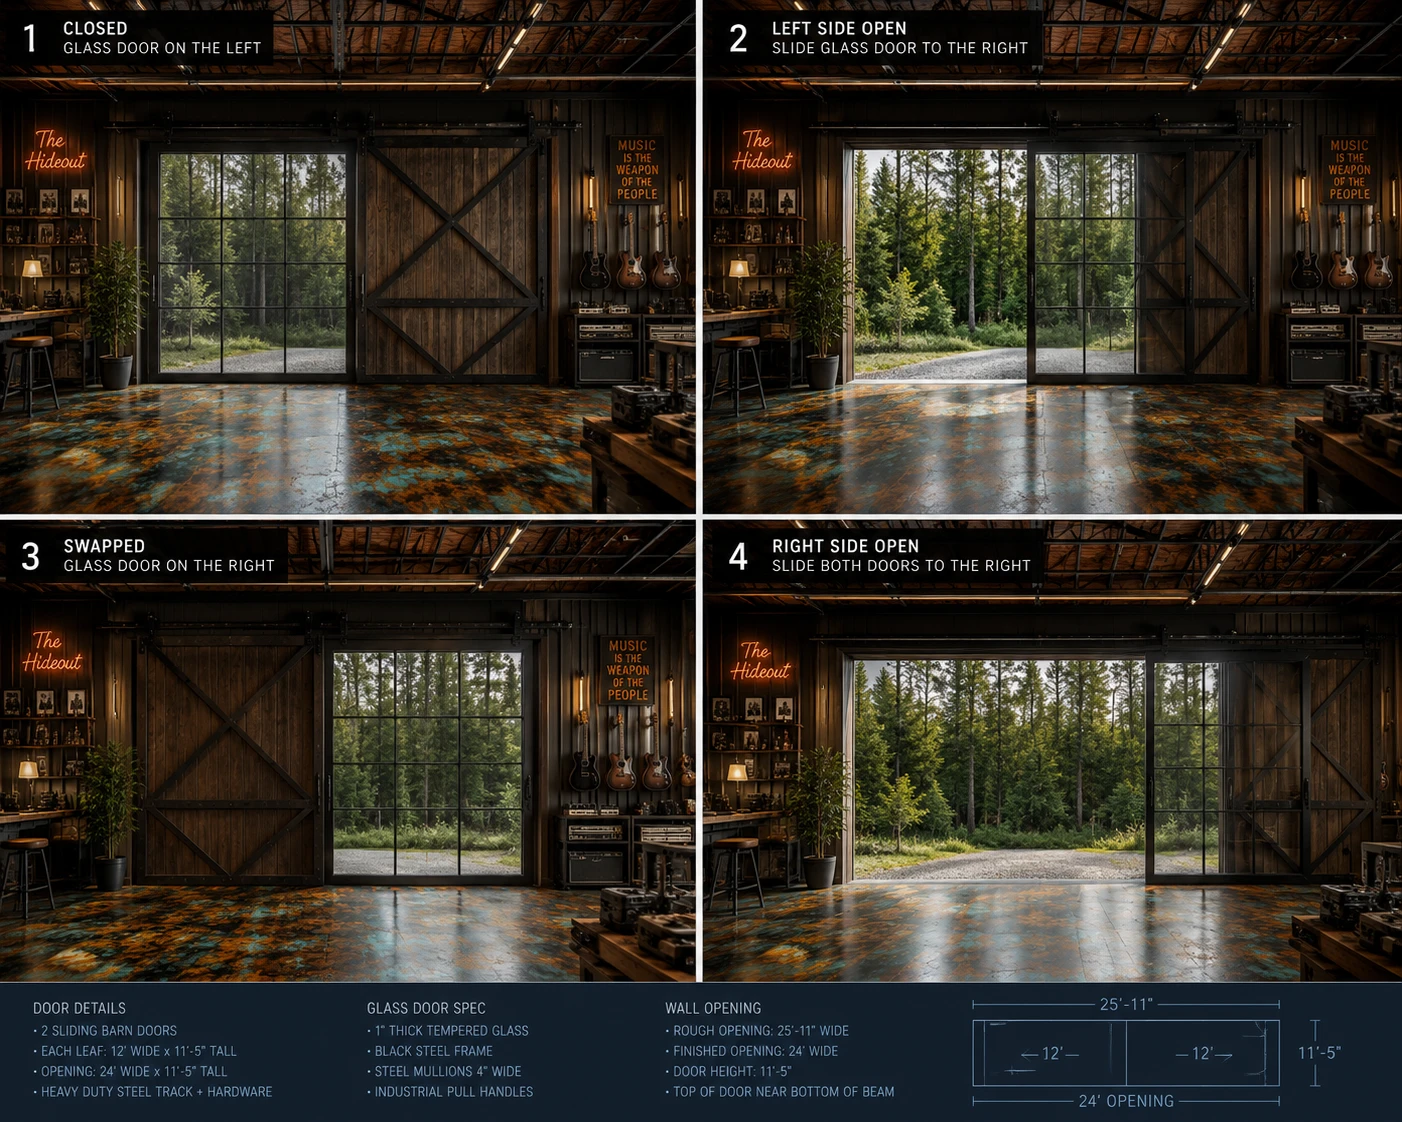
How it works (three layers)
- Fixed glass wall (the left opening) is the real weather and sound envelope. A fixed wall seals far better than a sliding glass leaf and is easy to insulate.
- The glass wall's own sliding glass doors open it up for open air when you want it.
- Sliding wood barn doors ride an outer track as the privacy, blackout, and security layer. Slide them aside for light, close them for a dark, private room. The right barn door operates independently.
- Opening: 24' wide × 11'-5" tall, in the 25'-11" front wall. Two 12' leaves.
- Glass wall: black steel frame, divided-lite grid (steel mullions). Glass = laminated safety glass in an insulated (double-pane) unit, low-E. Not single tempered: laminated so it does not ring and holds together if it breaks, double-pane for Texas heat plus sound. Full glazing detail below.
- Wood barn doors: matching X-brace leaves on a heavy-duty steel track, soft-close so they never slam, with perimeter weather seals and gaskets so the room seals airtight when closed.
- Tracks: wood doors on an outer track, glass doors on an inner track, the glass wall fixed between them. Confirm the header and jamb depth carry both tracks. The roof over a near-full-width opening rides on a big header beam, so a structural engineer signs this off.
- Floor: a bottom guide / threshold detail at the patina concrete so the doors track true.
Why this over one big sliding glass door: a sliding glass leaf large enough to fill the opening is roughly 1,800 lbs of glass on the track and is hard to seal. The fixed-wall design takes the heavy glass off the slider, seals properly, and adds the blackout option. This is the studio-correct version. (Some early renders carried a "The Hideout" working name; the studio is The Barn.)
The glass-wall alternative (real glass instead of polycarbonate leaves)
The polycarbonate leaves above are the lighter, cheaper, unbreakable default for the big doors. If you want the real thing instead, here is the glass-wall build and how the glass mounts to the bare steel frame. Glass is the premium option: heavier on the track, pricier, breakable, but unmatched clarity.
The front glass wall (a wall within a wall)
This is the move for the front: build a glass wall in front of the left barn-door opening, a wall within a wall. Make that glass wall out of glass doors, not a fixed pane, so you can slide it open into large doors, or leave it shut as a big window, whatever the day calls for. The wood barn doors slide over the whole thing for blackout and privacy. So you get three looks from one wall: a big window onto the forest, full glass doors thrown open to the air, or a sealed dark room. The wood-door blackout layers are detailed above.
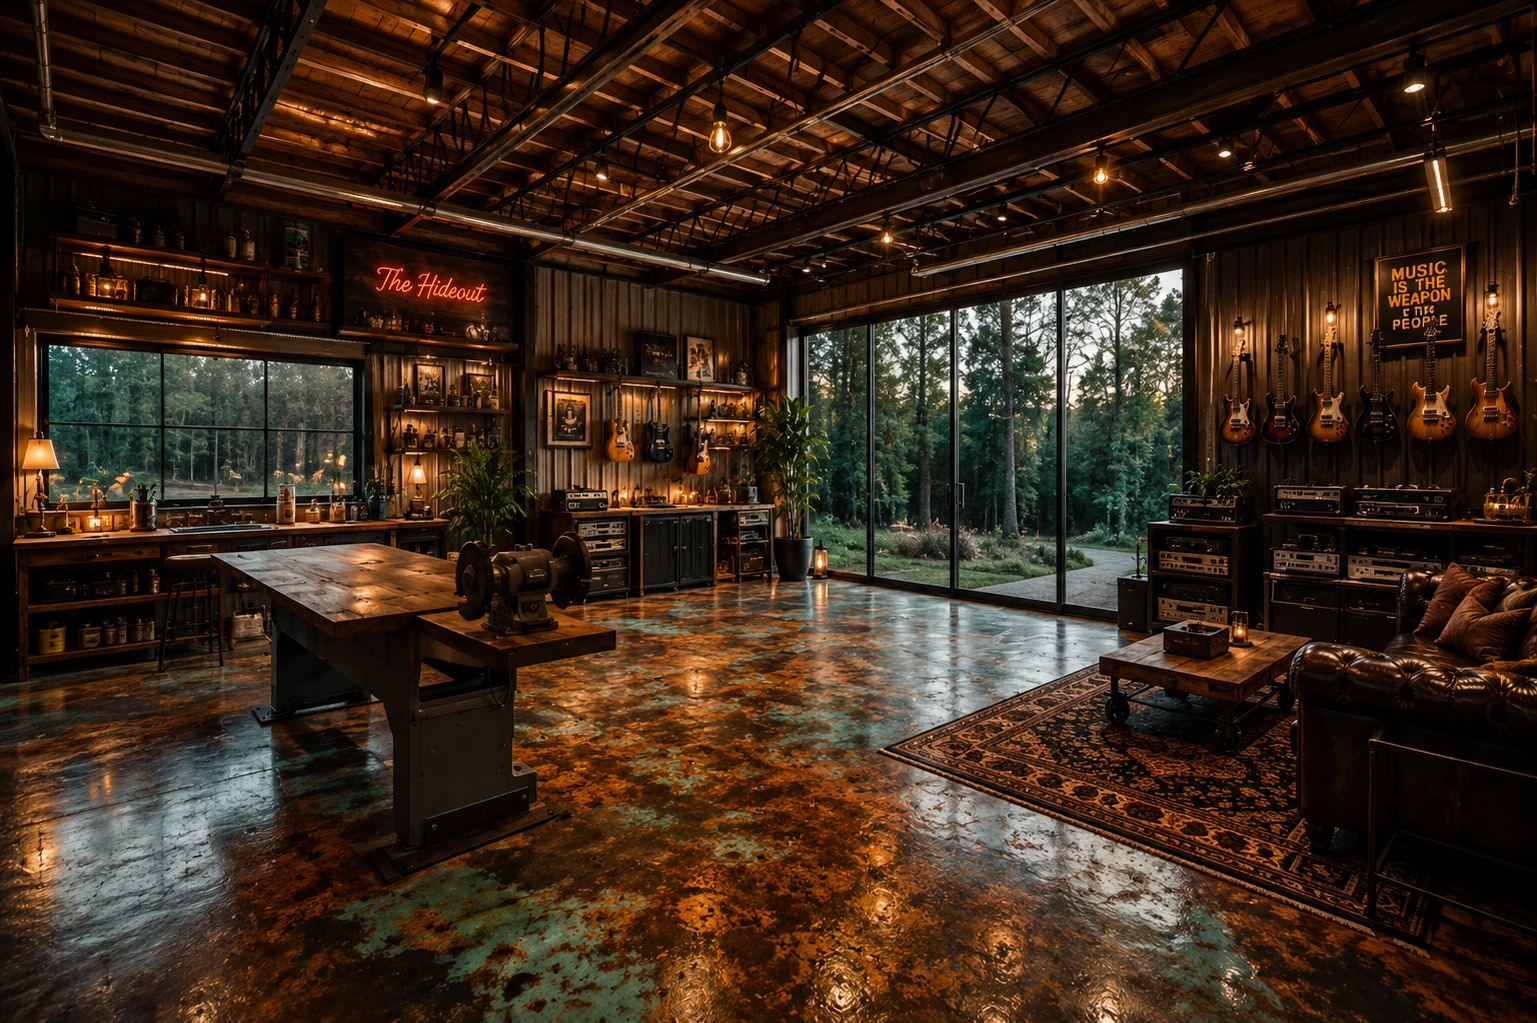
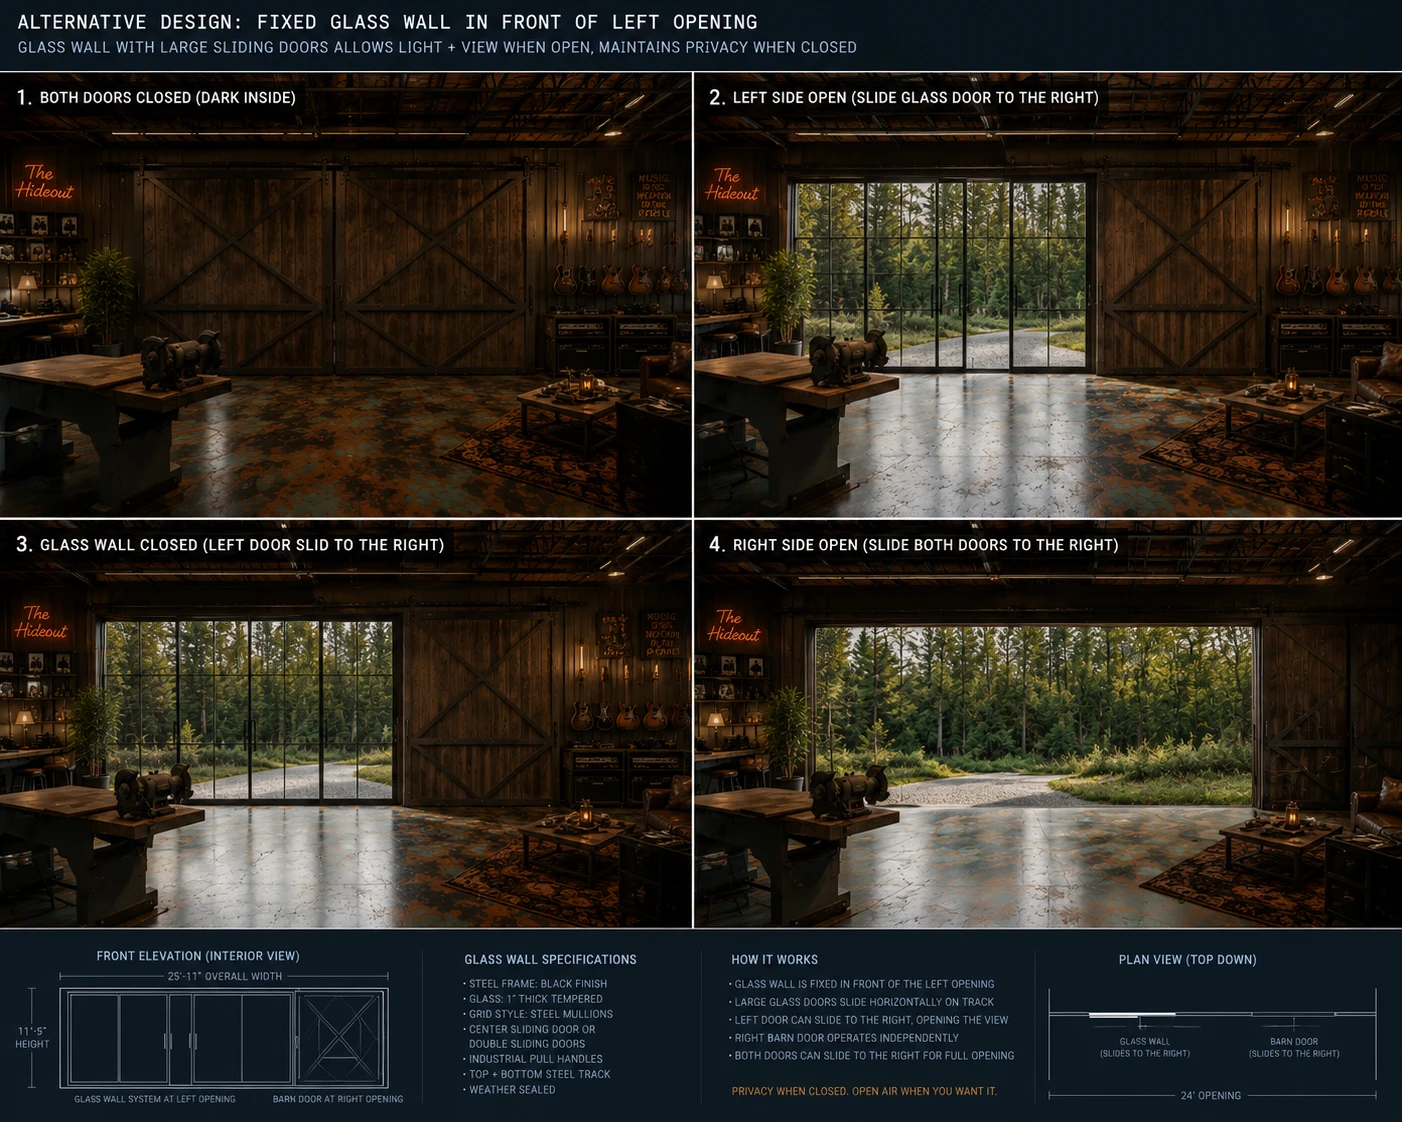
Barn-door glass + how it mounts to the bare steel frame
The barn door (and the live-room divider) is a moving, steel-framed door, so the glass has to survive the slam, block sound, and not buzz. The pick from the research: laminated safety glass, ideally tempered-then-laminated. The PVB interlayer damps vibration the way Green Glue does in a wall, so it does not "ring"; it holds together if it ever cracks; and it kills the coincidence dip. Run two different thicknesses across the leaves (3/8" + 1/2"), break each leaf into smaller divided lites (stiffer, quieter, cheaper to replace than one giant pane), and hang it on soft-close hardware rated for the heavy glass so it never slams. Plain tempered alone is strong but it rings; float glass is out (shards + poor sound).
- Finish the steel first. De-rust, prime, then paint or clear-coat (clear-coat keeps the raw / patina look but stops the rust). Never glaze onto bare rusting steel: rust swells the joint and wrecks the gaskets.
- Build the glass pocket. Weld or bolt a steel angle (about 1"×1"×1/8") around the opening as the fixed back stop the glass leans against. Add steel bars between panes for the divided lites (the industrial look, and it stiffens the door).
- Setting blocks. EPDM / neoprene blocks (80–90 durometer) at the bottom quarter-points. The glass weight rests on these, never on steel.
- Cushion both faces. A continuous EPDM wedge gasket or butyl glazing tape between the glass and the steel on each side.
- Set the laminated glass so it floats on the rubber, touching no metal.
- Trap it with a removable stop. A second steel angle bolted on, with gasket between it and the glass. Unscrew this stop to replace a cracked lite.
- Seal it airtight. Acoustic / polyurethane sealant around the whole perimeter, both faces. Doubles as the airtight seal the isolation needs.
Who builds it: cutting and welding the stops plus handling heavy laminated glass is a welder + glazier job. Or order a steel-framed glass panel made to fit and hang it as the leaf. Shopping list: steel angle 1"×1"×1/8" · EPDM setting blocks (80–90 durometer) · EPDM wedge gaskets or butyl tape · machine screws / self-tappers for the stops · acoustic or polyurethane sealant · primer + finish (or clear-coat). Scales down: for a smaller, more private door, use the same detail for a glass vision-panel set into a mostly-solid leaf.
18Sound walls
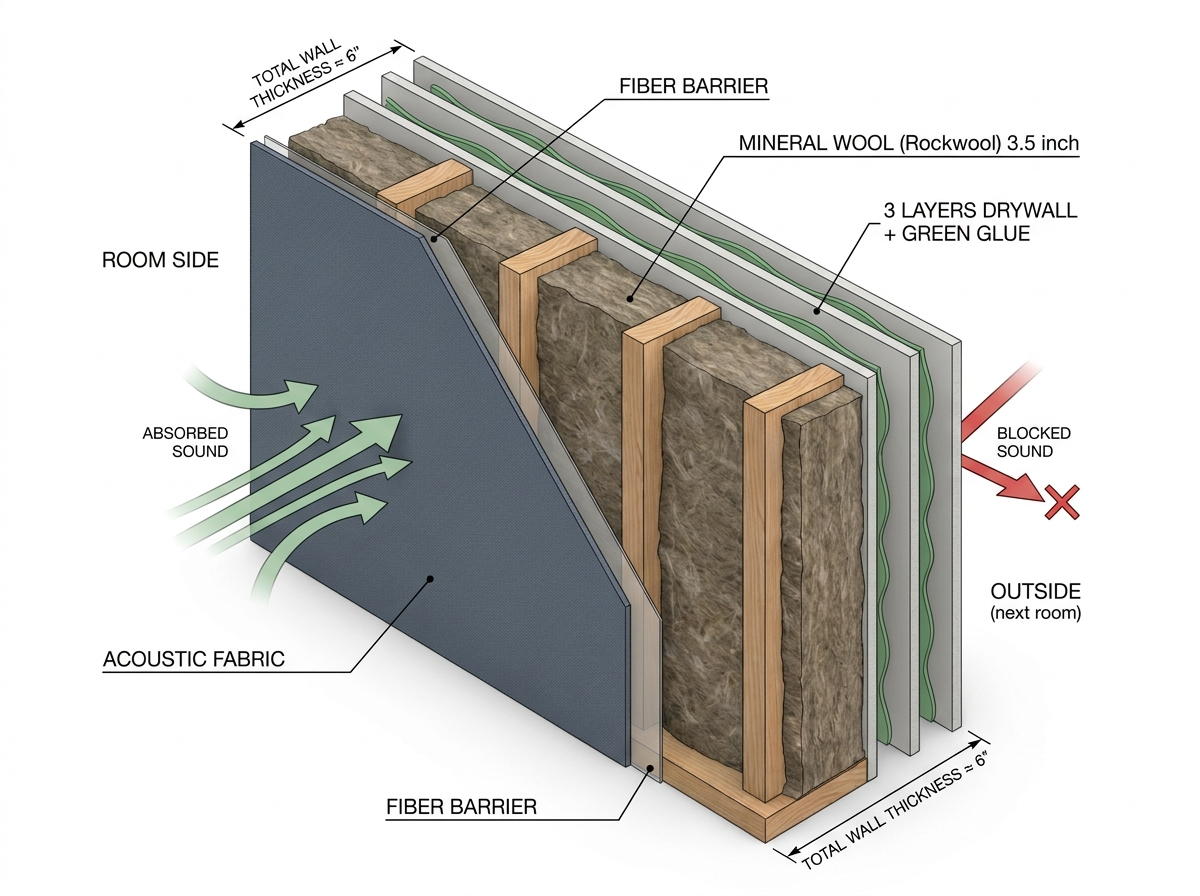
Animated wall cutaway (web version). The PDF shows the still above.
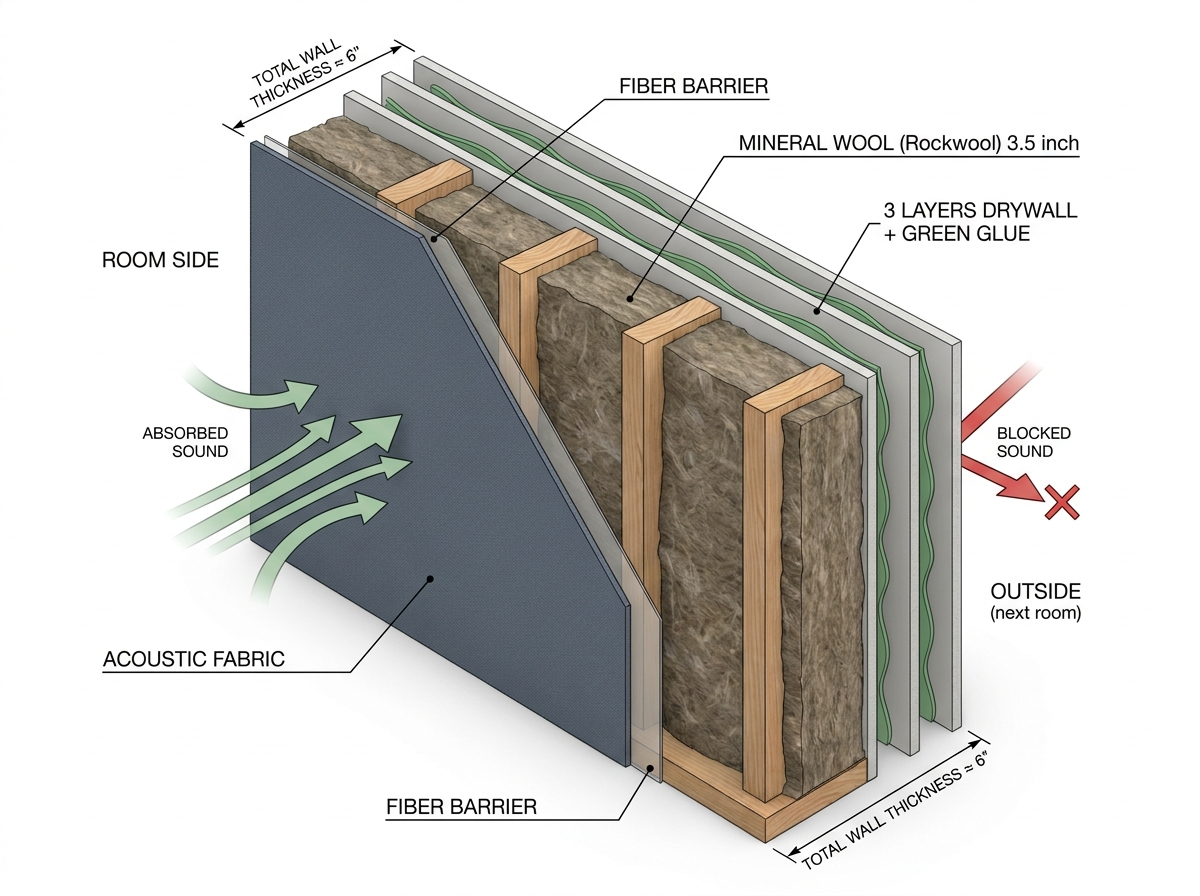
Budget-serious wall (inside-out)
Stud wall
Mineral wool in cavity
5/8" Type X drywall
Green Glue damping compound
5/8" Type X drywall
All seams sealed with acoustical sealant
Stronger practical wall (adds a mounting layer)
Stud wall
Mineral wool in cavity
3/4" plywood
Green Glue damping compound
5/8" Type X drywall
All seams sealed
The plywood layer lets you screw panels, slats, diffusers, and hardware anywhere later without hunting for studs.
Best isolation (room within a room)
Outer barn structure / outer framed wall
Air gap
Separate inner wall frame (not hard-connected)
Mineral wool in cavities
Two layers of drywall on the room side
Green Glue between the drywall layers
Acoustic caulk around every seam, corner, outlet, penetration
Compound = damping layer between two drywall layers (kills wall resonance). Sealant = acoustical caulk for sealing seams, edges, outlets, penetrations airtight. You need both.
★Floor isolation (the floated floor)
Keeping sound from traveling through the floor, the structure-borne path the dead walls do not catch. Treat this as design direction to confirm with a studio / acoustic builder, not a final spec.
The principle (what state-of-the-art studios do)
- Decouple the floor from the structure.
- Add mass on top.
- Keep the air gap controlled (the gap is the isolator).
- No rigid contact, no fasteners bridging the isolation layer.
- Seal the perimeter (open gap + acoustic caulk, never hard-packed).
- Stop the vibration paths so nothing short-circuits the float.
The ground-floor barn reality
The barn is slab-on-grade, so we are not mainly isolating downward into a room below, the ground is already a huge sink. The real concern is structure-borne vibration moving sideways through the slab between the live room and the control room (drums buzzing into the mix-position floor, the mics, the monitors).
- Float the control room / critical listening room. That is where precision matters most.
- The live room can stay on the slab unless we decide we need more isolation.
- Rugs + acoustic treatment handle room tone. The floating floor handles vibration / isolation.
- Whole-barn floated floor is probably overkill. Spend the floating-floor money on the control room only if it actually needs it.
The floated-floor stack (control room)
- VERIFY with a studio / acoustic builder first: load rating, isolator type + spacing, the mass-and-gap math.
- Do not bridge the perimeter. The floating floor never touches the walls.
- No rigid fasteners through the isolation layer. One screw that bridges the layers can ruin the float.
- Control room = priority. Live room = optional.
- Spring isolators only if deeper (low-frequency) isolation is needed.
A floated floor only works if the walls, ceiling, and details do not short-circuit it. One accidental rigid connection, a screw, a pipe, a hard-packed edge, or a wall built across the float, and you lose the whole benefit.
The loft is a different problem (wood-framed, sitting above the rooms below), so its floor gets a separate, budget DIY decoupled sandwich, see The Attic (2nd floor).
19Ceiling, floor, doors
Ceiling
- As tall as the barn allows. Control room min 9', ideal 10–12'. Live room: keep it tall.
- Treat the ceiling like a wall for isolation where there’s a room above (the loft): mass + decoupling + sealing.
- Deep absorption clouds (over the desk, over the singer) are treatment, added after construction.
Floor
- Concrete slab = good mass already. Build framed walls on a sill gasket / isolation tape to start decoupling. Floating floor only if budget + isolation needs justify it (see Floor isolation).
- No rattles, no hollow spots under the listening or mic positions.
Doors
- Doors are a top failure point. Do not cheap out.
- Heavy solid-core doors with full perimeter seals + automatic drop bottoms.
- For high isolation between loud rooms, plan two doors (a sound lock) where space allows.
- Seal the frame to the wall. A great wall with a rattly door is a bad wall.
20Acoustic treatment (per room)
REPEAT THE MEASUREMENT STEPS (§7) BEFORE COMMITTING TO ANY TREATMENT PLAN. Re-measure the room with the desk, console, chairs, racks, couch and every fixed item in place, and write down what's in the room. Furniture, gear and the desk change the modes and the reflections, so the numbers shift. Once everything is in, repeat the diagnosis and re-tune the plan to the new measurement. The frequencies in this manual are the starting target, not the final word.
Treatment goes in after walls are built and sealed, then you tune.
Control room
Your walls are open studs + mineral wool + fabric, so they already handle mid/high absorption and first reflections. No extra panels needed there. The one thing thin walls miss is deep bass, so the real work is corner trapping. Watch the opposite risk too: with absorptive walls everywhere, don't over-deaden. Keep the floor hard and skip a full rug.
The honest read from the mode math (§7): your three problem modes are 31.8, 41.4 and 59.2 Hz. Porous traps (even big ones) fully control ~59 Hz and up, but they physically can't reach the lowest two in a 9'6" room (quarter-wave depth is ~8.8 ft at 32 Hz, ~6.8 ft at 41 Hz). So the plan is layered:
- Layer 1, deep corner traps (the foundation): full-height DIY Rockwool superchunk in all 4 vertical corners (spec below). Covers 59 Hz and up, the dense pile-up, and the Schroeder region, and it collapses the modal ringing. This is the job the 3.5" walls can't do.
- Layer 2, tuned traps for the lowest two modes: porous can't reach 32 and 41 Hz, so add pressure-based tuned traps (membrane/diaphragmatic, e.g. GIK Scopus class, ~10" deep) mounted flat in the corners or against the wall where pressure is highest. Don't pre-buy the tuning. Build the room, measure it (§7), then tune to the measured peaks (modes shift a few Hz once the real shell is up).
- Layer 3, placement + multiple subs: your bottom end has nulls (notes that vanish), and no amount of absorption fills a null. Dual subs plus dialing in speaker, sub and seat positions is what smooths those gaps. Traps kill the ring; placement and subs fill the holes. Use both.
- Ceiling: deep cloud over the desk if the ceiling is hard. Rear wall: deep trapping, or some diffusion to keep life. Symmetry: left = right.
What: triangular stacks of Rockwool filling each vertical corner floor-to-ceiling. Corners are where every mode peaks, so that's where a trap works hardest, and full-height loading is what buys the real decay reduction (partial pieces barely move the needle).
Depth sets how low it reaches (each doubling of depth is about one octave lower): 6" is ~125 Hz, 12" is ~70 Hz, 17"+ superchunk is ~50 Hz. Build the triangle face (hypotenuse) at ~2 ft across the corner, which gives ~17" of depth, floor-to-ceiling. Bigger is better down low.
Material: go LOW density, not dense board. For deep bass the right fill is light, fluffy mineral wool (~30–50 kg/m³, 2–3 PCF). Rockwool Safe'n'Sound (~40 kg/m³, ~$0.40/ft², stocked at Home Depot) is the sweet spot. Don't use dense rigid board (Rockboard 80, OC705, RW3) in the corners: too dense reflects the long waves instead of soaking them up. Wrap in your fiber barrier + fabric.
Per corner (9'6" tall, ~2 ft hypotenuse) is roughly 5 Safe'n'Sound batts cut into triangles (8 triangles per batt, stacked floor-to-ceiling), so ~20 batts for all 4 corners. Behind any straddled (non-solid) panel, leave an air gap up to about 1:1 gap-to-material to reach lower for free. The door sits ~1.4 ft off its corner, so the trap still fits.

DIY all four corners is about $263: 20 Safe'n'Sound batts (2 bags, ~$118) + acoustic fabric (~$90) + a light frame (~$55). A weekend of cutting and stacking.
The same coverage from GIK is about $5,835: roughly 12 Soffit corner traps at $399 ($4,788) plus 2–3 Scopus tuned traps at $349. DIY saves about $5,500, roughly 22× cheaper for the same broadband corner trapping. You build for a living, so this is squarely in your wheelhouse, and you can make the chunks deeper than any off-the-shelf trap to reach lower.
The one thing worth buying, later: the lowest two modes (32 & 41 Hz) sit below what any porous trap can reach in a 9'6" room, so they want a tuned membrane trap on top. DIY a sealed plywood-faced box, or buy one GIK Scopus ($349), but only after you measure the built room and confirm they ring.
Yes, but know what they do. Bass traps do not move your mode frequencies (your dimensions set those, and they're permanent). What corner traps do is cut the ringing and decay (roughly quarter the room's Q), which is exactly what cures boomy, one-note bass. Steady-state, they only shave about 1–2 dB off the peaks. The lowest mode (32 Hz) you tame, never delete. The vanishing notes are a placement problem (Layer 3), not an absorption one. Traps are the decay fix; placement and subs are the evenness fix.
Vocal booth
Thick absorption, corner treatment, a soft ceiling cloud. Some adjustable/movable treatment so it isn’t lifeless. Avoid thin foam as the only solution.
Live room
Keep some life. Control only the harsh reflections. Movable panels / gobos to retune per session.
★Venue vs studio: the layered system
The barn is doing two acoustic jobs at once, and they are not the same job. The shell and the open rooms (lounge, school, events) want a venue treatment that sounds good and looks pro. The studios (control room, booth, live room) want isolation and accurate sound. Treat them differently. Serious venues never confuse the two.
- ISOLATION = stop sound leaking in or out: mass, airtight construction, separated walls, room-within-room, sealed doors, HVAC silencers, concrete.
- ROOM TREATMENT = make the room sound good: absorbers, diffusers, reflectors, clouds, baffles, curtains, bass traps.
- The shell foam does NEITHER acoustic job. Closed-cell foam + the black coating are survival: condensation, heat, air-seal, fire, and the dark look. They give you a surface; the sound work happens on and inside it.
Who does what (the three layers)
| Layer | What it is | Its job |
|---|---|---|
| The shell | closed-cell spray foam on the metal + black/charcoal intumescent coating | Survival: condensation, heat, air-seal, fire cover, the industrial look. Not acoustic. (§12 Phase 3.) |
| The studios | room-within-room: independent framing, mineral wool, double 5/8" drywall + Green Glue, sealed doors, isolated HVAC | Isolation + accurate monitoring (§18 / §19). |
| Open / lounge / school | the venue-treatment palette below | Make the big rooms sound good and read like a real performance room. |
The venue-treatment palette (for the open areas)
What real theaters, clubs, and auditoriums actually use. Pick from these for the lounge, the school rooms, and the event floor:
- Fabric-wrapped absorbers. Mineral wool core wrapped in acoustic fabric, the most common visible treatment in venues. Predictable, tunable, fire-rated when spec'd, repairable, clean. Black or charcoal on sidewalls, back walls, and lounge walls.
- Slatted / perforated wood panels. Walnut slats or perforated wood with black absorption behind. The warm mid-century barn look while still controlling reflections, and it survives public traffic better than soft fabric. This is the one that makes it feel like a real room, not an office.
- K-13 / SonaSpray black acoustic ceiling (hold off, optional later). Spray-applied acoustic cellulose for big exposed-ceiling areas: fast, seamless, industrial. This is not the shell foam (this one is acoustic, the foam is thermal). Design call: do NOT make it part of the initial build. First see how the space feels with the matte-black shell + the finished rooms + wood + lighting + treatment; you may not need it over large areas at all. Bring it back only for a specific space if reverb measurements show it is needed. If used: keep it OUT of the tracking rooms (sheds fine dust near mics) and away from the kitchen, and confirm it bonds over the coated foam.
- Clouds, baffles, reflectors, diffusers. Shape where the sound goes, do not just kill it. Absorptive clouds over the listening and desk positions, wood diffusion on rear and upper walls. Too much absorption makes a music room dead; too many hard surfaces make it harsh.
- Variable acoustics. Heavy curtains, gobos, movable panels. Switch the room between lessons, writing, listening, events, comedy, film, and live recording. A room that is right for speech is too dead for music, so variable treatment lets it adapt.
They do not trust spray foam alone for sound (that is shell survival, not acoustics), and they do not just glue cheap wedge foam everywhere (that is a bedroom / podcast move). Real rooms use thicker absorbers, tuned cavities, slats, fabric systems, diffusion, reflectors, bass control, and proper construction, all designed around the room, not guessed.
- Shell first: closed-cell foam on the metal + the black intumescent coating. The envelope.
- Frame the studios: room-within-room control room, booth, and live room inside the shell.
- Treatment last: the palette above in the open areas; corner bass traps + the soft fabric-over-wool walls in the studios (§20).
- Then measure and tune (REW), and add variable curtains and panels so the room can change for the night.
★The look outside: paint, finishes & the Oven HQ campus
Inside is the future-industrial speakeasy. Outside the rule is different: warm, timeless, grounded in nature. A dark charcoal Texas barn that reads as an honest old building from the road, then opens into a world-class studio. The same exterior language carries to the second building, The Shop, so the whole property reads as one place: The Oven HQ.
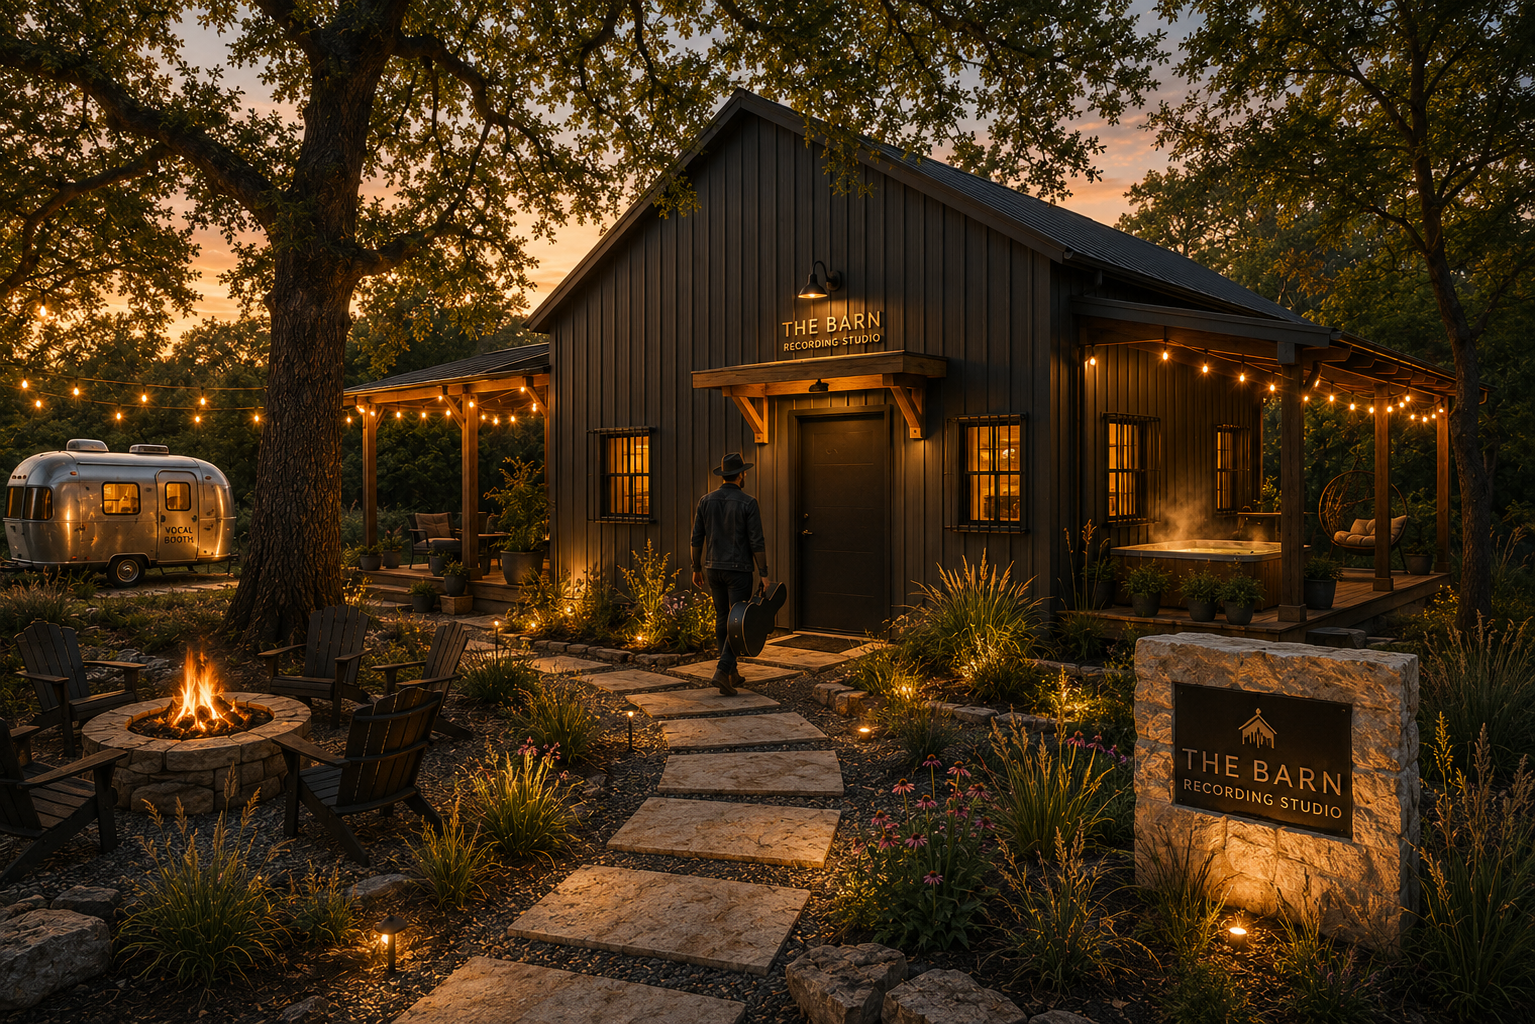
Exterior paint + finish spec
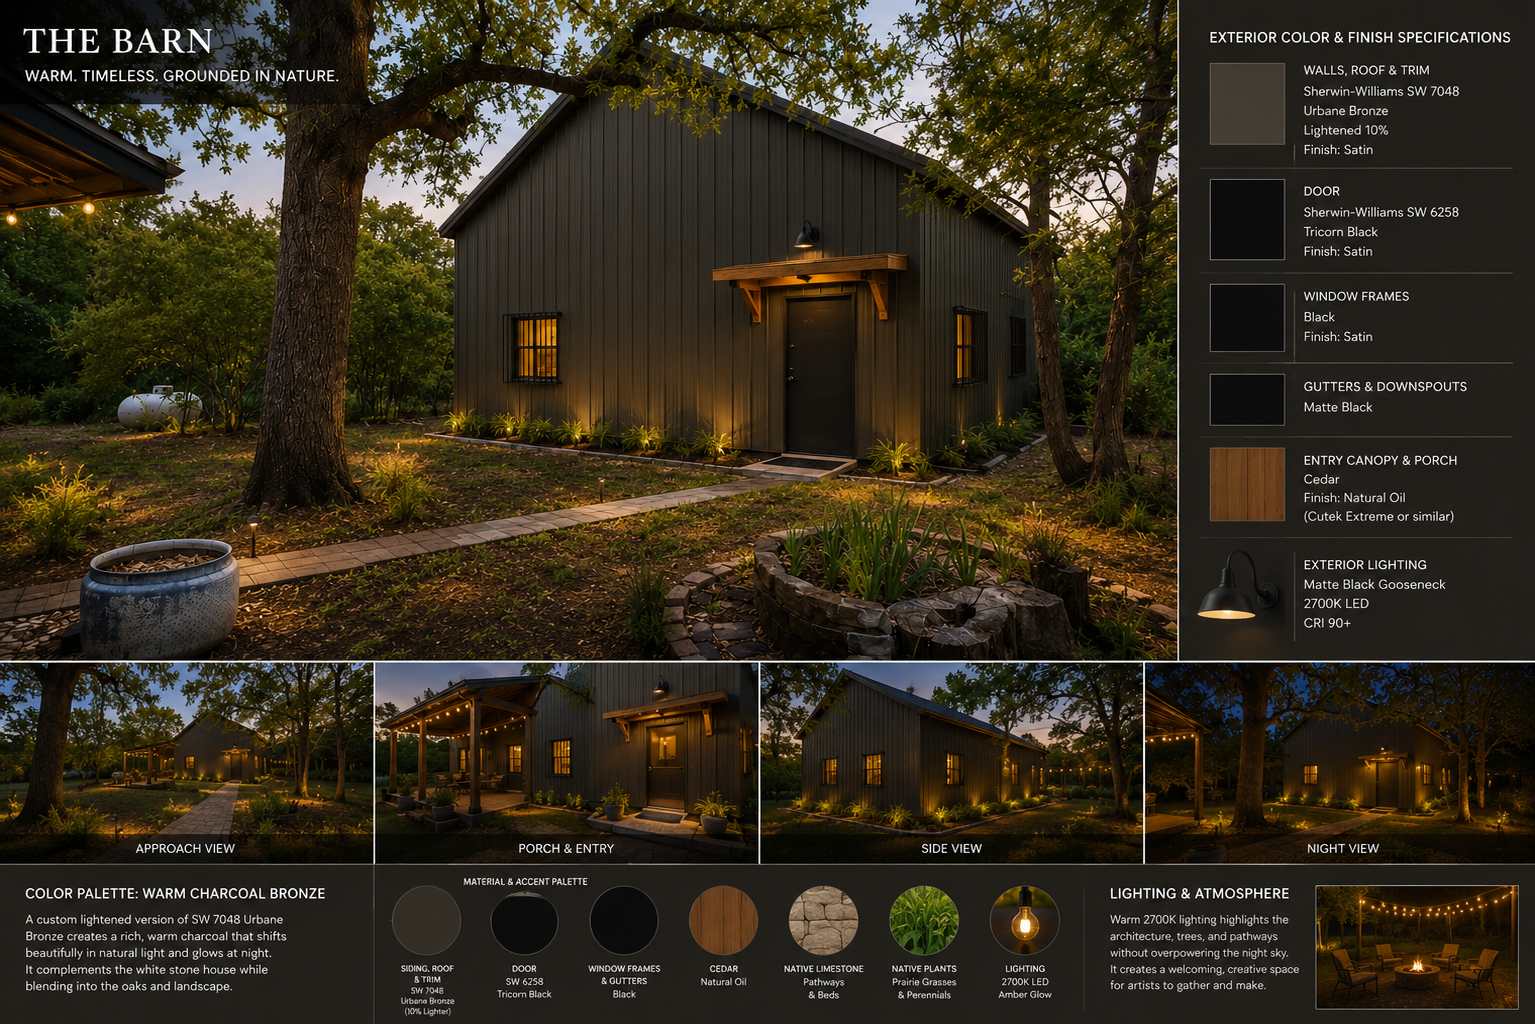
- Walls + roof + trim: Sherwin-Williams SW 7048 Urbane Bronze, lightened ~10% (keeps the metal ribs visible in full Texas sun instead of reading flat-black). One color on the whole building so it looks like a single clean object. Satin (or Low Lustre when spraying large metal). Never flat.
- Doors: SW 6258 Tricorn Black, Satin (not glossy).
- Window frames: Black, Satin. No white trim anywhere.
- Gutters + downspouts: Matte Black. Hardware: powder-coated black, not stainless.
- Entry canopy + porch: Western Red Cedar (or thermally-modified ash), natural-oil finish (Cutek Extreme or Rubio Monocoat). Consider a 4–6 ft cedar entry canopy over the main door on black steel brackets, shelter + a stronger entrance + warm wood without changing the barn's simple shape.
- Exterior lighting: matte-black gooseneck, 2700K LED, high CRI (90+). Barn Light Electric / RAB / Hinkley. Every fixture on the property matches so the whole place glows the same warm color at night.
Metal siding wants an industrial coating, not house paint: SW Pro Industrial DTM Acrylic (direct-to-metal) if the existing finish is sound after a clean + prep, or Pro Industrial Waterborne Alkyd Urethane for max durability / worn siding. Have the SW store spec the right primer + topcoat for the existing panels.
Order four samples and paint 2'×2' sections on different sides of the barn: ① SW7048 Urbane Bronze · ② SW7048 lightened 10% · ③ SW7069 Iron Ore · ④ SW7018 Dovetail. Look at them in morning sun, midday, sunset, and under the 2700K lights at night before committing. Full-strength Urbane Bronze can read ~5% too dark on big metal in Texas sun, that's why the 10%-lighter mix is the lead.
Texas prairie, not suburb: Little Bluestem, Mexican Feather Grass, Gulf Muhly, native limestone. Refined around the Barn, simpler and practical around the Shop.
The campus: The Oven HQ
Two buildings, one identity. The Barn (create music) and The Shop (build the technology) wear the same exterior language so they read as one headquarters under the same live oaks, not two unrelated metal buildings. The paint stays the same; the personality comes from purpose, landscaping, and architecture. That's the move every real campus uses, Apple Park, Tesla, Magnolia, Fender's Corona factory.
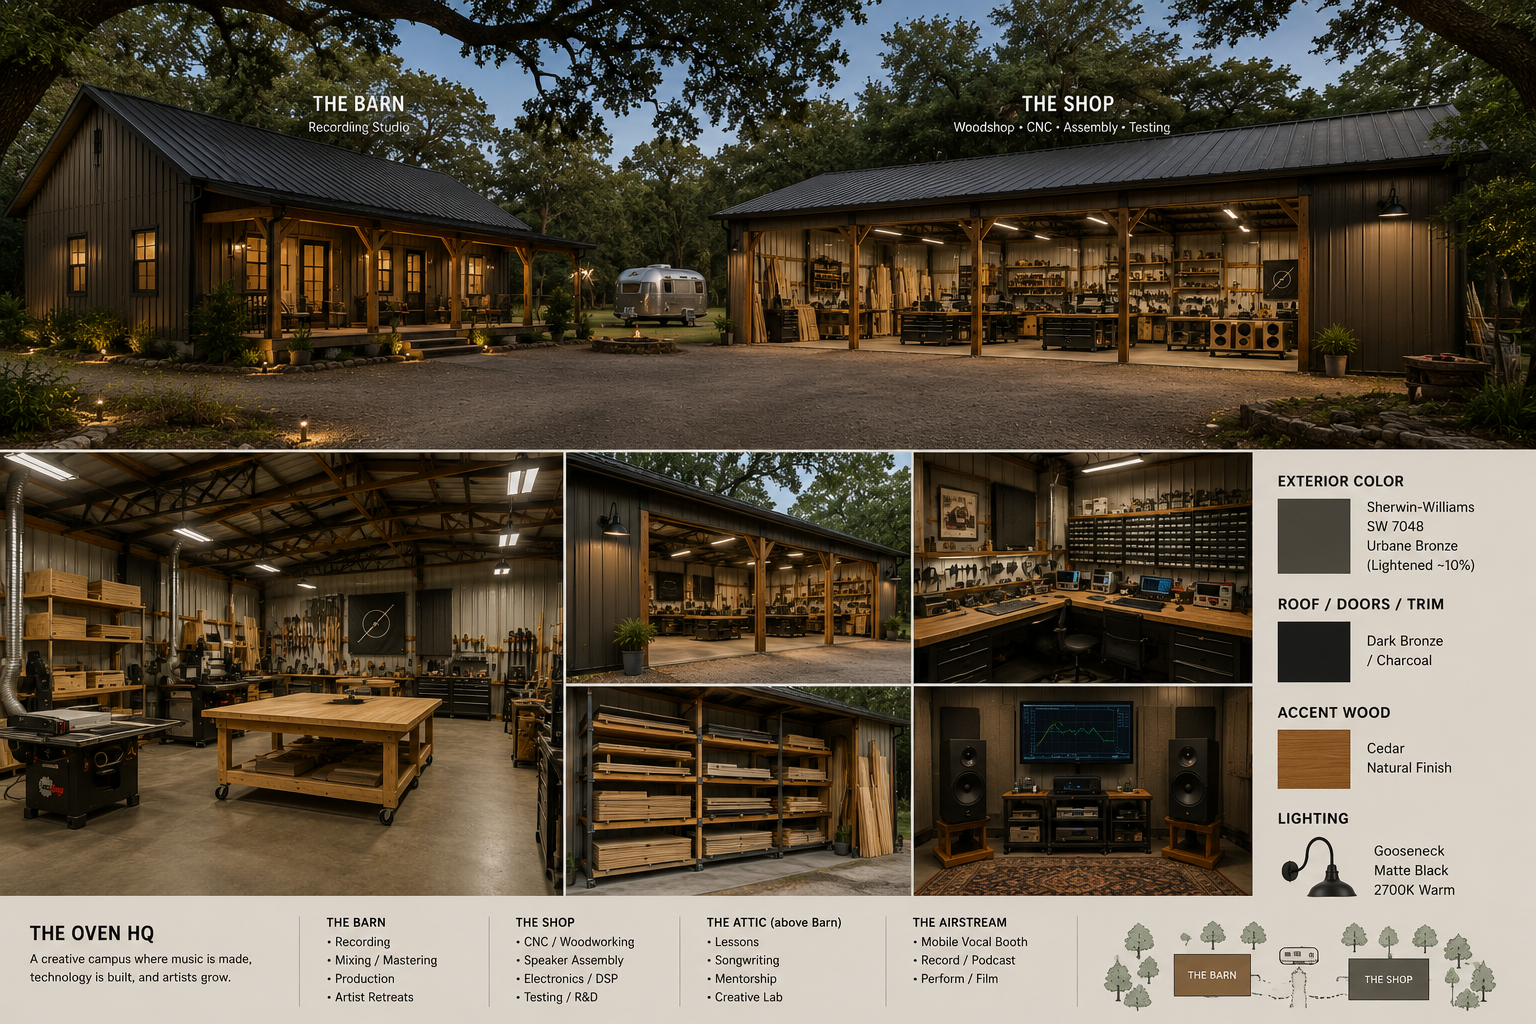
| Feature | The Barn | The Shop |
|---|---|---|
| Siding | SW 7048 Urbane Bronze (~10% lighter) | SW 7048 Urbane Bronze (same) |
| Roof | Dark bronze / charcoal | Dark bronze / charcoal |
| Doors | Black | Black |
| Exterior lights | Warm decorative gooseneck | Functional gooseneck work lights |
| Cedar | Cedar porch, pergola, soffits | Heavy cedar posts, exposed trusses, braces, lumber racks (more raw) |
| Landscaping | Refined | Simpler, practical |
| Purpose | Creative | Fabrication |
The Shop (ZerØphase Works)
The second building is the fabrication side: "The Shop by ZerØphase", where the speakers, cabinets, and gear get built and tested. Same charcoal shell, more raw cedar and open work bays. It's its own future build; here it's the campus context the Barn lives inside.
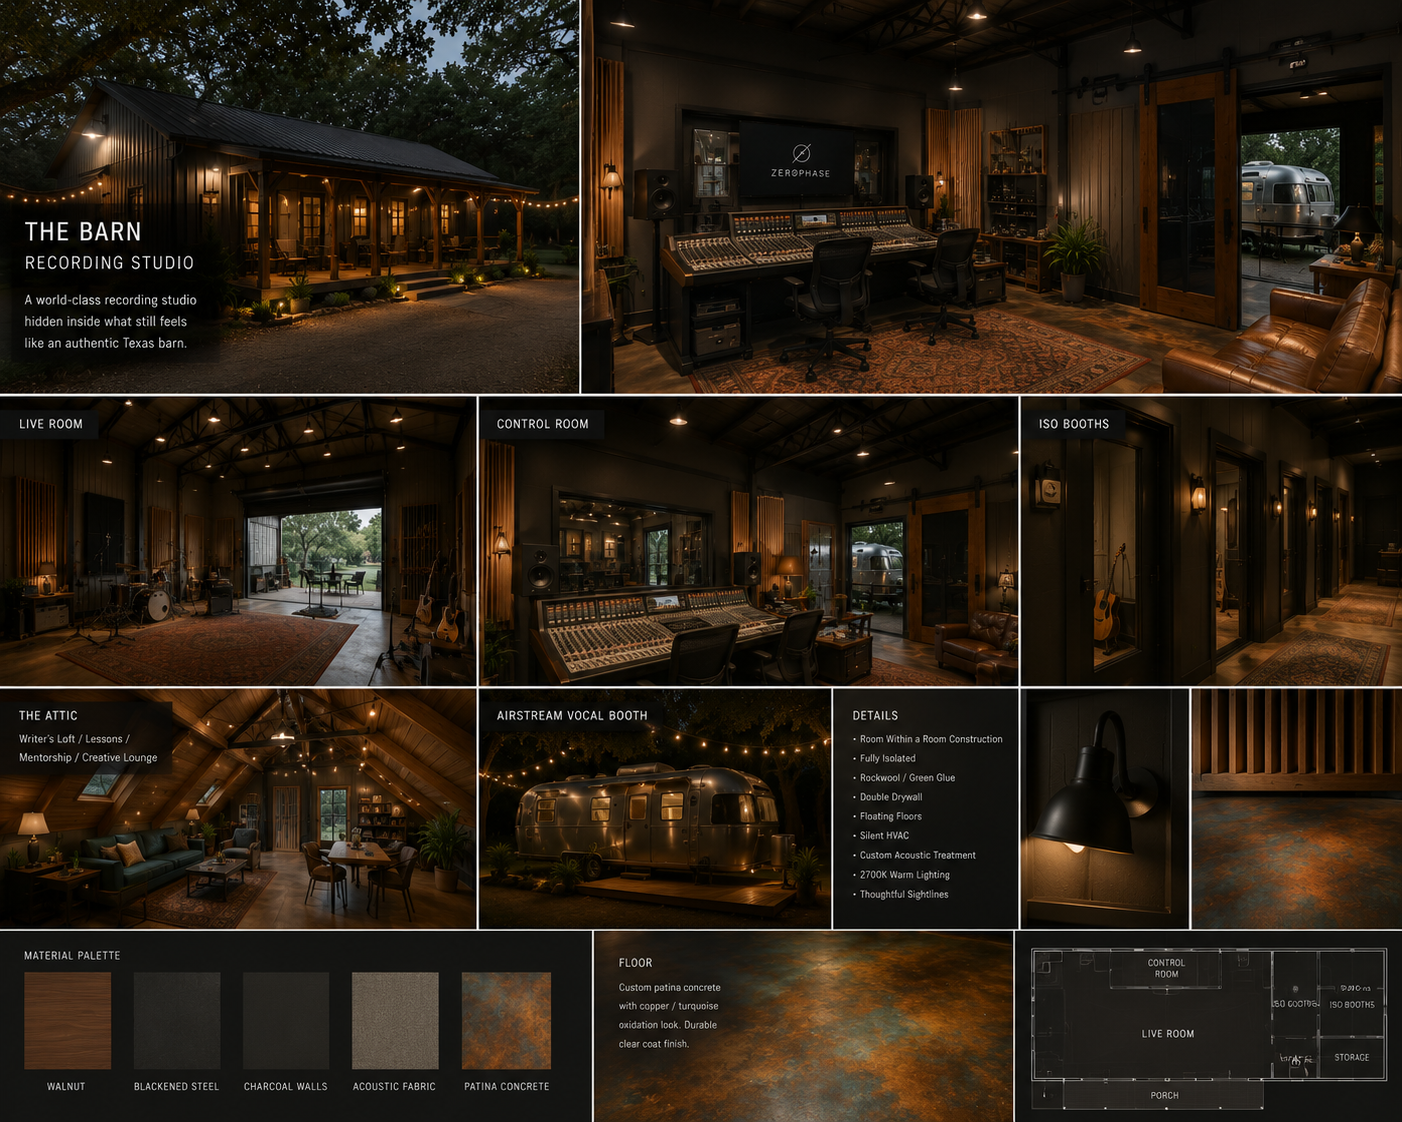
★Interior design
The vibe: future industrial speakeasy barn. A secret recording room under an old steel barn where the future is leaking through the rust. Not a nightclub, not a garage, not a white sci-fi box. Old console metal, oxidized copper, black steel, warm walnut, dim amber light, and a tiny bit of teal tech glow.
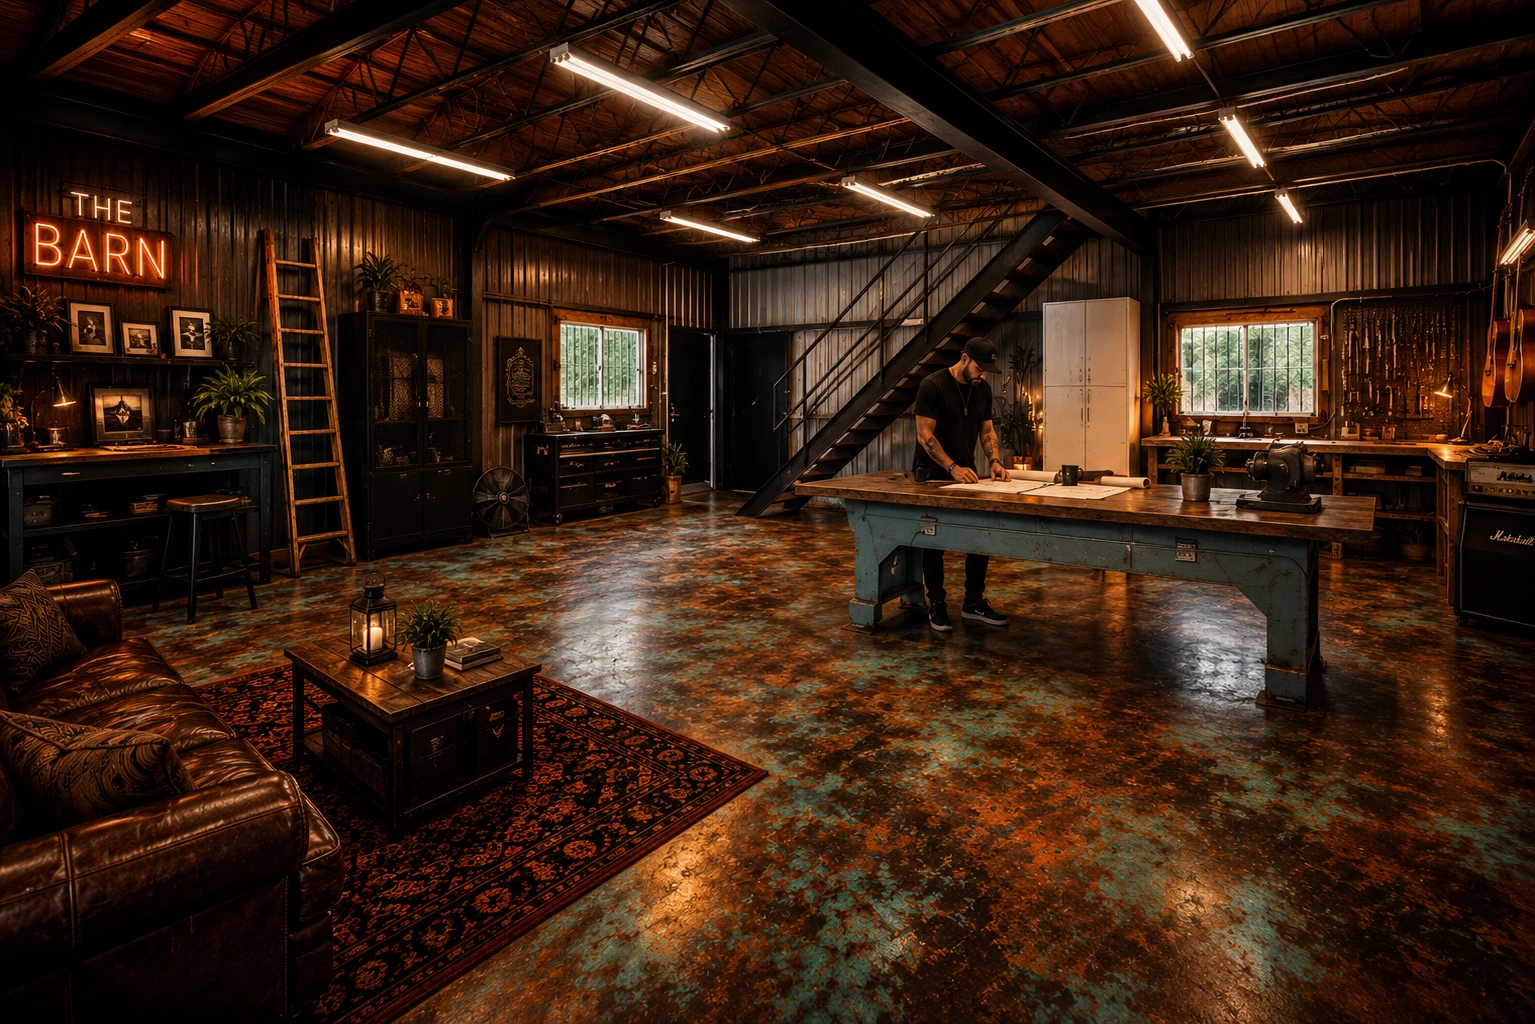
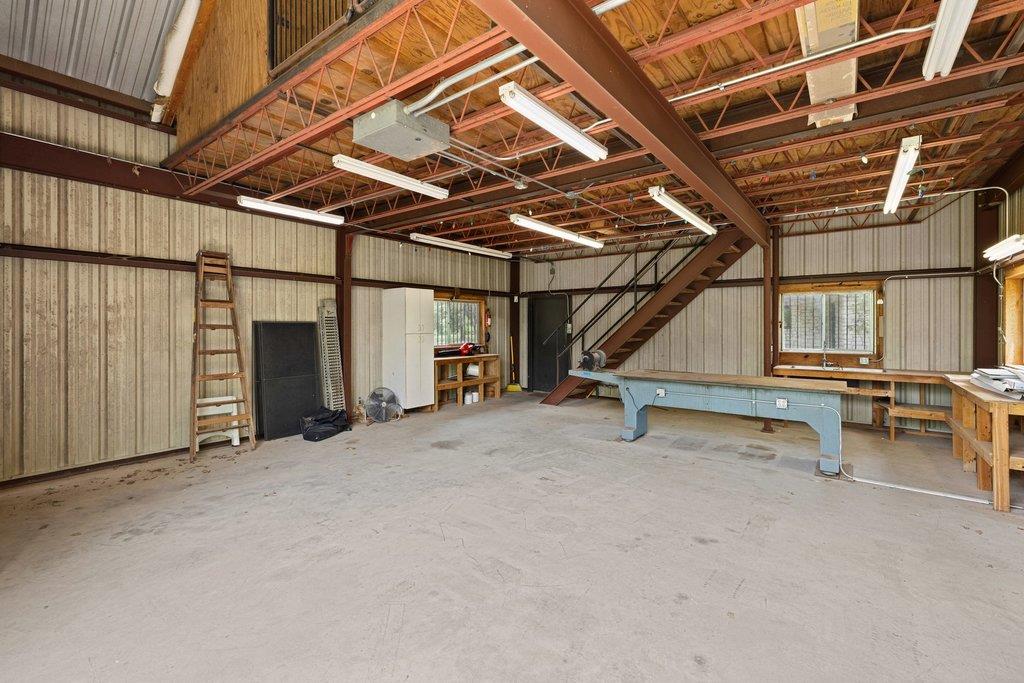
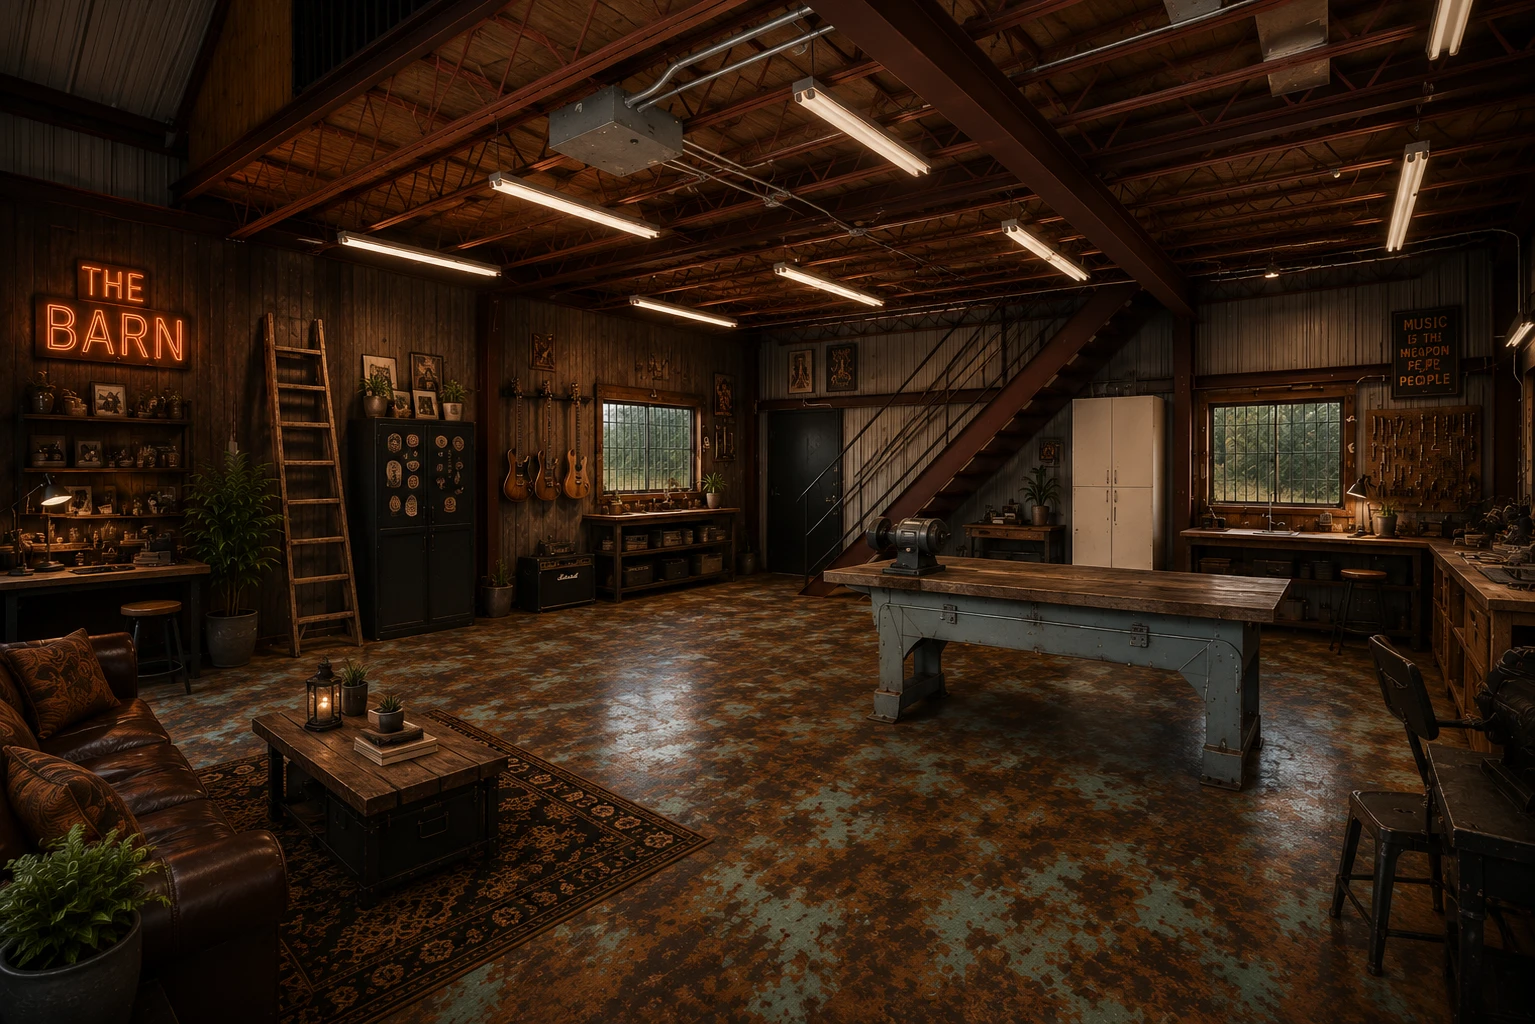
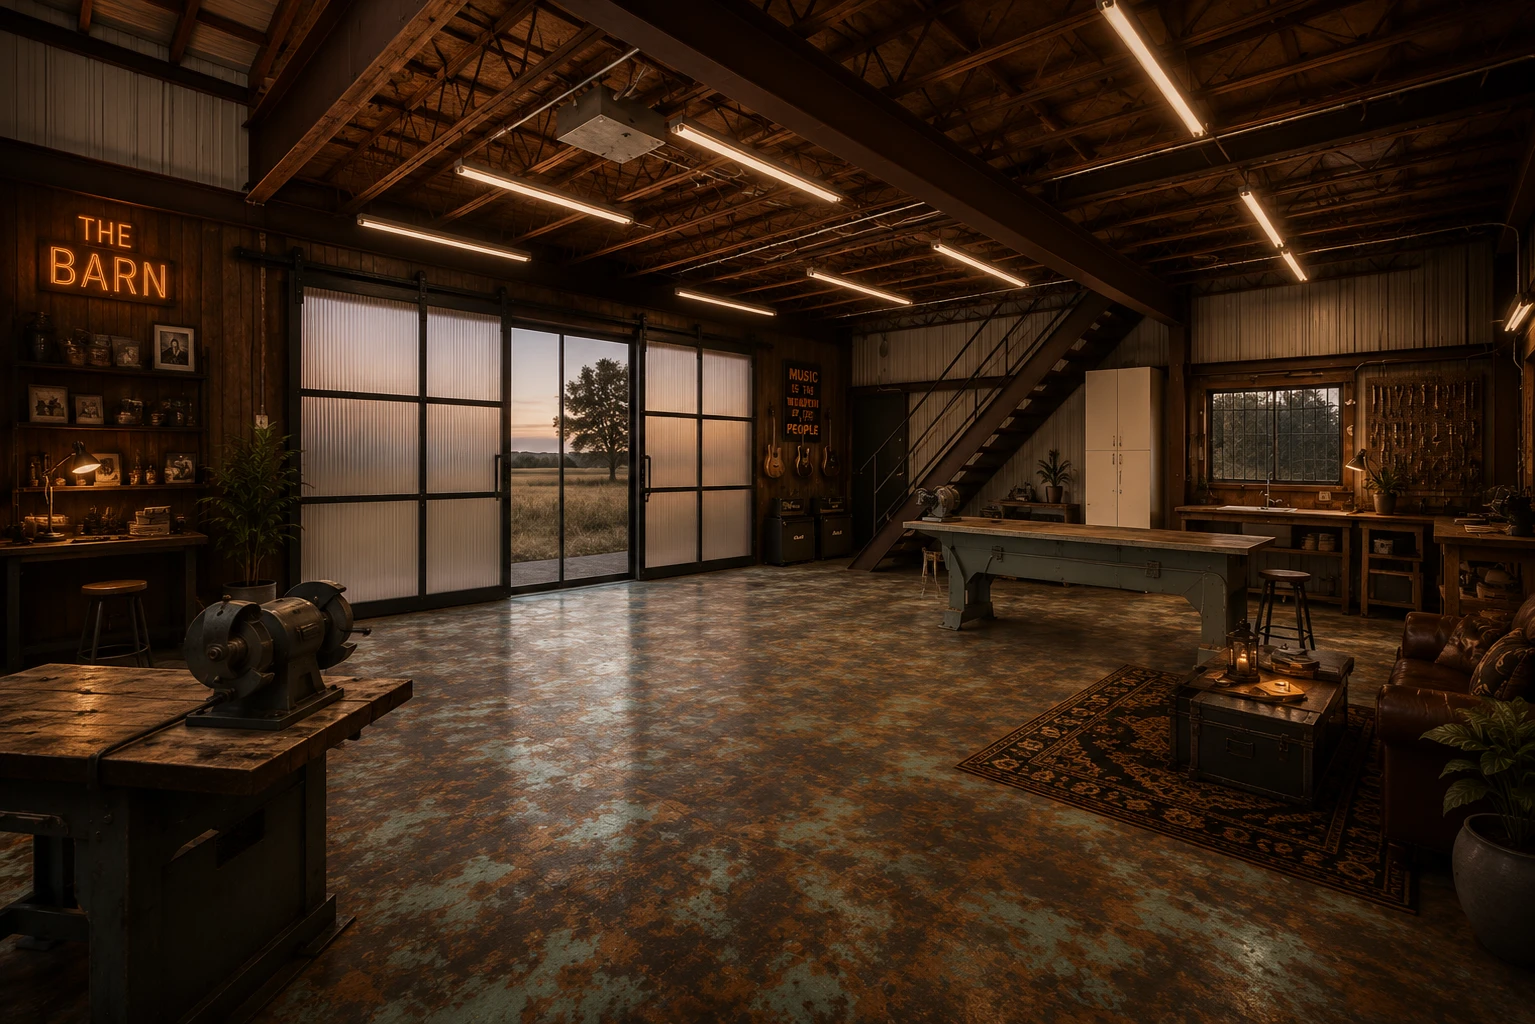
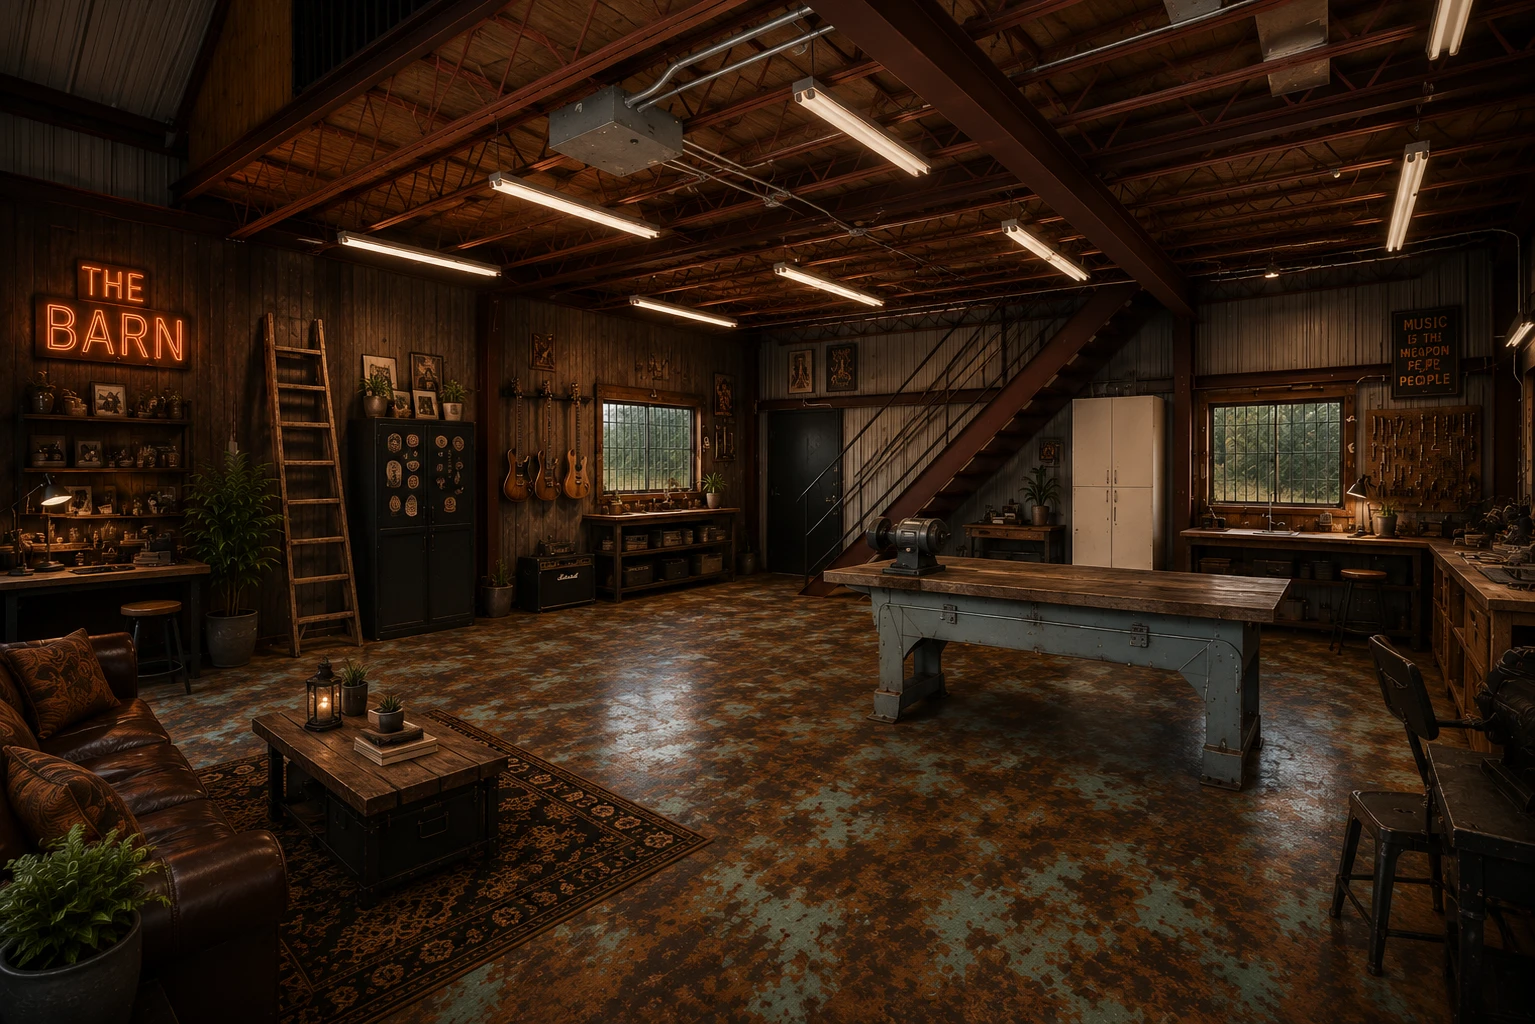
The direction, element by element
- Floor (the hero): oxidized copper / rust / turquoise patina on stained concrete under a satin clear coat. Aged metal under glass. The whole room builds out from this. Rugs as islands where acoustics need them.
- Walls: deep warm charcoal-black. The front wall behind the monitors darker still so the speakers visually disappear. Selected zones in walnut slats + fabric panels. No bright white drywall.
- Wood: warm walnut acoustic slats and wood clouds soften the black walls. Enough warmth that the room is not cold or goth.
- Trim: black steel or dark bronze. Clean, industrial, premium. Ties the barn steel, the studio glass, and the patina floor together.
- Ceiling: keep the barn structure visible, beams darkened. Acoustic clouds between the beams wrapped in charcoal / rust / tobacco fabric, never basic gray.
- Lighting: warm amber indirect, dimmable, soft under-cloud glow. Pin spots on the guitars, amps, and gear. A subtle teal accent only in tiny controlled moments. No shop lights, no neon nightclub.
- Furniture: low, heavy, worn. Distressed brown leather Chesterfield, tobacco / cognac / oxblood leather, blackened-steel + reclaimed-wood tables, factory carts, Persian rugs in rust / black / faded gold / muted teal.
- Metal: blackened steel, oil-rubbed bronze, aged brass, oxidized copper. Everything aged or oxidized, no shiny chrome or stainless.
Other looks on the table
The dark speakeasy above is the lead direction. But there is a strong warm "Warm Modern Mid-Century" alternative on the table: the same raw barn shell, but brighter and more welcoming. Warm reclaimed wood, cognac leather, brass and bronze, amber light, the patina floor. It reads more like a creative space and retail front than a dark hideout. This is the "competition look" for the ground floor, the warm parallel to The Attic upstairs. Not locked, the warm-vs-dark call is still open.
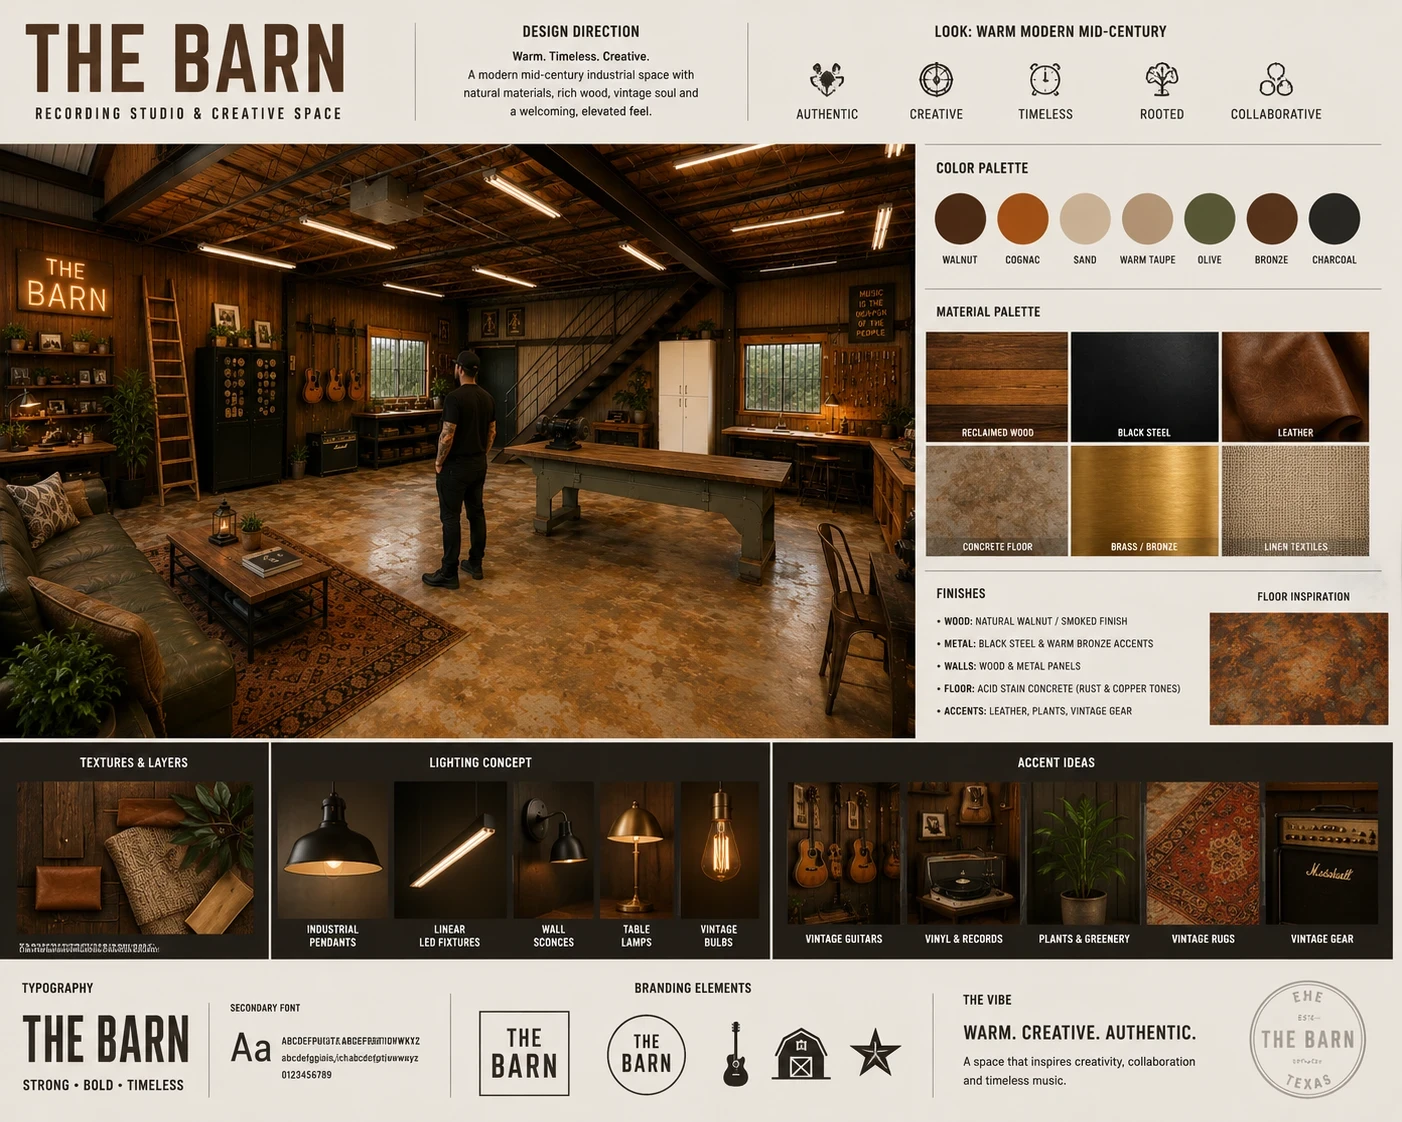
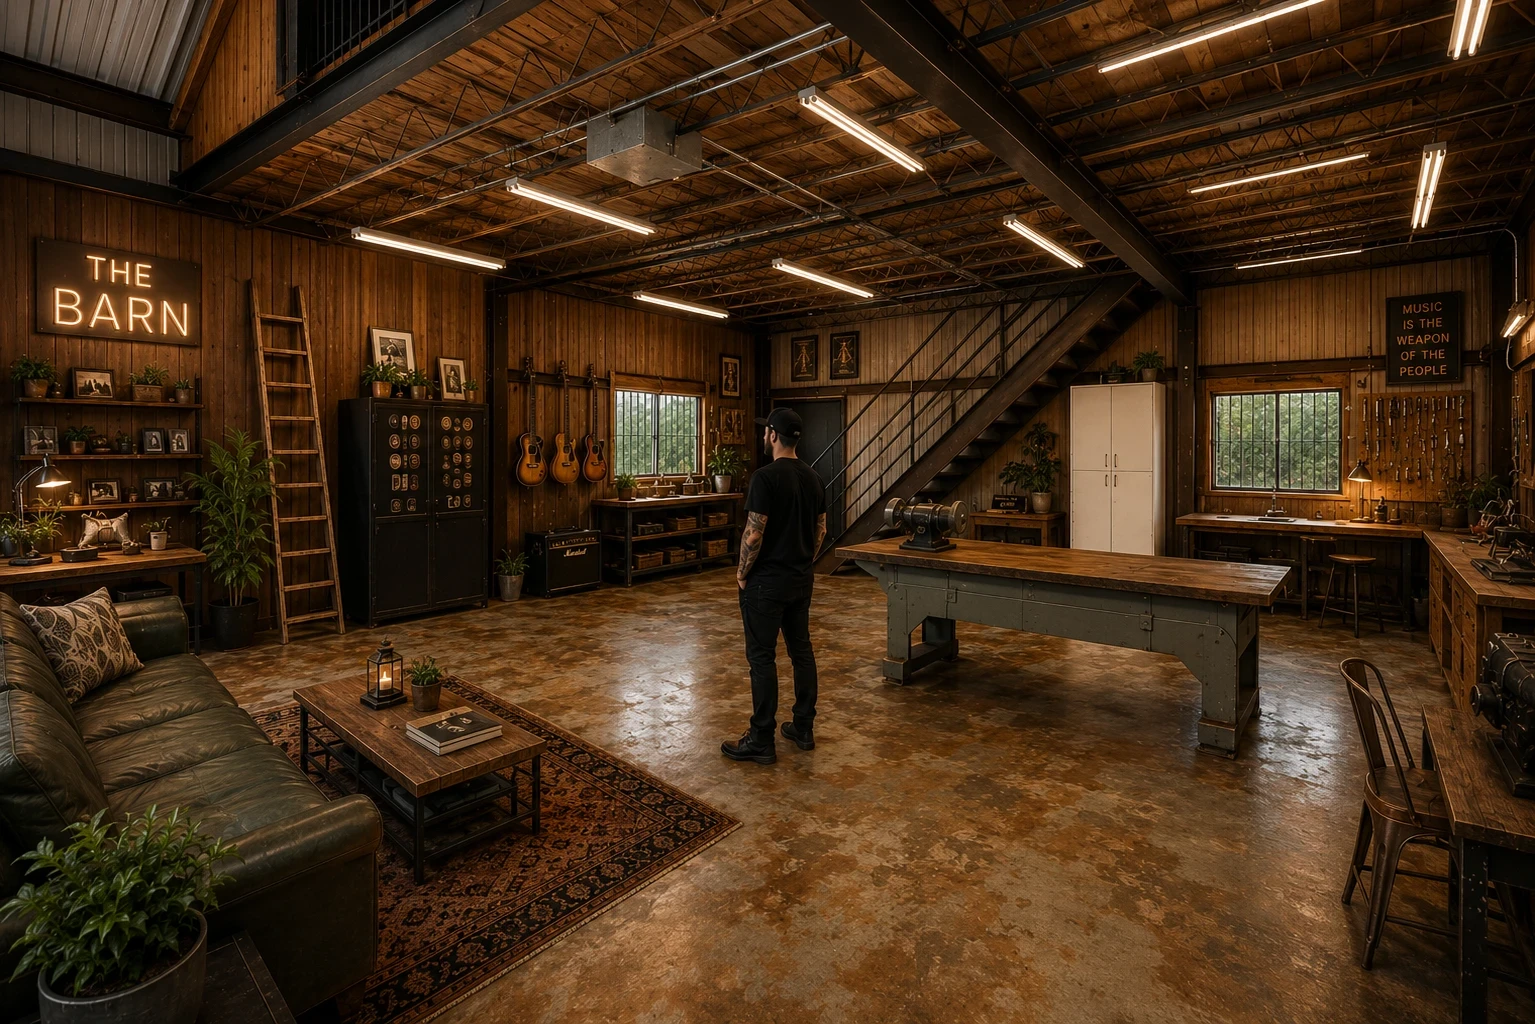
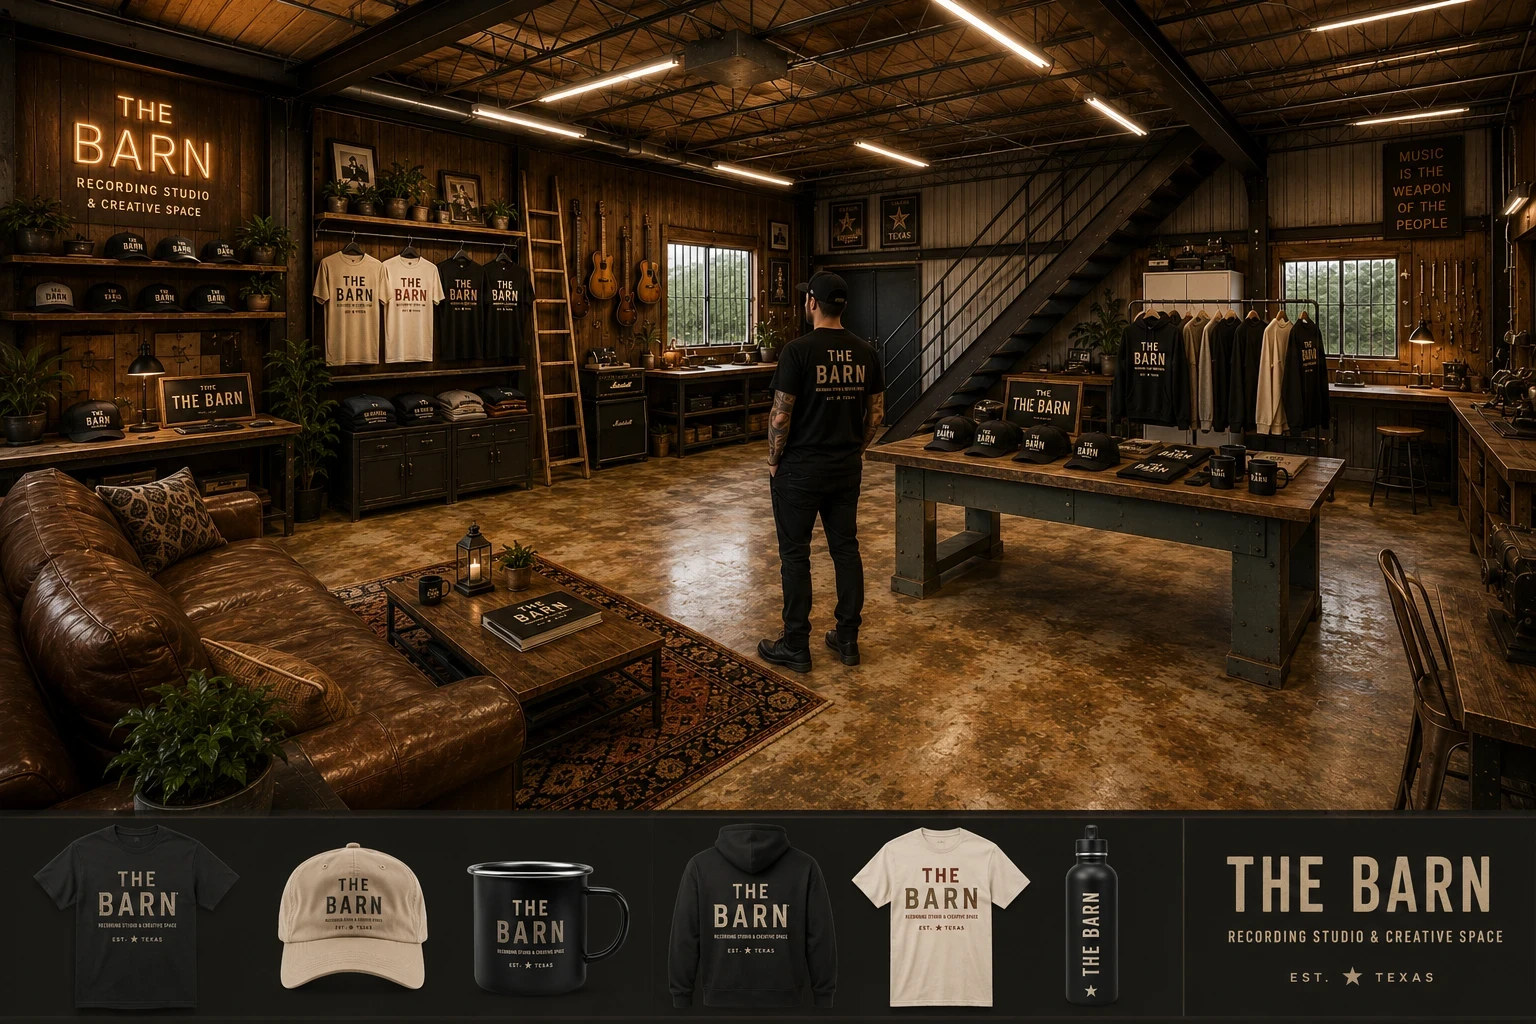

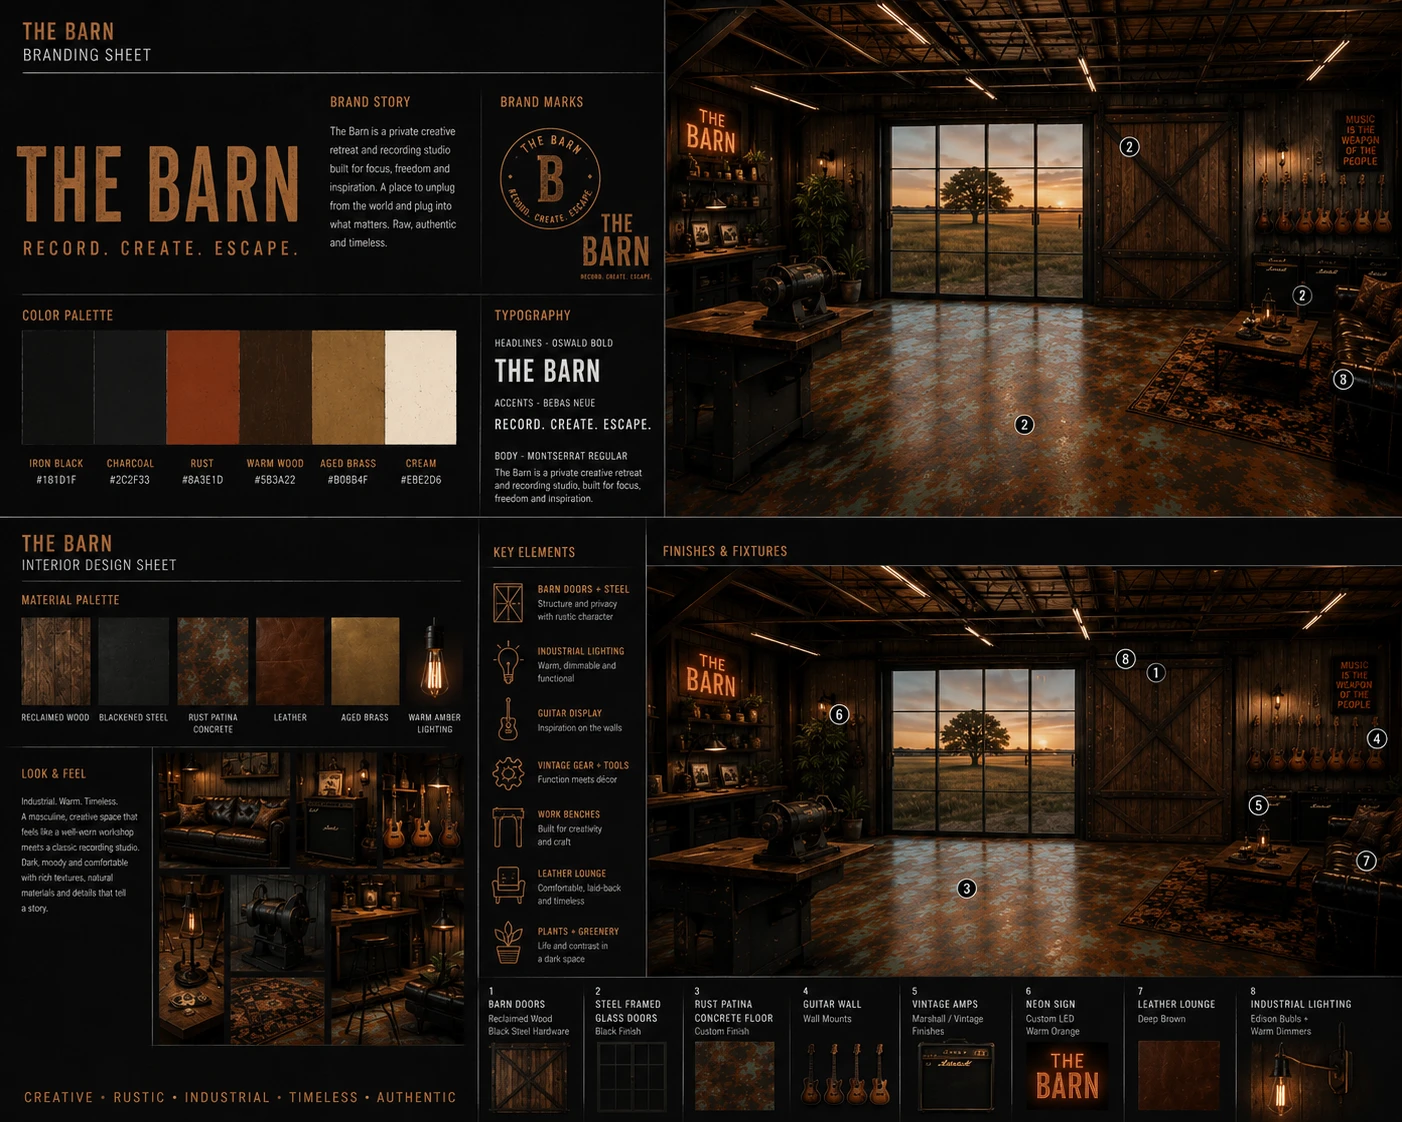
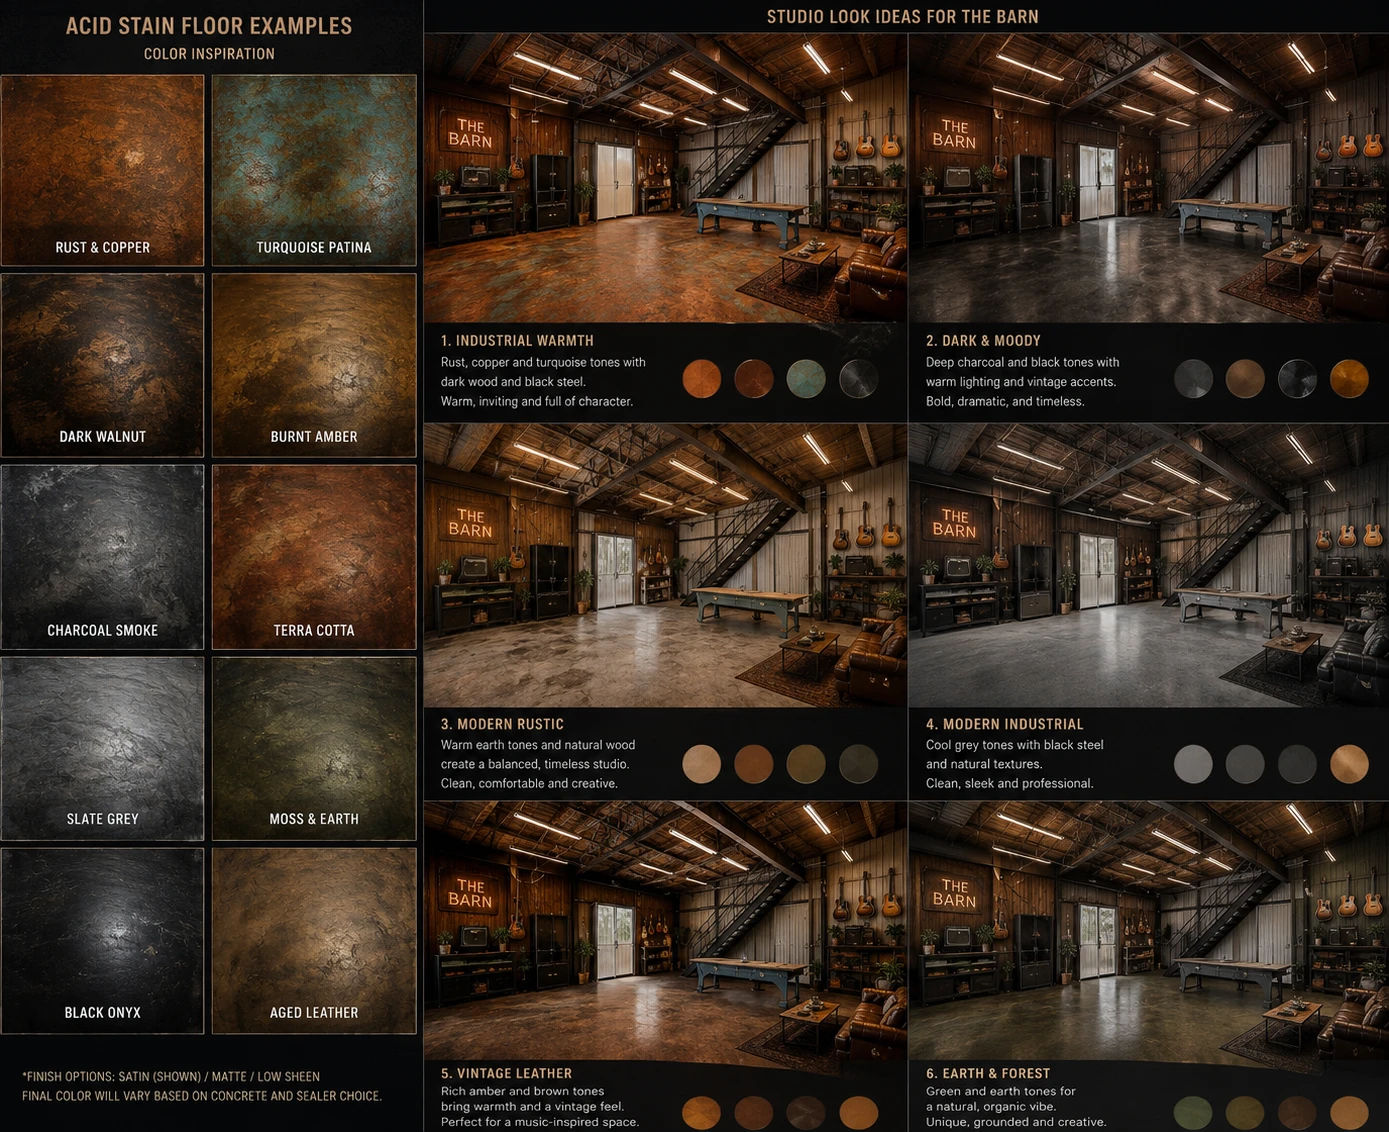
Avoid: bright white walls, clean gray office paint, shiny chrome, the cheap black-and-red "studio" look, too much blue (the floor already carries the electric turquoise). Full direction + per-room image prompts: BARN_INTERIOR_DESIGN.md.
★The Attic (2nd floor)
The upstairs creative layer: "The Attic at the Barn, " a writer's layer + creative school (lessons, writing, mentorship, workshops). Warm Modern Mid-Century. Full brand + interior brief: THE_ATTIC_DESIGN.md. The detailed cork build (color sourcing, the soundproof sandwich, how cork is made) lives in §13 Floor 2; the skylight spec is in Polycarbonate glazing.
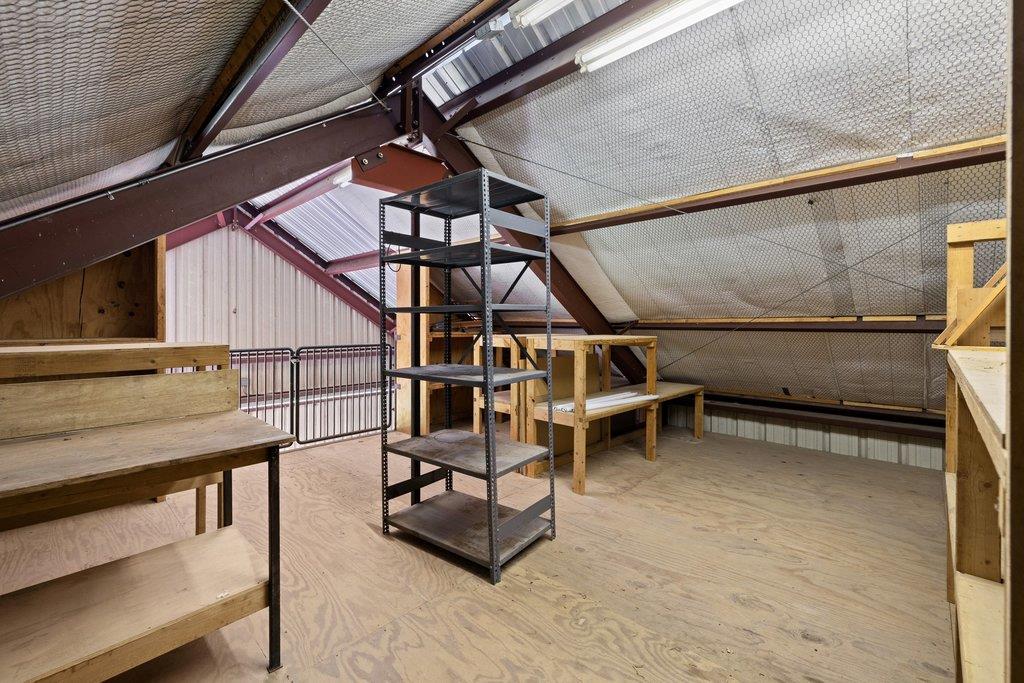
Getting the look: swirly cork
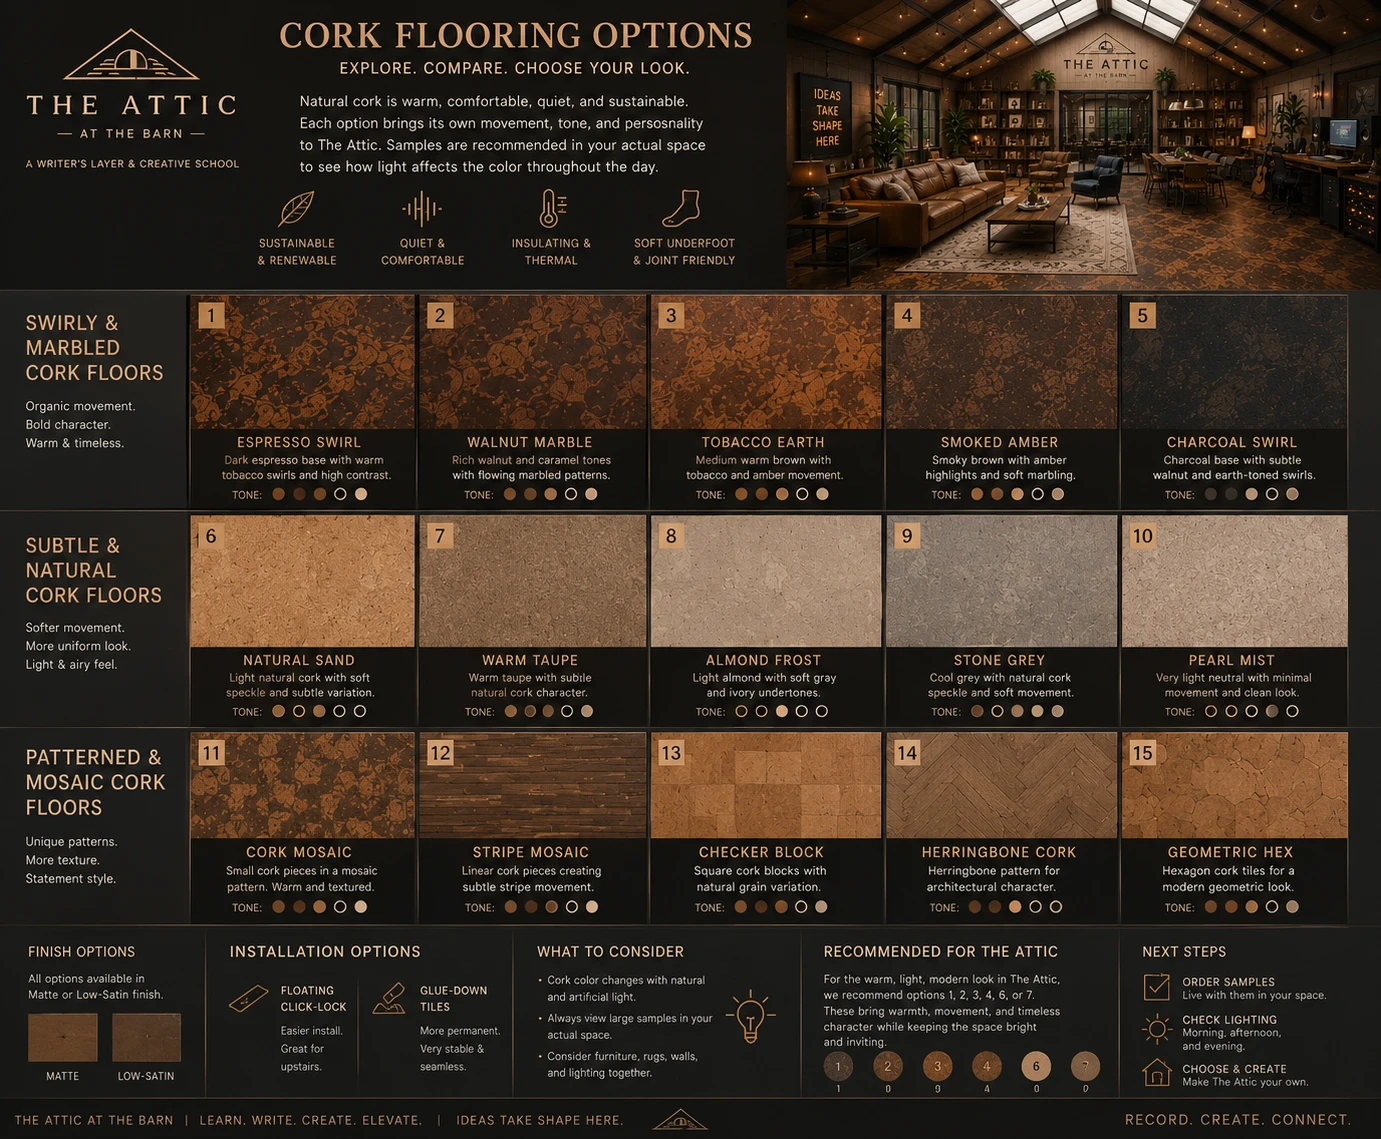
You do not choose between the swirly look and the isolation. The swirly cork is the finish on top; the budget sandwich is underneath. The move: floating click-lock swirly cork (e.g. Espresso Swirl / Walnut Marble), it floats over the underlayment, is easiest upstairs, and is repairable. For a seamless, permanent look, glue-down swirly cork bonds to the new plywood top instead (then the isolation comes from the Green Glue + the sandwich below). Matte or low-satin, never gloss. Rugs on top in the walk and music zones are the cheapest acoustic win.
The loft, explored dark
The locked direction is the warm Modern Mid-Century above. These earlier renders show the loft going moody, a control-room-in-the-loft, if it ever wants to: same patina floor, leather, navy chairs, the skylight in the ridge. Kept as the dark alternative.
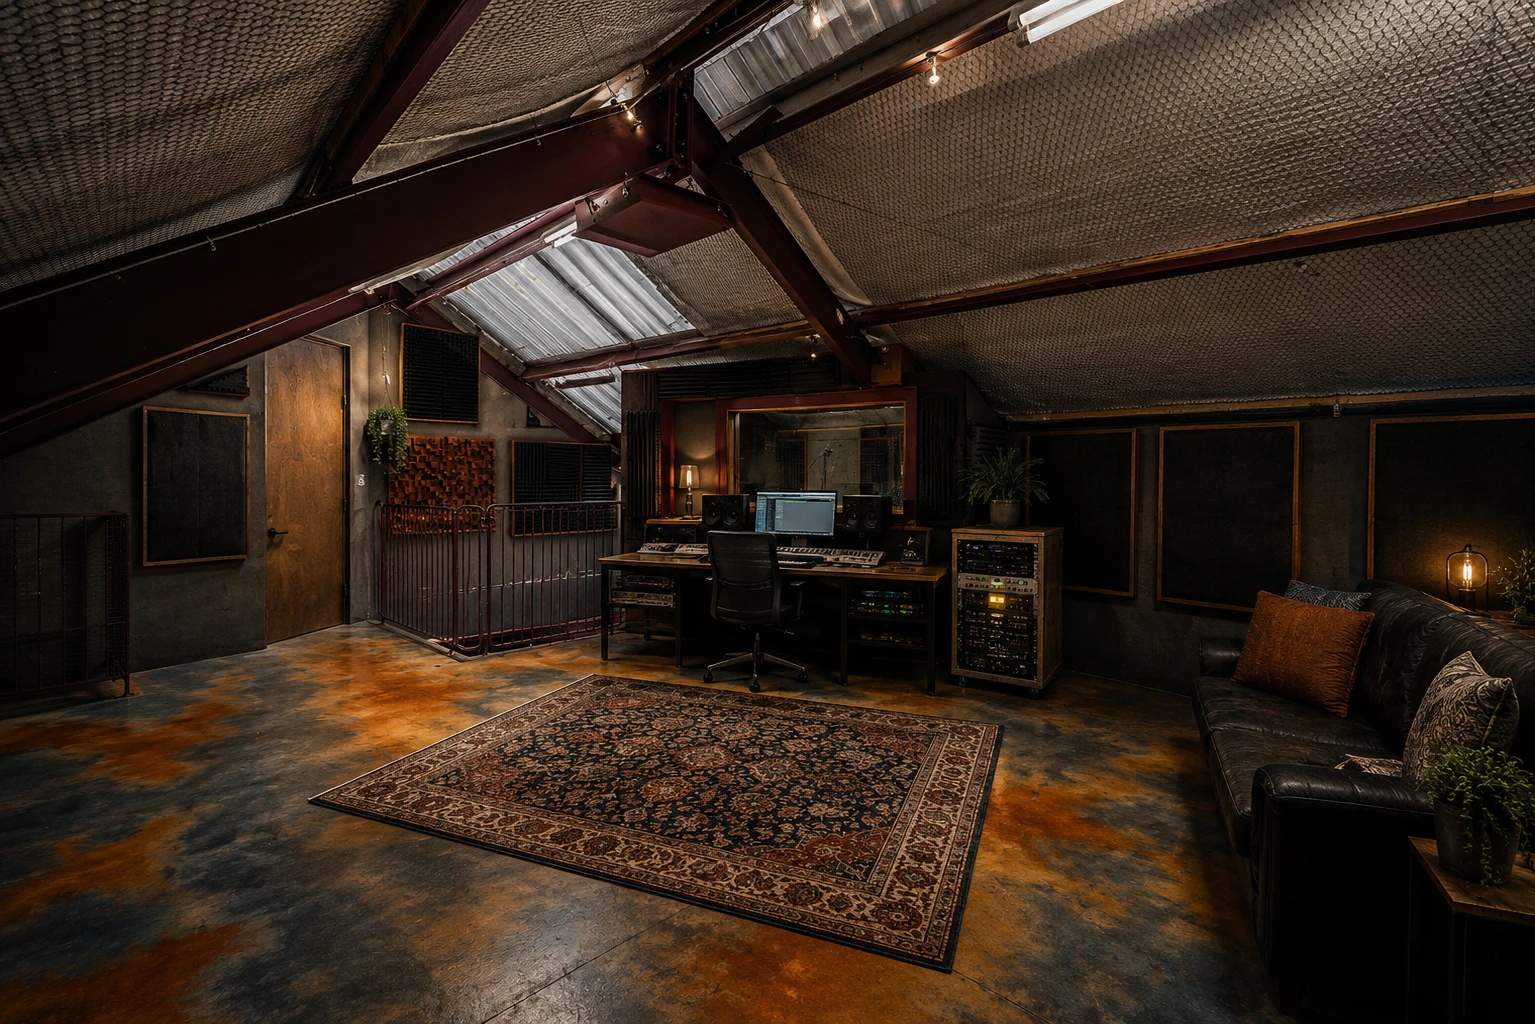
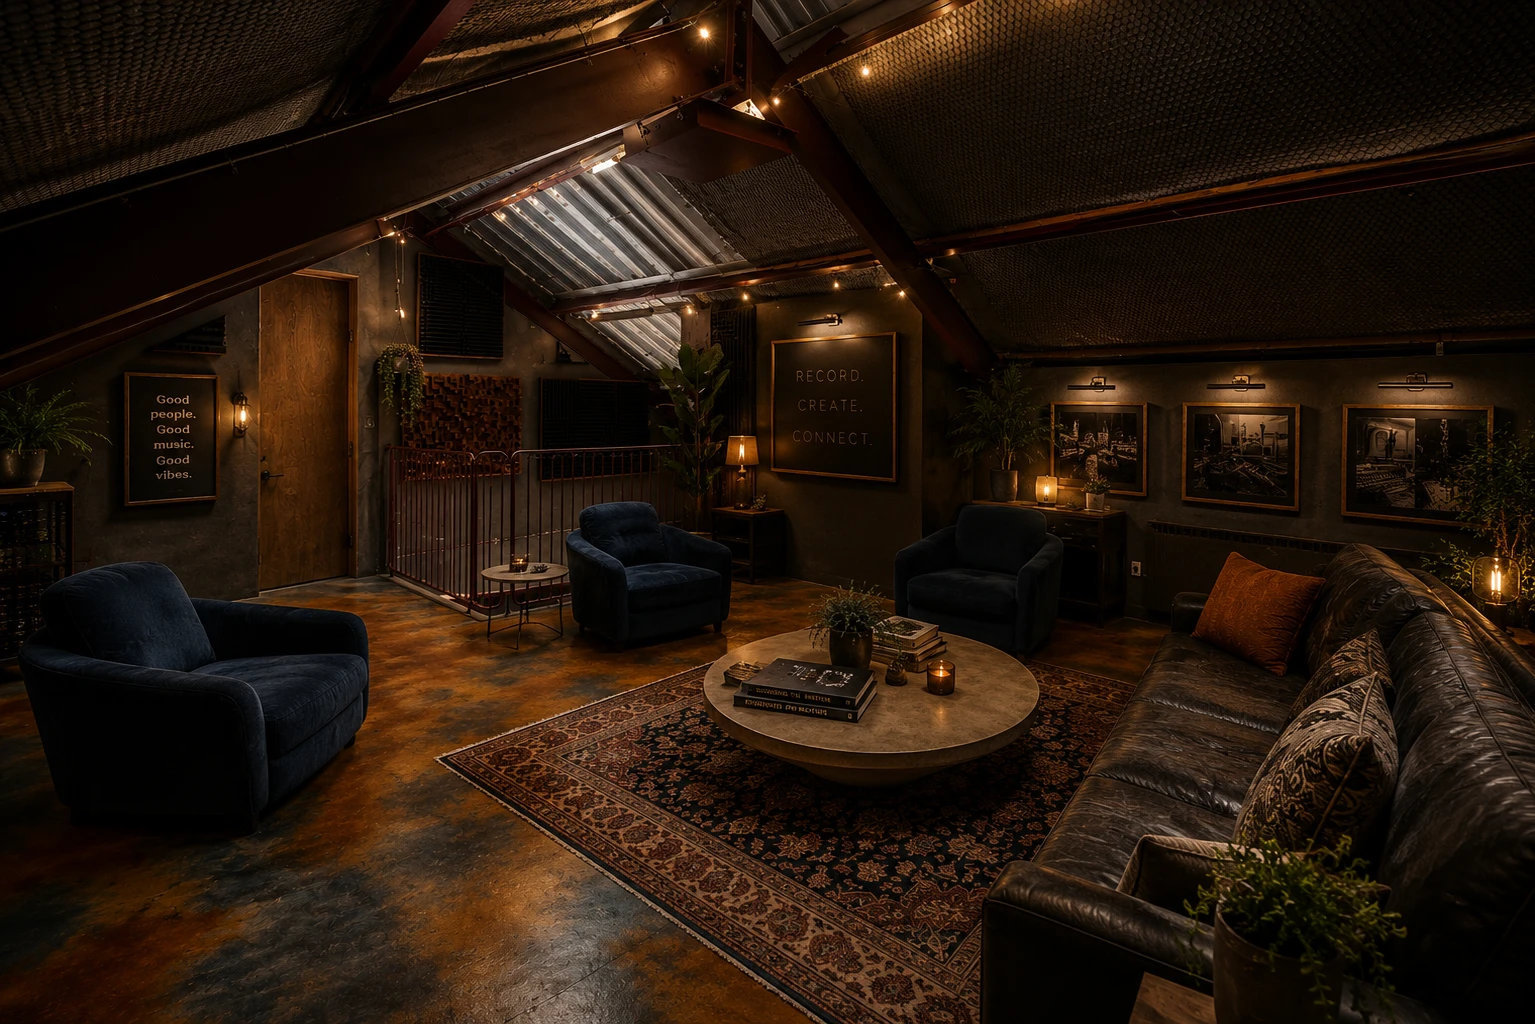
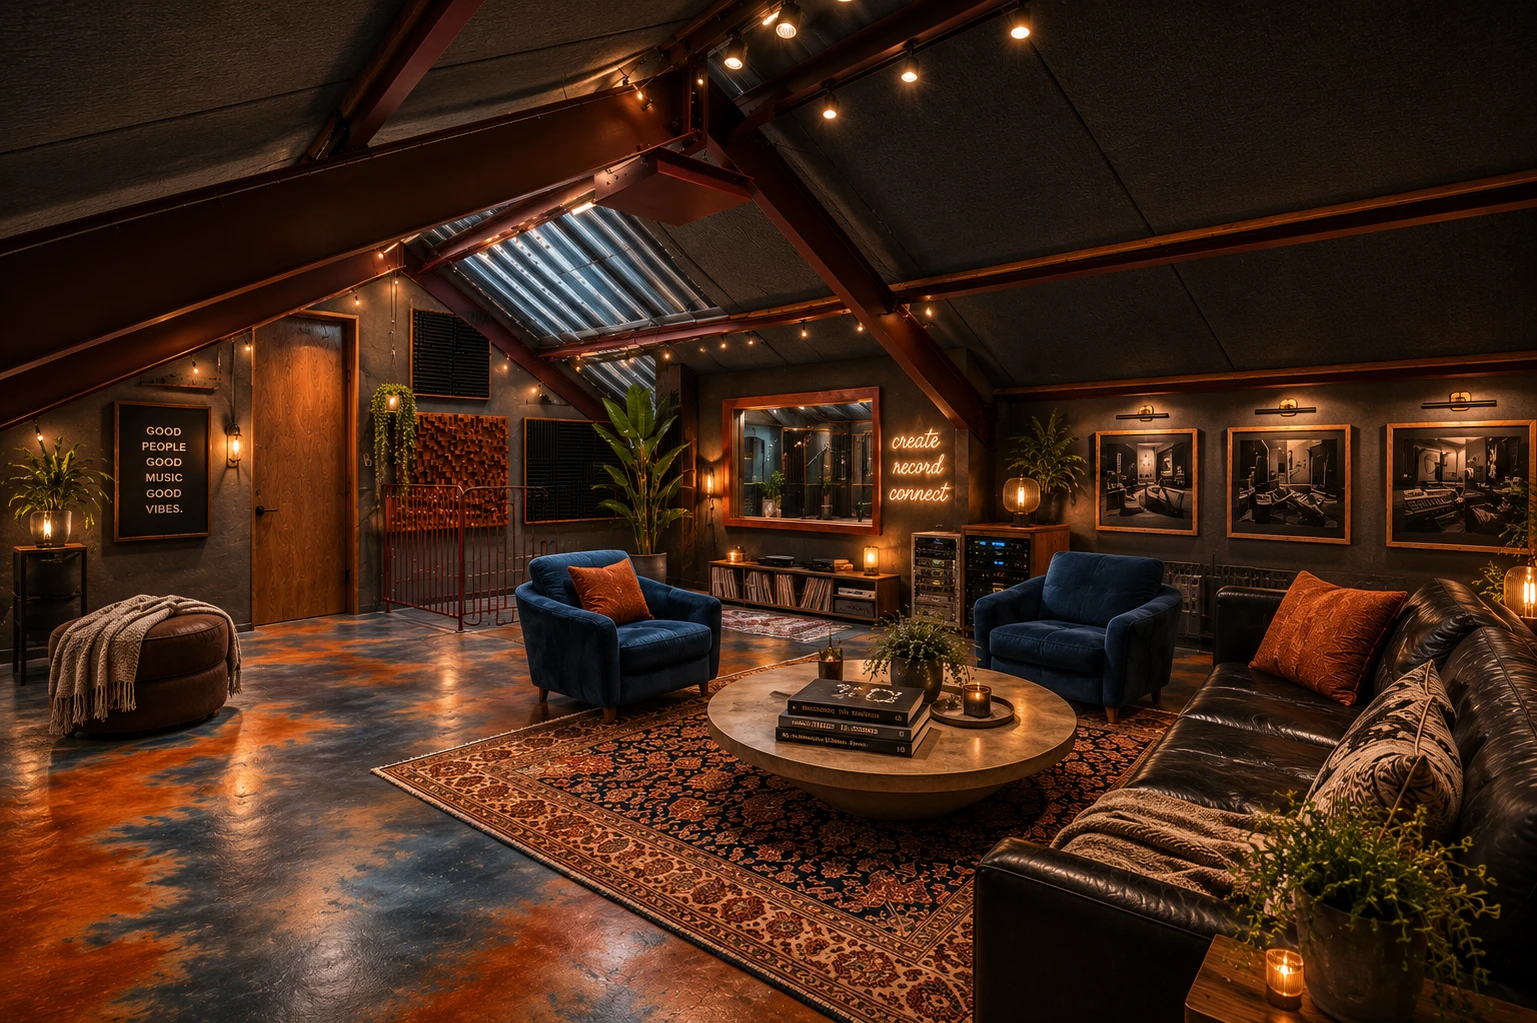
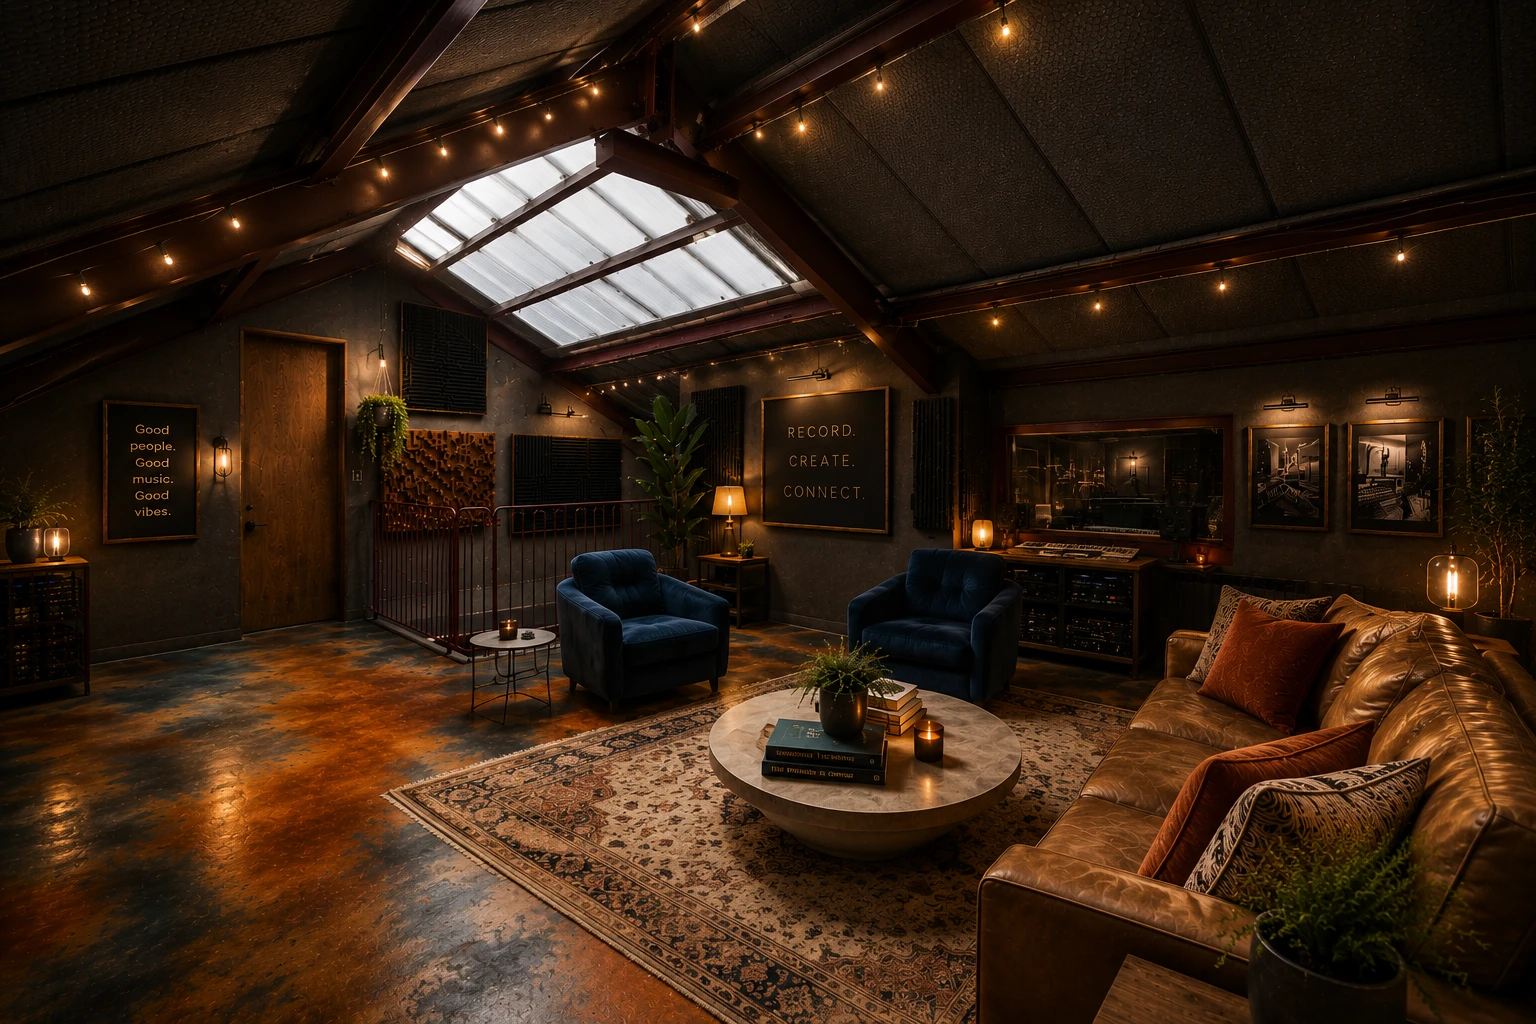
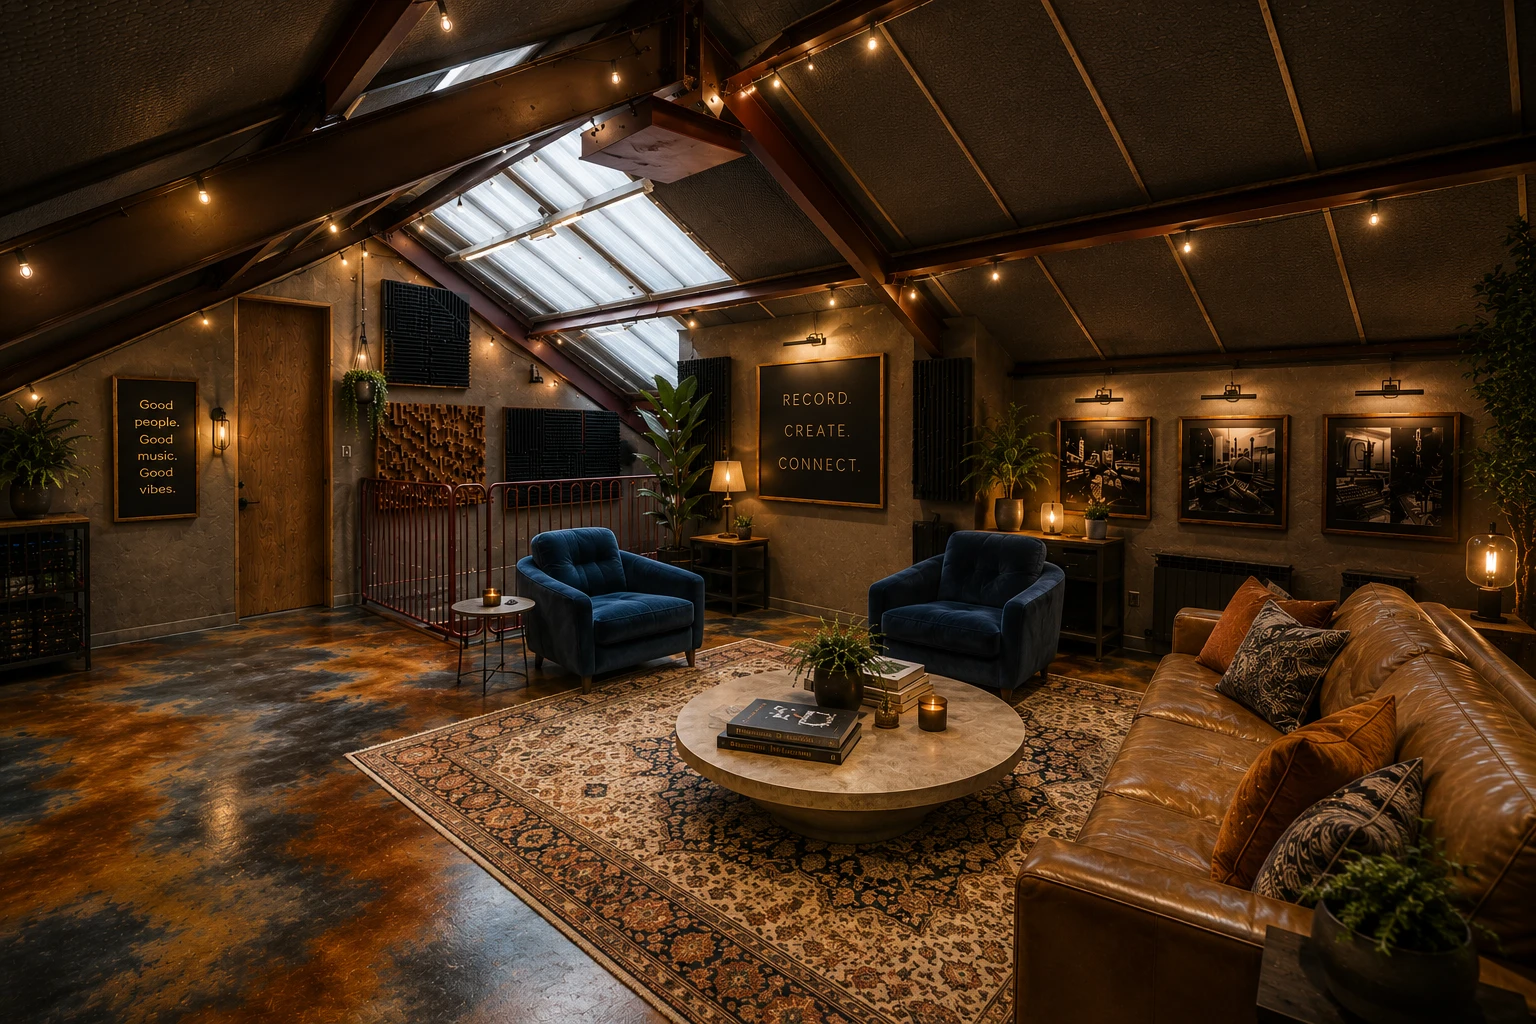
The loft floor: budget isolation stack
The loft is wood-framed and sits over the rooms below, so it gets a budget DIY decoupled sandwich, mass + damping + a soft break + sealed gaps + rugs. Not springs, not concrete.
- Check the structure first (bounce, squeaks, soft spots, water damage, metal flex). If it is bouncy now, reinforce before adding weight. VERIFY the load with a structural person.
- No concrete upstairs unless a structural engineer approves it. Too heavy.
- Don't screw the new plywood all the way through into the Z-bar if isolation is the goal, that rigid bridge short-circuits the decouple. Screw into the existing plywood, stagger seams from the existing ply, leave a perimeter gap, seal with acoustic caulk.
- No squishy foam as the support layer (it compresses and squeaks). Cork-rubber, not soft foam.
- This is a budget isolation improvement, not fully soundproof.
If sound leaking down ever becomes a real problem, the better fix is from underneath: Rockwool in the cavity, resilient / hat channel, 5/8" drywall, Green Glue, a second 5/8" drywall, sealed perimeter. That does more than overbuilding the walking surface.
Budget vs pro: what the upstairs floor costs
Same swirly cork on top either way. The difference is how much isolation you build underneath, and what it costs. Rough mid-2026 Central-TX materials for a ~550 sq ft loft. Every price is an estimate, VERIFY locally.
21Materials list
Full dead-wall build: 4 walls + ceiling (3 layers drywall + Green Glue + mineral wool + fabric) plus the 4 corner bass traps. Home Depot pricing, mid-2026, verify locally.
| Item | Qty | Cost |
|---|---|---|
| Drywall 5/8" Type X (4×8) | 79 | $1,264 |
| Green Glue compound (tubes) | 90 | $1,620 |
| Rockwool Safe'n'Sound, walls + ceiling | 14 bags | $756 |
| Rockwool,4 corner bass traps | 3 bags | $162 |
| 2×4 studs + plates | 74 | $482 |
| Acoustic fabric FR701 (online/specialty) | 36 yd | $720 |
| Fiber-barrier membrane (specialty) | 594 sf | $148 |
| Screws · Tapcons · caulk · sill seal · staples | · | $394 |
| Tape / mud / primer / paint (outward face) | lot | $180 |
| GRAND TOTAL (shell + treatment) | ≈ $5,726 |
≈ $4,860 is at Home Depot (incl. Green Glue); the fabric + membrane (~$870) are online/specialty. Not included: door, studio glass, floated floor, electrical, HVAC. Build time: ~2 weeks full-time for 2 people (≈10–14 working days), or ~4–6 weeks of evenings/weekends, the 3-layer drywall + Green Glue + taping is the slow part (Green Glue reaches full damping in ~30 days, but the room's usable right away). Full line-item list: CONTROL_ROOM_MATERIALS.md.
Structure / isolation
- 2×4 / 2×6 framing lumber; double-stud where isolation matters most
- Staggered studs OR isolation clips + hat channel where budget/space is tight
- Mineral wool (Rockwool Safe’n’Sound, Comfortbatt, or equiv.)
- 5/8" Type X drywall (double layer); 3/4" plywood (mounting-layer variant)
- Green Glue Compound (between drywall) + Green Glue Sealant/acoustical caulk (seal everything)
- Backer rod for large gaps; putty pads for electrical boxes; rubber sill gasket under framing
Doors + windows
- Heavy solid-core doors + full perimeter seals + automatic drop bottoms
- Laminated glass (1/4" control side, 3/8"–1/2" booth side); neoprene/EPDM blocks, gasket tape, removable stops
Acoustic treatment
- Corner bass traps (full-height); broadband panels (703-type rigid board); ceiling cloud panels
- Diffusion / slat panels (hybrid); movable gobos; breathable acoustic fabric; rugs
Airflow / HVAC
- Oversized ducting; lined silencer/muffler boxes; flex duct for bends
- Mini-split or low-velocity system sized for heat load (verify with HVAC pro)
22What NOT to do
- Don’t rely on foam for soundproofing.
- Don’t leave unsealed gaps around doors, outlets, pipes, or wall edges.
- Don’t build a tiny square booth with hard walls and no air.
- Don’t fire speakers across the short dimension if a better layout exists.
- Don’t run loud HVAC into recording rooms, or cut air holes between rooms.
- Don’t build permanent walls before confirming exact measurements + workflow.
- Don’t cheap out on doors, seals, and air paths, the common failure points.
23What to tell the builder
Copy-paste this to a GC / framer:
We are building a serious mastering-style control room first.
The finished inside target is 13'7" W x 17'8" L x 9'6" H (the locked control-room size from §6, fit to the
measured shell; ceiling height is capped by a loft + an off-center beam).
Speakers go on the short wall and fire down the long dimension.
The room must be symmetrical, heavy, airtight, and decoupled from the
barn shell as much as budget allows.
We want free-standing swappable monitors, not soffit holes yet.
HVAC must be planned before framing: quiet supply, quiet return,
no straight-through vents.
The vocal booth is a widening non-square room with a short window wall,
angled side walls, and a deeply treated rear wall behind the singer.
All doors, windows, vents, outlets, and seams must be sealed.
Nothing can rattle.
Reminder: working design package, not a final engineered set. Final dimensions, structure, electrical, HVAC, doors, windows, and code get checked on-site by qualified builders, an HVAC pro, and where needed an acoustician.
Before the first trip: the remote-site material + rental brief
The barn is far out, so every forgotten item is a wasted half-day round trip. Lock the shopping carts, pickup, shipping, rentals, and test samples early, and bring it all in one or two organized trips. Buy extra material and build in extra time. There will be test failures, errors, and missing items, so plan for them. Stop treating the finish work like "we'll figure it out later."
Concrete stain reacts differently on every slab, so you cannot pick a floor color from a screen. You test on the actual concrete. Order the test materials NOW so you can stain sample patches the moment the slab is clean enough to expose real concrete. You do not need the whole floor done to test, just a clean area, ideally several 2'×2' patches in a corner or under the future workbench / rug.
Direct Colors sells a 3-color EverStain trial system made for testing on your own concrete; their full acid-stain systems (stain + sealer + neutralizer + supplies) cover ~200 sq ft. Buy trial kits / small bottles first, then full gallons once the test looks right.
Test BOTH floor directions on the slab and pick from the sealed patches:
- Warm Modern Mid-Century: Malayan Buff or Shifting Sand base, Desert Amber warmth, Coffee Brown depth, diluted English Red for rust/copper accents, optional diluted Blackish shadow.
- Verdigris Rust (signature): English Red / Cola rust base, Desert Amber copper movement, Coffee Brown tobacco shadow, Azure Blue / turquoise water-based stain for the patina, optional Blackish / dark-teal shadow. Full recipe: the Verdigris Rust Floor.
Closed-cell spray foam on the metal walls + roof deck, not open-cell (closed-cell is the one that air-seals, adds R-value per inch, and controls condensation on metal). Confirm thickness with the contractor. Do not spray until leaks, wiring, conduit paths, blocking, and penetrations are figured out, since changing anything after foam is slow and expensive. Confirm whether the foam needs 5/8" drywall, an ignition barrier, or a listed intumescent coating for that exact foam assembly (not random fire paint). Full detail in §12 the build order.
Priority 3: the equipment + rental list (plan the trip now)
| Floor prep + finish | Cleaning | Safety + masking |
|---|---|---|
| Floor grinder / buffer + diamond pads | Shop vac / HEPA vac | Respirators, gloves, goggles, boots |
| Wet/dry vac | Pressure washer (only if it can drain + dry) | Drop cloths / plastic / paper masking |
| Pump sprayers rated for acid stain | Degreaser / TSP-substitute | Painter's tape |
| Plastic sprayers for water-based stain | Concrete cleaner / degreaser | Wire brushes / Scotch-Brite / sanding pads |
| Rollers, trays, extension poles | Mop buckets, scrub brushes, squeegees | Fans + dehumidifier / air movers |
| Neutralizer + sealer + satin topcoat | Concrete crack repair | Extension cords |
| Anti-slip additive (+ spiked shoes if the coat needs them) |
Two things keep this from biting you. The floor splits in two: rough prep + grind + the test patches go EARLY (dusty work first); the stain + seal + satin topcoat go LAST. The split AC line-set hole gets cut BEFORE foam (it is a shell penetration), but the unit installs AFTER foam and after the overhead dark paint, and BEFORE the floor finish. So: clean → grind + test → cut penetrations → closed-cell foam → overhead dark paint → split AC → floor stain + seal + satin topcoat → cure → gear. The full 17-step sequence is §12 the build order; the short version for the 2-week push is the playbook's "Right now" sprint.
24Accessories (in the 3D walkthrough)
Four add-ons modeled into the walkthrough, not core studio gear, but the upgrades that turn The Barn into a destination. Each is sized to a real, buyable product. Walk them in the 3D model; you can shift+drag the stove and airstream to reposition them.
In the model: a see-through white geodesic dome, 28 ft diameter × 14 ft tall (a true half-sphere), on a ~30 ft round cement slab raised ~1 ft above grade, ~12 ft off the SE corner of the barn, with a life-size Trixie inside for scale.
Real-world match: a standard 30 ft / 9 m geodesic dome, the closest stock size, essentially identical. ~9.1 m diameter, ~15 ft peak, ~700 sq ft floor. Aluminum or galvanized-steel hub-and-strut frame; clear/transparent panels (PVC, ETFE, or polycarbonate) for the see-through look.
Price: ≈$3k–15k for a frame + cover kit; $30k+ for a premium insulated clear hardshell. Makers: Pacific Domes, Ekodome (Stellar 30'), Glamping Dome Store, Shelter Dome, gaxdome.
Use it as a listening/chill lounge, photo + video set, small event / yoga space, or a greenhouse. Needs the slab + drainage; confirm the wind rating for Central Texas.
From Shelter Dome's pricing breakdown: standard glamping domes run 5–8 m (211–541 sq ft), market range $200–$30,000. The value sweet spots:
- Best overall value, a 6–7 m dome, treated-steel frame + PVC cover. Shelter Dome's own "balances cost, durability, and appearance" combo; roomy enough for a lounge without the premium 8 m+ jump. Low-thousands ($1k+ frame, cover on top).
- Best see-through on a budget, polycarbonate panels instead of glass: "durable, lighter, a budget-friendly alternative to glass, " and it gets the clear look from the 3D model.
- Closest to our 28' model, the 8 m standard (541 sq ft), top of the standard range; our 28' (≈8.5 m) reads as an 8 m+ / entry-custom.
Skip real glass (premium clarity but expensive + hard to ship) and aluminum frames (lighter but pricier) unless the budget's there. Source: Shelter Dome, glamping dome cost guide.
In the model: a life-size, see-through ~16 ft Airstream Bambi parked off the barn (drag it anywhere).
The idea: buy a used/gutted ~16 ft Airstream → convert to a room-in-a-room vocal booth, float the floor, decouple the shell, pack in absorption. A rolling, iconic iso booth that doubles as a photo prop and a writing nook. Sourcing + acoustic plan in the airstream-vocal-booth notes.
In the model: a cast-iron wood stove tucked under the high end of the steps by the sink, with a copper flue that elbows out through the wall and up the outside on standoffs.
Why: it heats the barn, the rising heat warms the loft, and the radiant heat keeps the water lines from freezing, the control room stays gear-heated. An on-brand fire core for The Oven.
⚠ VERIFY / code: licensed stove + chimney installer, Bastrop County mechanical permit, Class-A double-wall flue (copper is decorative cladding only), 3-2-10 termination + spark arrestor, CO + smoke detectors. Do not run hot-tub water through a homemade coil inside the firebox, trapped water can flash to steam.
The plan: a hot tub on a cement slab outside the telephone window, fits 5–6. Two routes, a low-cost wood-fired stock-tank (8 ft tank + enclosed wood heater, on-brand fire vibe, add smart-LED strips for the night look, ≈$1–1.5k), or a turnkey electric smart spa (built-in LED + precise temp, needs 240 V, $5–9k).
⚠ VERIFY / safety: enclosed firebox on a non-combustible slab, clearance from the barn, drainage away from the foundation, and a Bastrop County burn-ban check before every wood fire. The tub gets its own separate heater, never plumb tub water through the indoor stove.
25Still open / to verify
- Budget tier per room (drives Option 1 vs 2 vs 3, and door/window spend).
- Drums in the live room? If yes, the live room needs Option-1 isolation too.
- Loft / stairs: keep, remove, or use as iso/storage/machine space?
- Timeline: earn-while-building (open studio first) or build-then-open?
- Who builds it, you + crew, hired GC, or hybrid? Changes how detailed the builder doc needs to be.
Eave height · exact beam run + post locations · loft footprint · exact window/door sizes · slab level + moisture · which exterior side is quietest. Worksheet: worksheets/measurement_sheet.csv.
26Sources: videos studied
The videos studied frame-by-frame to build this manual. Watch them for the full picture.
- "How To Soundproof A Sliding Glass Door", Soundproof Your Studio (Wilson). youtube.com/watch?v=lszlUwgm_LY. The three graphics in §17 are from this. Vendors it names: Arc Acoustics (Canada), Silent Windows / Hugo Carter (UK + Europe), Lotus (Australia / NZ), plus US suppliers on soundproofyourstudio.com.
- Studio-glass / STC explainer, youtube.com/watch?v=rUGmWfMRHrA. Where the STC numbers come from: dual-pane ≈ 29 · + a sound package ≈ 34 · + laminated ≈ 35 · triple-pane ≈ 40–42. The whole envelope (wall + door + window together) sets the real isolation, not the glass alone.
- Reference text: the §17 frequency-dip chart is from Everest & Pohlmann, Master Handbook of Acoustics (McGraw Hill, 2022), "Sound Isolation: Windows and Doors."
- Polycarbonate types overview, PlasticSolutions.ie (multiwall, solid, hygienic cladding). youtube.com/watch?v=uQblc5gmSs8. Solid-sheet colors: clear, bronze, opal, obscure.
- Polygal multiwall install, official 3D install method. youtube.com/watch?v=ilcszyd2JRw. Base + cap profiles, vent tape on the flute ends, oversized holes for thermal expansion, UV side out, peel the film fast.
- Polycarbonate architectural review,30x40 Design Workshop (Eric Reinholdt). youtube.com/watch?v=pL9SC_U1EsY. Source of the R-values, the 15–23 dB sound numbers, the 200× impact, and the Texas hurricane-code note.
Five videos on the clean → power-wash → grind → acid + metallic stain → neutralize → seal process. Full list + notes: FLOOR_ACID_STAIN_PLAN.md.
Open-burning + on-the-ground fire safety in Central Texas (Bastrop County): youtube.com/watch?v=_XlTc84Et3w. Confirms permits / burn-ban rules before any outdoor fire feature.
"What Coatings & Paints Can We Put on Spray Foam Insulation?", Spray Jones (a foam contractor). youtube.com/watch?v=BMZHEFLqoHI. How to finish exposed closed-cell foam inside and out: the three reasons to coat it (UV discoloration, animals, fire) and the three levels (plain UV paint → washable elastomeric → intumescent fire-barrier coating). Key takeaways are in the Build order (Phase 3) finishing box.
27Bonus: the Jeep (not a barn thing, just cool)
Pulled up next to the hot tubs in the 3D model. Has nothing to do with the studio. Parked here anyway, in case something needs fixing out at the property.
- Engine: 3.8L EGH V6, about 202 hp / 237 lb-ft. (The stronger 3.6 Pentastar didn't arrive until 2012.)
- Drivetrain: 6-speed manual (NSG370) or 4-speed auto (42RLE); NV241 Command-Trac part-time 4WD; Dana 30 front / Dana 44 rear axles. Sport = no factory lockers (that's the Rubicon).
- Quick fluids (verify on the door-jamb sticker + owner's manual): oil 5W-20, ~6 qt with filter; coolant Mopar HOAT 50/50; battery Group 65; tire pressure per the jamb (~30–37 psi stock).
A violent steering shimmy that hits after you cross a bump at speed. It feels scary; slow down and it stops. It's almost always worn or loose front suspension / steering, not the whole front end failing. Check in this order: track bar (bolt + bushings, the #1 culprit), tie-rod ends, ball joints, control-arm bushings, steering stabilizer, then tire balance. Fix the track bar first; most wobbles die right there.
- Watch the oil: the 3.8 can sip oil, so check it often.
- Wet footwells usually mean clogged cowl / AC drains or soft-top seals, not always a big leak.
- Electrical quirks often trace to the TIPM (the power module).
- 4WD: Command-Trac lever runs 2H · 4H · N · 4L. Shift into 4L stopped, in neutral or clutch-in, under ~3 mph.
- The Jeep things: fold the windshield, pull the doors, drop the top. That's the whole point.
Real manual: the 2010 JK factory service manual (FSM) or Haynes 50030; community help at JK-Forum / WAYALIFE; parts at Quadratec, Morris 4x4, Northridge4x4.